Epson CX6400 Start Here Card - Page 5
Install Software and Connect to Your Computer, Windows - stylus installation software
 |
UPC - 013438468694
View all Epson CX6400 manuals
Add to My Manuals
Save this manual to your list of manuals |
Page 5 highlights
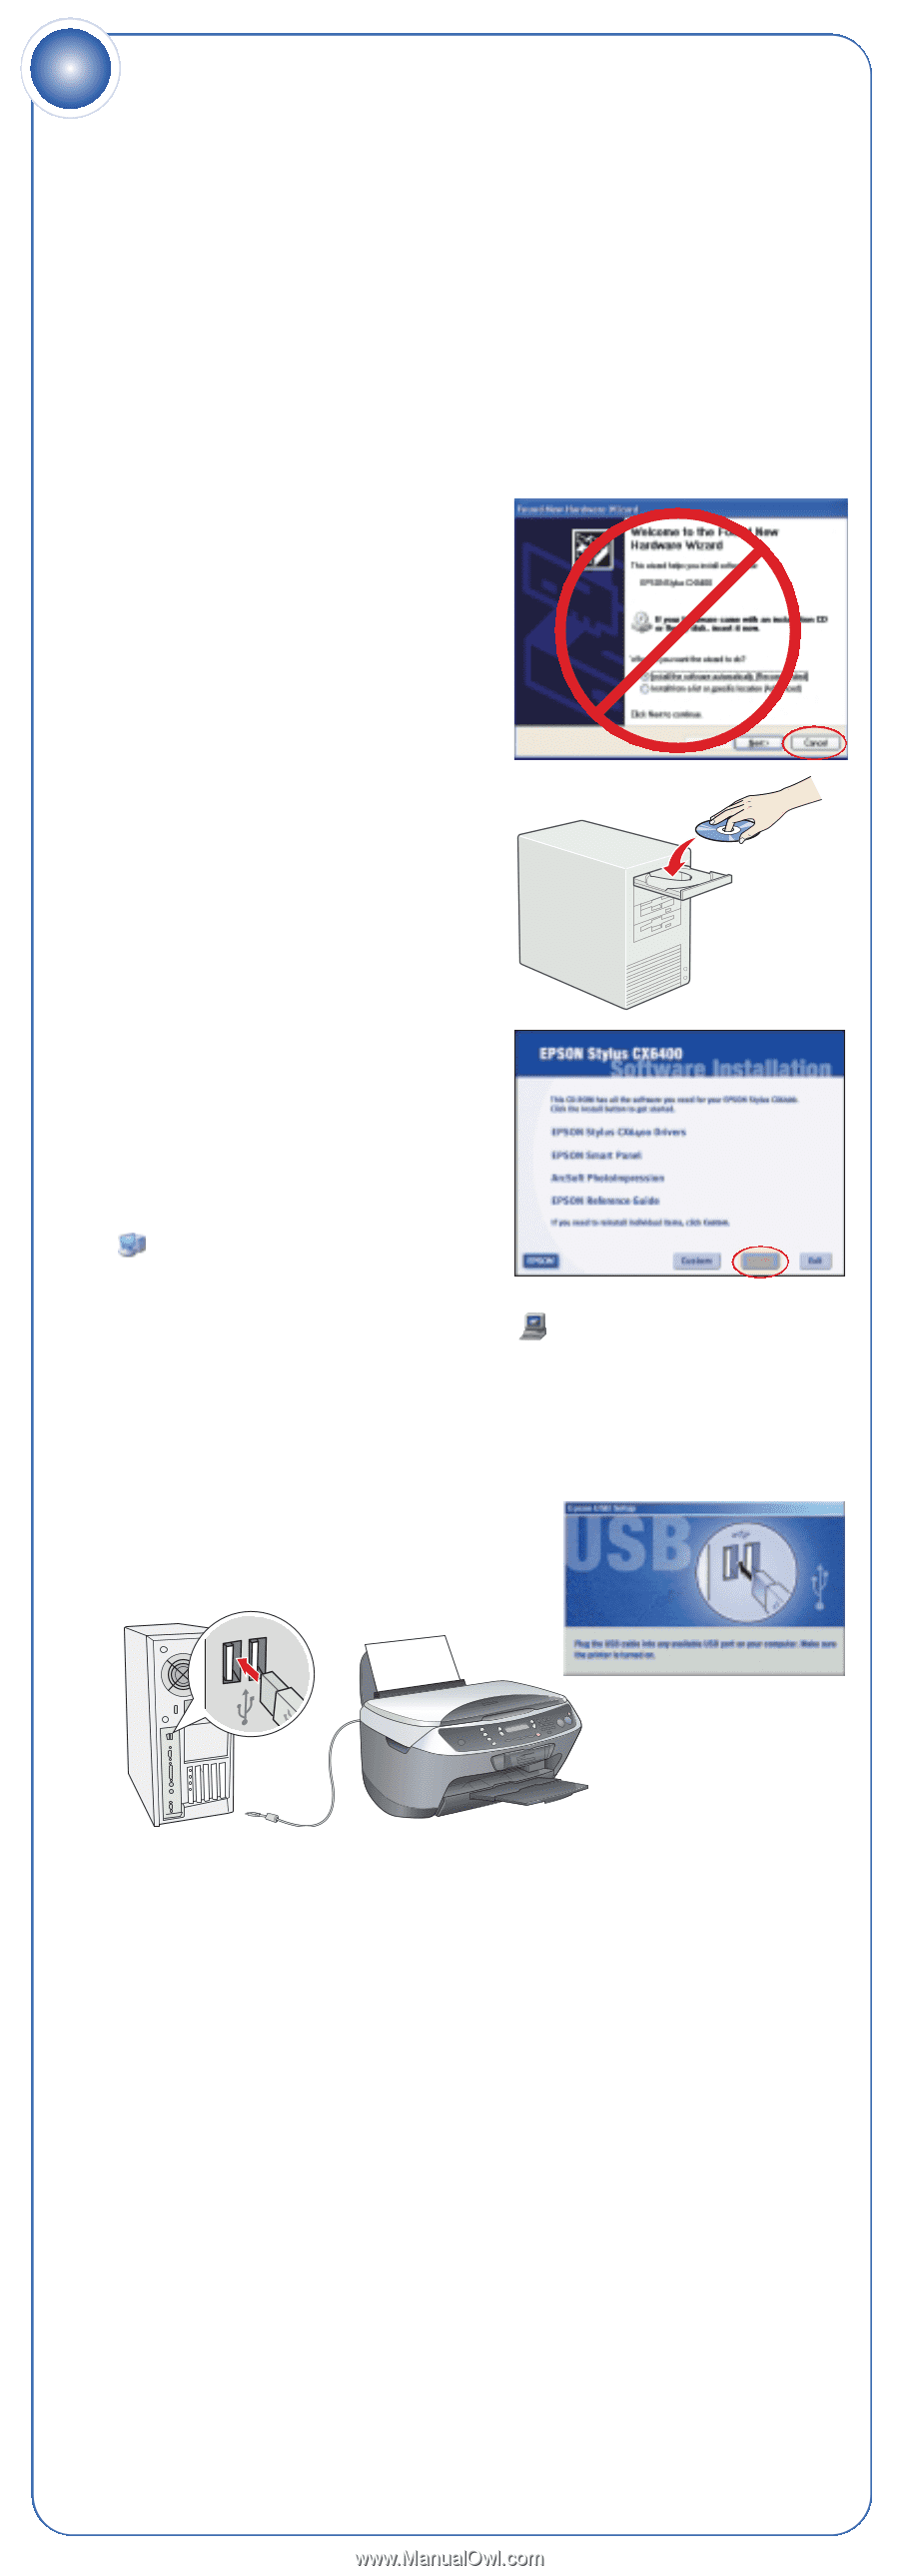
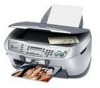
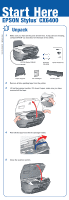
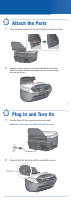
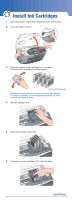
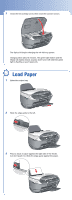
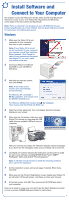
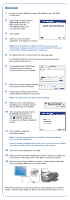
6 Install Software and Connect to Your Computer The software works with Windows® 98, Me, 2000, and XP, and Macintosh® OS 8.6 to 9.x and 10.2 to 10.3. Follow the steps below (for Windows), or the steps in the next column (for Macintosh). Note: There is a Security Lock program on your CD-ROM that lets you prevent unauthorized use of your CX6400. See the Quick Reference booklet for instructions on installing and using it. Windows 1 Make sure the Stylus CX is not connected to your computer, then turn on your computer. Note: If your Stylus CX is turned on and connected to your computer, you may see several New Hardware Wizard screens. Click Cancel for each of these screens and disconnect your Stylus CX. You can't install your software that way. 2 Insert your Stylus CX software CD-ROM in your CD-ROM or DVD drive. 3 Wait until you see this screen, then click Install. Note: If the install screen doesn't open automatically, do the following: For Windows XP: click Start > My Computer. Then double-click the EPSON CD-ROM icon. For Windows 98/Me/2000: double-click My Computer. Then double-click the EPSON CD-ROM icon. 4 Read the license agreement, then click Agree. Several messages display on your screen. 5 When you see this screen, make sure your Stylus CX is turned on, then plug the USB cable into any available USB port on your computer. After you connect your Stylus CX, Windows displays several messages. If you don't see the messages, make sure your Stylus CX is turned on. 6 Click Next and continue following the instructions on the screen to install the rest of your software, including EPSON Smart Panel,™ ABBYY® FineReader® Sprint, and ArcSoft® PhotoImpression™. Note: It will take several minutes to install the remaining software. Don't cancel the installation. 7 At the completion screen, print a test page, if desired. When done, click Exit. 8 When you see the Product Registration screen, register your Stylus CX as instructed. At the last screen, click Done or close your browser. 9 At the last screen, click OK. Then remove the CD-ROM and restart your computer. Now you're ready to copy, scan, and print. See the Quick Reference booklet or your on-screen CX6400 Reference Guide for instructions. continue
-
 1
1 -
 2
2 -
 3
3 -
 4
4 -
 5
5 -
 6
6 -
 7
7 -
 8
8
 |
 |