Epson Expression 800 Product Information Guide - Page 5
Lights And Buttons, Transporting The Printer, Transporting The Transparency Unit, Epson Expression 800
 |
View all Epson Expression 800 manuals
Add to My Manuals
Save this manual to your list of manuals |
Page 5 highlights
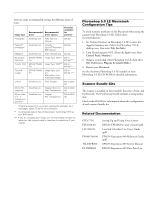
EPSON Expression 800 Lights and Buttons The scanner has three indicator lights and two buttons. Light status and button functions are described in the tables below. Scanner buttons Button Function P OPERATE Turns the scanner on and off. RESET Resets the scanner after an error. (Pressing this button while scanning is in progress stops the scanner and may cause an error.) ERROR light READY light OPERATE light RESET button OPERATE button Scanner indicator lights Light Light status OPERATE N O READY N Color Green N/A Green Scanner status Initializing or busy scanning Scanner is turned off Ready to scan images ERROR F (flashing) Green N Red F (rapidly flashing) Scanning in progress An error has occurred N = on, O = off, F = flashing Error conditions ERROR light READY light N N O F F F O O Error type Command error: The scanner has received incorrect commands from the scanning software. Try rescanning. Interface error: Make sure the scanner is securely connected to the computer, then press RESET. Fatal error: Make sure the transportation lock is released, then press RESET. Option error: There's a problem with the TPU or ADF unit. Consult your EPSON dealer. Transporting the Scanner When you transport the scanner a long distance or store it for an extended time, follow the steps below to secure the carriage: 1. Make sure the transportation lock on the back of the scanner is in the UNLOCK position. 2. Locate the SCSI ID rotary switch on the back of the scanner. Align the dot on the switch with the asterisk (*) setting. 3. If you're using a transparency unit or auto document feeder, remove it and replace the scanner cover. 4. Turn on the carriage and wait until the carriage moves to the home position (toward the back of the scanner). Then turn off the scanner. 5. Slide the transportation lock to the LOCK position. If the carriage doesn't automatically return to the home position, slowly raise the front of the scanner and hold it up until the carriage comes to rest in the home position. Then slide the transportation lock to the LOCK position. Transporting the Transparency Unit After you've removed the transparency unit from the scanner, prepare it for shipping as follows: 1. Slowly raise the front of the transparency unit to allow the lamp assembly to slide to the back of the unit. Wait until the lamp assembly comes to rest. 2. Reinstall the transparency unit's shipping screw in the hole marked CLAMP. 1/99 EPSON Expression 800 - 5
-
 1
1 -
 2
2 -
 3
3 -
 4
4 -
 5
5 -
 6
6 -
 7
7
 |
 |
