Epson Expression 800 Product Information Guide - Page 6
SELECTING A DRIVER AND SETTINGS, Lite and EPSON TWAIN Pro. In both of
 |
View all Epson Expression 800 manuals
Add to My Manuals
Save this manual to your list of manuals |
Page 6 highlights
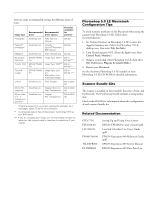
EPSON Expression 800 Selecting a Driver and Settings Here is a brief overview of the scanning steps using LaserSoft® SilverFast™ Lite and EPSON TWAIN Pro. In both of the following illustrations, the Macintosh interface is shown; the Windows steps are the same. If you select Expression 800 (32-bit) (Windows) or Expression800 (Macintosh) as your scanner source, you see the SilverFast Lite window: 1 Select the basic settings 2 Preview your image 3 Adjust the frame border (dotted line) to crop the image If you select EPSON TWAIN Pro(32-bit) (Windows) or EPSON TWAIN Pro (Macintosh) as your scanner source, you see the EPSON TWAIN Pro window. 4 Use Auto Adjust to optimize image quality 5 Size or scale the image 6 Set the Resolution 7 Scan the image into your application 1 Select the basic settings 2 Preview your image 3 Size or scale the image 4 Customize your settings and use color management 5 Scan the image into your application 6 - EPSON Expression 800 1/99
-
 1
1 -
 2
2 -
 3
3 -
 4
4 -
 5
5 -
 6
6 -
 7
7
 |
 |
