Epson LQ 670 Product Information Guide - Page 20
the ribbon-tightening knob in the direction of the arrow - cartridges
 |
View all Epson LQ 670 manuals
Add to My Manuals
Save this manual to your list of manuals |
Page 20 highlights
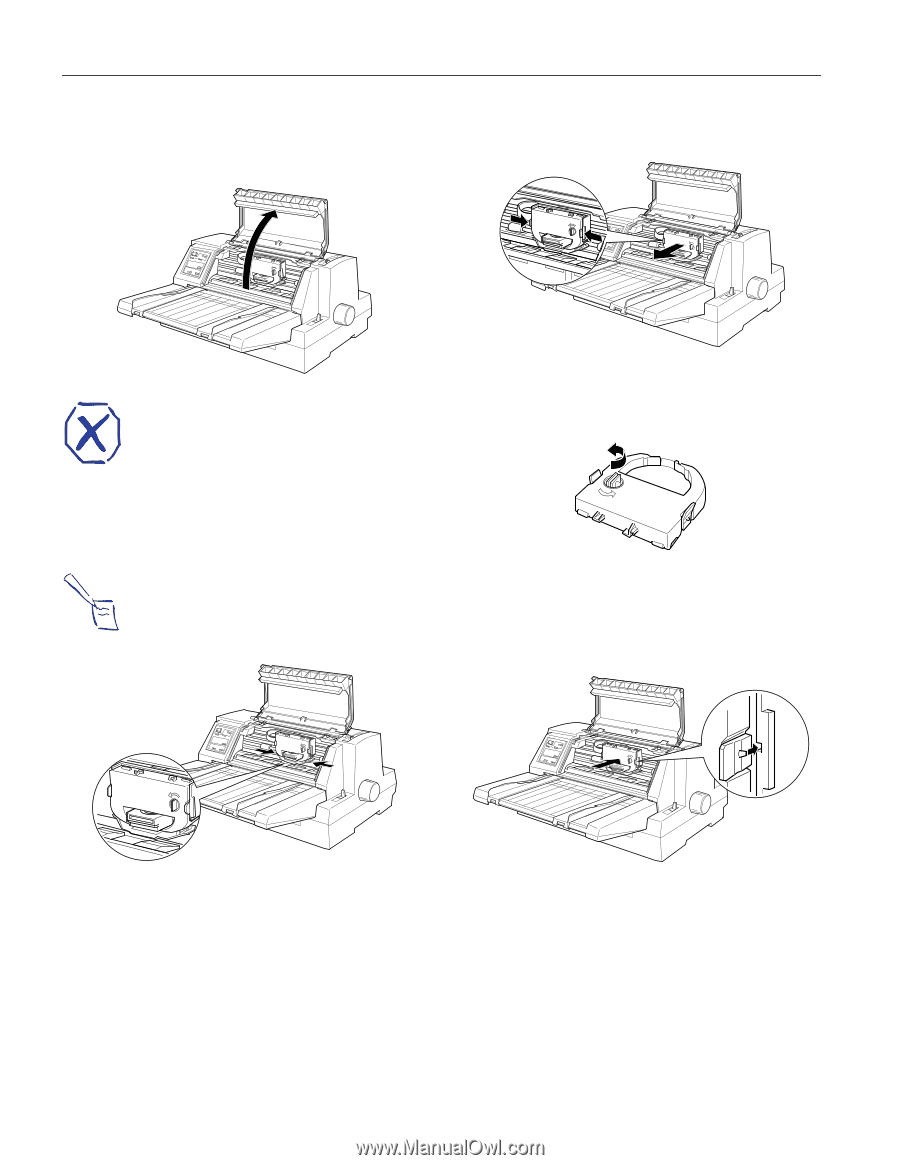
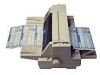
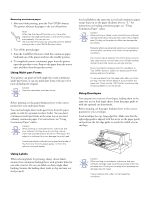
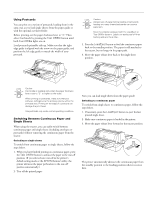
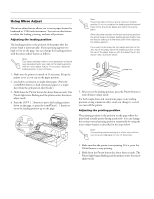
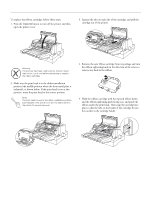
EPSON LQ-670 To replace the ribbon cartridge, follow these steps: 1. Press the Operate button to turn off the printer and then open the printer cover. 3. Squeeze the tabs on each side of the cartridge, and pull the cartridge out of the printer. Warning: If the printer has been used recently, the print head may be hot. Let it cool before attempting to replace the ribbon cartridge. 2. Make sure the print head is at the ribbon installation position (the middle position where the front metal plate is indented), as shown below. If the print head is not at this position, move the print head to the correct position. Note: The print head moves to the ribbon installation position automatically if the printer is on and no data is sent to the printer for several seconds. 4. Remove the new ribbon cartridge from its package and turn the ribbon-tightening knob in the direction of the arrow to remove any slack in the ribbon. 5. Hold the ribbon cartridge with the exposed ribbon down and the ribbon-tightening knob facing you, and guide the ribbon under the print head. Then snap the cartridge into place so that the tabs on both sides of the cartridge fit into the notches in the cartridge holder. 20 - EPSON LQ-670 3/97
-
 1
1 -
2
-
3
-
4
-
5
-
6
-
7
-
8
-
9
-
10
-
11
-
12
-
13
-
14
-
 15
15 -
 16
16 -
 17
17 -
 18
18 -
 19
19 -
 20
20 -
 21
21 -
 22
22
 |
 |