Epson LQ 870 User Manual
Epson LQ 870 - B/W Dot-matrix Printer Manual
 |
View all Epson LQ 870 manuals
Add to My Manuals
Save this manual to your list of manuals |
Epson LQ 870 manual content summary:
- Epson LQ 870 | User Manual - Page 1
LQ-870/1170 U s e r' s M a n uaI 4rn00*03"A77 - Epson LQ 870 | User Manual - Page 2
, and ESC/P 2 is a trademark, of Seiko Epson Corporation. General Notice: Other product names used herein are for identification purposes only and may be trademarks of their respective companies. Copyright © 1991 by Epson America, Inc., Torrance, California. All rights reserved. User's Manual - Epson LQ 870 | User Manual - Page 3
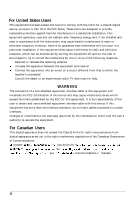
energy and, if not installed and used in accordance with the instructions, may cause harmful interference to radio or television reception. However by the FCC for this equipment. It is the responsibility of the user to obtain and use a shielded equipment interface cable with this device. If - Epson LQ 870 | User Manual - Page 4
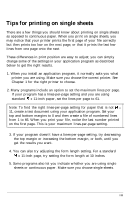
are a few things you should know about printing on single sheets as opposed to continuous paper. When you print on single sheets, you may notice that your printer prints the first page of your file correctly but then prints too low on the next page, or that it prints the last few lines from one page - Epson LQ 870 | User Manual - Page 5
software drivers P Sales of the Epson ESC/P Reference Manual, which has comprehensive information on all commands, including ESC/P 2 P Epson technical information library fax service P Product literature with technical specifications on our current and new products P Sales of ribbons, supplies - Epson LQ 870 | User Manual - Page 6
a Paper Feeding Method 2-2 Using Single Sheets 2-3 Using Continuous Paper 2-7 Switching Between Continuous and Single Sheets 2-21 Printing on Special Paper 2-24 Chapter 3 Using the Printer 3-1 Control Panel 3-2 DIP Switches 3-6 Micro Feed 3-13 Tear Off 3-16 Typestyles 3-19 Data - Epson LQ 870 | User Manual - Page 7
4-16 Chapter 5 Maintenance and Transportation 5-1 Cleaning the Printer 5-2 Replacing the Ribbon 5-3 Transporting the Printer 5-4 Chapter 6 Troubleshooting Problems and Solutions Power Supply Printing Paper Handling Options 6-1 6-2 6-3 6-4 6-8 6-10 Chapter 7 Technical Specifications - Epson LQ 870 | User Manual - Page 8
. Epson's ESC/P 2. The first dot matrix printer control language to offer scalable fonts and enhanced graphics. Compatibility. Supports the Epson ESC/P commands widely used in application programs written for other Epson LQ printers. More about ESC/P 2 Epson's enhanced printer control language, ESC - Epson LQ 870 | User Manual - Page 9
user, you may also want to order the Epson ESC/P Referrence Manual for complete programming information. Call the number above to purchase the reference manual. Options For additional information on these options, see Chapter 4. Single-Bin Cut-Sheet Feeder (C806371 for LQ-870, C806391 for LQ-1170 - Epson LQ 870 | User Manual - Page 10
on paper handling and day-to-day operation of your printer. Chapter 6 contains troubleshooting information. If the printer does not operate properly or the printed results are not what you expect, see Chapter 6 for a list of problems and solutions. Other chapters contain information on installing - Epson LQ 870 | User Manual - Page 11
Introduction Printer parts paper guide edge guides paper tension unit tractor front cover paper thickness lever flrant edge guide A C inlet front paw 1 Note: In some countries, the power cord is attached. I 4 Introduction - Epson LQ 870 | User Manual - Page 12
and save them for later reference. 2. Follow all warnings and instructions marked on the product. 3. Unplug this product from the wall outlet before cleaning. Do not use liquid cleaners or aerosol cleaners. Use a damp cloth for - Epson LQ 870 | User Manual - Page 13
the product. 12. Except as specifically explained in the User's Manual, do not attempt to service this product yourself. Opening or removing those covers that when the operating instructions are followed. Adjust only those controls that are covered by the operating instructions since improper - Epson LQ 870 | User Manual - Page 14
Checking the parts 1-2 Removing the protective material 1-3 Choosing a Place for the Printer 1-4 Assembling the Printer 1-6 Installing the ribbon cartridge 1-6 Attaching the paper guides 1 - 9 Testing the Printer 1-10 Plugging in the printer 1-10 Running the self test 1-11 Connecting the - Epson LQ 870 | User Manual - Page 15
you have all the parts shown below and that none has been damaged. Paper guide Printer Power cord Note: In some locations, the power cord is attached to the printer. Store the packing materials in case you ever need to transport your printer. CAUTION: It is not possible to adjust voltage of the - Epson LQ 870 | User Manual - Page 16
damage during shipping, several pieces of protective material are packed with your printer. You must remove these before you put your printer together. Follow the directions on the Notice Sheet inserted in your printer when removing the protective material. Note: l Make sure you remove all packing - Epson LQ 870 | User Manual - Page 17
outlet; do not use an adapter plug. Avoid electrical outlets controlled by wall switches or automatic timers. Accidental disruption of power can wipe out information in the memory of your computer or your printer. Avoid outlets on the same circuit with large motors or other appliances that might - Epson LQ 870 | User Manual - Page 18
Choosing a Place for the Printer Note: If you plan to use a printer stand, follow these guidelines: l Use a stand that supports at least twice the weight of the printer. 17.8 kg (39.3 lbs) for the IQ-870 24.6 kg (54.2 lbs) for the LQ-1170 l Never use a stand that tilts the printer at an angle of - Epson LQ 870 | User Manual - Page 19
below. Press up firmly with your thumbs to lift the front of the unit; then pull the paper-tension unit up and off of the printer. 3. Slide the print head to the middle of the printer. 1-6 Setting Up the - Epson LQ 870 | User Manual - Page 20
into position; then press on both ends of the cartridge to fit the plastic hooks 5. Use a pointed object, such as a ball point pen, to guide the ribbon between the print head and ribbon guide while you turn the ribbon-tightening knob to help feed the ribbon into place. Setting Up the Printer 1-7 - Epson LQ 870 | User Manual - Page 21
Assembling the Printer 6. Slide the print head from side to side to make sure it moves smoothly. Also check that the ribbon is not twisted or creased. - 7. Replace the paper-tension unit by placing it on the printer's mounting pegs; then lowering it into place. Press down both ends of the paper- - Epson LQ 870 | User Manual - Page 22
an upright position or lower it back to lie flat on the printer. Front paper guide The front paper guide fits inside the front of the printer, and may be installed over the tractor unit. Hold the paper guide as shown and slide it into place between the metal slots on either side of the - Epson LQ 870 | User Manual - Page 23
the built-in self-test function to see that the printer is working properly. Plugging in the printer 1. Make sure the printer is turned off. 2. Check the label on the back of the printer to make sure the voltage required by the printer matches that of your electrical outlet. CAUTION: If the rated - Epson LQ 870 | User Manual - Page 24
down the LF/FF button while you turn on the printer. The printer beeps several times and the POWER and PAPER OUT lights come on. The self test begins by printing on the first and last lines of page 1. The printer then prints the DIP-switch settings and character samples on page 2. Setting Up the - Epson LQ 870 | User Manual - Page 25
or 360 mm (14 inches) - wide for the LQ-1170; otherwise the print head prints directly onto the platen. 4. Insert a sheet of paper down between the edge guides until it meets resistance. After about two seconds, the printer loads the - paper automatically and starts the self test. -. 1-12 - Epson LQ 870 | User Manual - Page 26
Printer The self test prints the current DIP-switch settings, followed by font samples for each of the printer's available fonts. 5. The self test continues until the paper runs out or until you press the PAUSE button. When the printer beeps, you can load another sheet of paper to continue printing - Epson LQ 870 | User Manual - Page 27
to Your Computer If the self test printed correctly, you are ready to connect your printer to the computer. Use a shielded twisted-pair parallel cable to connect your computer to your printer's built-in parallel interface. Connect the parallel interface cable as described below: 1. Make sure both - Epson LQ 870 | User Manual - Page 28
if it does not list your printer on its printer selection menu, to take full advantage of your printer's features (including ESC/P 2), choose the LQ-870/1170 or LQ-570/1070 when you set up your program. If your printer is not listed, call the software manufacturer or call Epson at (800) 922-8911 to - Epson LQ 870 | User Manual - Page 29
paper with the pull tractor 2-17 Removing continuous paper from the pull tractor 2-20 Switching Between Continuous and Single Sheets 2-21 Switching to single sheets 2-21 Switching to continuous paper 2-23 Printing on Special Paper 2-24 Setting the paper-thickness lever 2-24 Multi-part forms - Epson LQ 870 | User Manual - Page 30
Selecting a Paper Feeding Method Your printer comes with four paper paths so that you can print on almost any type of paper: l Choose the top or front paper guide to print on single sheets l Choose the tractor unit to load continuous paper from the front, rear, or bottom. You can mount the tractor - Epson LQ 870 | User Manual - Page 31
Selecting a Paper Feeding method l Single-sheet position For all single sheets, whether loaded from front, top, or either of the optional cut-sheet feeders. l Front push-tractor position For continuous paper with the tractor unit installed in the front. l Rear push-tractor position For continuous - Epson LQ 870 | User Manual - Page 32
width of 257 mm (10.1 inches) on the LQ-870 and 420 mm (16.5 inches) on the LQ-1170. You can load single sheets from either the top or front of the printer. If the paper-tension unit is removed, you need to replace it before you print on single sheets. See page 1-8 in Chapter - Epson LQ 870 | User Manual - Page 33
until it locks in place next to the arrow the paper guide. Next adjust the right edge guide to match the width of your paper. 4. Slide a sheet of paper down between the edge guides until it meets resistance. The printer loads the paper automatically and you are CAUTION: Use the knob on the left - Epson LQ 870 | User Manual - Page 34
Loading single sheets from the front 1. Place the paper-release lever in the single-sheet position and open the front cover. 2. Turn on the printer. The POWER light on the control panel comes on. 3. Move the edge guide until you feel it click into place above the arrow mark on the paper - Epson LQ 870 | User Manual - Page 35
edge of the paper with the edge guide and insert the page firmly until it meets resistance. The printer loads the paper automatically. You are now ready to print. CAUTION: Use the knob on the left side of the printer only to clear paper jams when the printer is off. Otherwise you may damage the - Epson LQ 870 | User Manual - Page 36
position of the tractor unit and the placement of your paper supply. Your printer can handle continuous paper up to 254 mm (10.0 inches) wide on the LQ-870 and up to 406 mm (16.0 inches) wide on the LQ-1170. To print on continuous paper, you can install the tractor unit in one of - Epson LQ 870 | User Manual - Page 37
stand that has a large enough opening for paper to feed from the bottom without obstruction. Using the paper-path guide You can lift the paper-path guide on the printer cover to change the direction that continuous paper is ejected, as shown below. Forward ejection Rear ejection Changing tractor - Epson LQ 870 | User Manual - Page 38
, and lift it out of the printer. See page 2-12 for instructions on loading continuous paper with the front push tractor. Installing the push-tractor in the rear position 1. Make sure the printer is turned off. Lift the paper guide up and off the printer. 2. While pressing in the tractor's lock - Epson LQ 870 | User Manual - Page 39
the printer cover and paper guide up and off the printer. 2. Grasp both ends of the paper-tension unit and lift it up and off the printer. instructions on loading paper with the pulltractor. To remove the tractor unit, press the tractor's lock tabs, tilt the unit back, and lift it off the printer - Epson LQ 870 | User Manual - Page 40
Using Continuous Paper Loading continuous paper with the front push-tractor 1. Make sure the printer is turned off and remove the front cover and the front paper guide. 2. Make sure the tractor is in the front push-tractor position and the paper-release lever is in the front push-tractor position. - Epson LQ 870 | User Manual - Page 41
it in place. Now slide the right sprocket unit to approximately match the width of your paper, but do not lock it. Move the paper support so it is midway between the sprocket units. 12 mm (0.5 inch) Paper Handling 2-13 - Epson LQ 870 | User Manual - Page 42
unit in place by pulling the sprocket lock forward. 8. Attach the front paper guide and the front cover. 9. Turn on the printer. When the printer receives data, it automatically loads the paper before printing. Removing continuous paper from the front push-tractor 1. To remove continuous paper - Epson LQ 870 | User Manual - Page 43
Using Continuous Paper Loading continuous paper with the rear push-tractor 1. Make sure the printer is turned off and the paper guide is removed. 2. Make sure the tractor is in the rear push-tractor position and the paper-release lever is in the rear push-tractor position. 3. - Epson LQ 870 | User Manual - Page 44
(0.5 inch) from the far left position (use the alignment marks on the printer case). Push the lever back to lock it in place. Then slide the right to match the width of your paper, but do not lock it. Move the paper support so it is midway between the sprocket units. 5. Make sure your paper has a - Epson LQ 870 | User Manual - Page 45
in the paper; then lock it in place. 8. Attach the paper guide in its flat position over the printer. Slide the edge guides to the center. 9. Turn on the printer. When the printer receives data, it loads the paper automatically before printing. Note: You can also advance the paper to the loading - Epson LQ 870 | User Manual - Page 46
Using Continuous Paper Loading continuous paper with the pull tractor 1. Make sure the printer is turned off and the printer cover and paper guide are removed. 2. Make sure the tractor is installed in the pull-tractor position and the paper-release lever is set to the pull-tractor position. 3. - Epson LQ 870 | User Manual - Page 47
the far left position (use the alignment marks on the printer case). Push the sprocket lock back to lock it your paper, but do not lock it. Move the paper support so it is midway between the sprocket units. 5. Make between the platen and the ribbon guide. Pull the paper up until the perforation between the first - Epson LQ 870 | User Manual - Page 48
unit to remove any slack in the paper; then lock it in place. 9. Attach the paper guide in the flat position. Then slide the edge guides to the center of the paper's width. 10. Turn on the printer. 11. Make any adjustments to the loading position with the micro- feed feature, as described - Epson LQ 870 | User Manual - Page 49
the printer feeds the paper to when it loads the paper or performs a form feed. This position is important because it determines where the printing begins page 3-14. Removing continuous paper from the pull tractor 1. Tear off the printed document or excess paper at the tear-off edge. 2. Hold the LF/ - Epson LQ 870 | User Manual - Page 50
rear or when using both the front and rear (with the optional tractor). Switching to single sheets To switch from continuous paper to single sheets, follow the steps below. 1. If you have a printed document still in the printer, press the TEAR OFF button to feed the paper forward to the tear-off - Epson LQ 870 | User Manual - Page 51
Switching Between Continuous and Single Sheets 3. Push the paper-release lever back to the single-sheet position. 4. You can now load single sheets from either the front or top as described in Using Single Sheets, earlier in this chapter. Paper Handling 2-23 - Epson LQ 870 | User Manual - Page 52
continuous paper You can also easily switch back to printing on continuous paper. 1. If you have a single sheet still in the printer, press the LOAD/EJECT button to eject it. 2. Lift up slightly on the paper guide and then lower it until it lies flat on top of the printer. Slide the left and right - Epson LQ 870 | User Manual - Page 53
damage to the print head. For more information on the printable area, see Chapter 7. Always return the paper-thickness lever to position 0 when you return to printing on ordinary paper. Setting the paper-thickness lever To accommodate various thicknesses of paper, the printer is equipped with - Epson LQ 870 | User Manual - Page 54
Printing on Special Paper Use the following table to set the paper-thickness lever to match - the thickness of your paper according to the table below: Paper type* Lever position Ordinary (single sheets or continuous) 0 Ordinary (with film ribbon) -1 Thin paper -1 or0 Carbonless multi- - Epson LQ 870 | User Manual - Page 55
use them under normal operating conditions. Do not leave labels loaded in the printer between jobs; they curl around the platen and may jam when you resume printing. To remove labels from the paper path after you finish printing, first tear off the labels at a point before the paper slot. Then use - Epson LQ 870 | User Manual - Page 56
earlier in this chapter. Note: l The print head must not print past the left or right edge of the envelope printing entirely within the printable area of the envelope you are using. l Always keep the longer side of the envelope horizontal. l If you use No. 6 envelopes, make sure the left edge guide - Epson LQ 870 | User Manual - Page 57
Chapter 3 Using the Printer Control Panel 3 - 2 Lights 3 - 2 Buttons 3 - 3 Other control-panel features 3 - 5 DIP Switches 3 - 6 Changing a DIP-switch setting 3 - 6 DIP-switch tables 3 - 7 DIP-switch functions 3 - 9 Micro Feed 3-13 Using micro feed 3 - 1 3 Adjusting the loading position 3 - Epson LQ 870 | User Manual - Page 58
indicator lights give you the current status of the printer. The buttons let you control many of the printer settings. Lights POWER (green) On when the power switch is on and power is supplied. DATA (orange) On when data is present in the printer's memory buffer. MULTI-PART (green) On when the paper - Epson LQ 870 | User Manual - Page 59
. Pitch (green) Shows which pitch is selected. Buttons PAUSE Press this button to temporarily stop printing. Press this button again to resume printing. LOAD/EJECT Press this button to load paper, if it is not loaded, or to eject continuous paper to the top of the next page. Using the Printer 3-3 - Epson LQ 870 | User Manual - Page 60
paper bin when both optional cutsheet feeders are installed and you are printing on single sheets. When printing on continuous paper, press this button once to feed paper from the panel are meant as guides only; your actual printed results may differ slightly in appearance. -. 3-4 Using the Printer - Epson LQ 870 | User Manual - Page 61
DIP-switch settings. See the section on testing the printer in Chapter 1 for more information. Data dump: Hold down both the LF/FF button and LOAD/EJECT button while you turn on the printer to enter data dump mode. The data dump mode allows advanced users to find the cause of communication problems - Epson LQ 870 | User Manual - Page 62
such as the character set and the page length. These new settings become effective when the printer is turned on, reset, or initialized. Changing a DIP-switch setting 1. Make sure the printer is turned off. 2. Open the DIP-switch cover. 3. Use a pointed instrument, such as the tip of a pen, to turn - Epson LQ 870 | User Manual - Page 63
sets/ character tables See tables 3 and 4 Table 2 DIP Switch 2 setting SW Description ON OFF 2-1 Page length (for continuous 2.2 paper) See Table 5 2-3 Tear off ON OFF* 2-4 Auto linefeed ON * Asterisks indicate the default settings. OFF* Page 3-8 3-12 3-12 Using the Printer 3-7 - Epson LQ 870 | User Manual - Page 64
DIP Switches Table 3 International character sets Table 4 Character tables Character table SW l-1 SW 1-2 SW 1-3 SW 1-4 Italic Set international character sets OFF select PC 437 (United States). Table 5 Page length for continuous paper Page length 1 sw2-1 I sw2-2 I 3-8 Using the Printer - Epson LQ 870 | User Manual - Page 65
with DIP switches are USA, France, Germany, United Kingdom, Denmark I, Sweden, Italy, and Spain I. However, you can also select the following sets only with the ESC R software command: Japan (English), Norway, Denmark II, Spain II, Latin America, Korea, and Legal. Character tables Your printer has - Epson LQ 870 | User Manual - Page 66
, subscript, dot-graphics, or downloaded characters, printing speed switches to normal draft speed for that line only. Input buffer capacity The input buffer stores data sent from your computer. If you want to free your computer for other tasks while the printer prints, turn DIP switch 1-7 off - Epson LQ 870 | User Manual - Page 67
at the top of the next page. Continuous paper page length When you are printing on continuous paper, DIP switches 2-1 and 2-2 let you select one of the four page lengths described in DIP-switch Table 5. Tear off You can turn DIP switch 2-3 on to select tear-off mode. See page 3-16 for a complete - Epson LQ 870 | User Manual - Page 68
Switches Auto line-feed When auto line feed is on (DIP switch 2-4 on), the printer follows each carriage-return code (CR) received with a line feed code (LF). If your printer is double spacing, turn DIP switch 2-3 off. If each line overprints the next, turn DIP switch 2-4 on. 3-12 Using the Printer - Epson LQ 870 | User Manual - Page 69
-feed feature, you press the ALT button in combination with the LOAD/EJECT or LF/FF button, as indicated on the printer's control panel. Follow the steps below to see how the MICRO FEED button operates: 1. Make sure that printing has stopped before you adjust the position of the paper. Using the - Epson LQ 870 | User Manual - Page 70
arrows above the buttons. Adjusting the loading position The loading position is the position of the paper after it is automatically loaded by the printer. If your printing is too high or low on the page, you can change the loading position with the micro-feed feature as follows: 1. Make sure the - Epson LQ 870 | User Manual - Page 71
page, or press the LF/FF button to move the loading position up on the page. The printer remembers the new loading position and advances all subsequent pages to the new position. Note: l The printer has a minimum and maximum loading position. If you try to advance the loading position beyond these - Epson LQ 870 | User Manual - Page 72
the tear-off mode When you select tear-off mode with DIP switch 2-3, the printer automatically advances continuous paper to the tear-off position when you finish printing. The printer advances paper to the tear-off position whenever the printer receives a full page of data or a form feed, and then - Epson LQ 870 | User Manual - Page 73
printing, the printer automatically feeds the paper back to the loading position and begins printing. You can leave tear-off mode turned on (DIP switch you resume printing, the printer automatically feeds the paper back to the loading position and begins printing. (You can also manually feed the - Epson LQ 870 | User Manual - Page 74
the LF/FF button to move the tear-off position up on the -. page. The printer remembers the new tear-off position even after the printer is turned off. 3. Tear off any printed pages. 4. When you begin printing, the printer automatically feeds the paper back to the loading position and begins - Epson LQ 870 | User Manual - Page 75
as guides only; your actual printed results print options instead of the control panel to select typestyles. If your panel setting does not work, check your software user's manual for instructions on selecting typestyles. Character fonts The printer supports the LQ-870/1170) to increase the - Epson LQ 870 | User Manual - Page 76
Draft (DIP switch l-6 OFF) 0123456789:;?@ABCDEFGHIJK ILMN~Pc~RsTuVWXYZ[\]~ 'abcdefghi jklmnopqrstuv wxyr{l}"aC~~~aaa~s f~F~~~~ Epson Roman proportional 0123456789:;?8ABCDEFGHIJK LMNOPQRSTUVWXYZ[\]^_'abcdefghijklmnopqrstuv wxyz{l}"oCiie~~LC~~~~~~~~~~o~~~~~~~~~~i 3-20 Using the Printer - Epson LQ 870 | User Manual - Page 77
Epson Sans Serif proportional 0123456789:;c=>?@ABCDEFGH I JK LMNOPQRSTUVWXYZ[\]^-'abcdefghijklmnopqrstuv wxyz{t}-p~Ue~LBBB~g9ei"i~~A j Epson Prestige 0123456789:;?@ABCDEFGHIJK LMNOPQRSTUVWXYZ[\]"-'abcdefghijklmnopqrst,uv wxyz(~}"h~~~~88~~~~~~~l~A$~~~~~~~~uu~~~R~~f Epson Epson Epson - Epson LQ 870 | User Manual - Page 78
letter like the lowercase i receives less space than an uppercase W. The printout below compares the different pitches: This is 10 cpi printing. This is 12 cpi printing. This is IS cpi printing. This is 17 cpi printing. This is 20 cpi printing. This is proportional printing. 3-22 Using the Printer - Epson LQ 870 | User Manual - Page 79
users to find the cause of communication problems between the printer and application programs. In data dump mode, the printer application program or a program you have written in any programming language. Your printer prints all the codes it receives in hexadecimal format, as shown below. Data Dump - Epson LQ 870 | User Manual - Page 80
Using the Printer Options Cut-Sheet Feeders 4 - 2 Installing a cut-sheet feeder 4 - 2 Loading paper with the single-bin cut-sheet feeder.. .... 4-3 Loading paper or envelopes with the high-capacity cut-sheet feeder 4 - 6 Assembling the double-bin cut-sheet feeder 4-9 Switching between continuous - Epson LQ 870 | User Manual - Page 81
with your printer: Printer Single-bin High-capacity LQ-870 C806371 C806381 LQ-1170 C806391 C806401 The single-bin cut-sheet feeder holds up to 50 single sheets of paper. When this cut-sheet feeder is installed alone, you can still manually insert single sheets using the paper guide. The - Epson LQ 870 | User Manual - Page 82
above. Loading paper with the single-bin cut-sheet feeder Load paper using the single-bin cut-sheet feeder as follows: 1. Make sure the paper guide is removed. Using the Printer Options 4 - 3 - Epson LQ 870 | User Manual - Page 83
the paper support midway between the paper guides. 3. Pull the paper-set levers all the way forward until the paper guides retract and lock open. 4. Take a stack of paper and fan it. Next, tap the side and bottom of the paper on a flat surface to even up the stack. 4-4 Using the Printer Options - Epson LQ 870 | User Manual - Page 84
levers back to clamp the paper against the guide rollers. 8. Attach the stacker-support wires to the edge guides of the paper guide. Then place the notches on the paper guide straight down over the mounting posts on the printer to reinstall it. Slide the edge guides to the middle of your paper. You - Epson LQ 870 | User Manual - Page 85
the left paper guide until it is aligned with the triangle mark; then lock it in place by pushing back on its lock lever. Next, slide the right paper guide to roughly match the width of your paper. Slide the paper support midway between the paper guides. "'.-- -- 4-6 Using the Printer Options - Epson LQ 870 | User Manual - Page 86
Pull the paper-set levers all the way forward until the paper guides retract and lock open. 4. Take a stack of paper and fan , 25 plain bond or 30 air mail envelopes along the left paper guide. 6. Adjust the position of the right paper guide so that it matches your paper's width and lock it in place - Epson LQ 870 | User Manual - Page 87
. Note: You can also insert single sheets using the front paper slot or the slot between the paper guide and stacker. The cut-sheet feeder automatically loads paper when you send print data to the printer (as long as the PAUSE light is not lit). You can also load paper from the cut - Epson LQ 870 | User Manual - Page 88
the notches in the single-bin cut-sheet feeder over the mounting posts on the rear of the high-capacity cut-sheet feeder. Using the Printer Options 4-9 - Epson LQ 870 | User Manual - Page 89
cut-sheet feeders are securely locked together. 4. Install the assembled double-bin cut-sheet feeder on the printer. See Installing a cut-sheet feeder in this chapter. 5. Load paper into each bin. See the application software as described in your software user's manual. 4-10 Using the Printer Options - Epson LQ 870 | User Manual - Page 90
supply. Switching to continuous paper 1. If a single sheet is in the paper path, press the LOAD/EJECT button to eject it. 2. Place the paper release lever in the front or rear push-tractor position. 3. Open the paper-path guide to eject the continuous paper forward. Using the Printer Options 4-11 - Epson LQ 870 | User Manual - Page 91
. Labels can easily come off their backing and jam the printer. See the instructions below. 4. Place the paper-release lever in the single-sheet position. If you are printing labels, follow these instructions to remove to the label supply and switch to the cut-sheet feeder: 1. Press the LF/FF button - Epson LQ 870 | User Manual - Page 92
two tractor units at once is also recommended to print the highest quality graphics. Also, if you install the tractor units in the front and rear pushtractor positions, you can load two types of continuous paper at the same time and switch between them by moving the paperrelease lever. The tractor - Epson LQ 870 | User Manual - Page 93
. 2. Place the continuous paper on the sprocket units of the front or rear push-tractor unit (see Using Continuous Paper in Chapter 2). 3. Turn on the printer. Press the LOAD/EJECT button to load paper; then hold down the LF/FF button to feed one page of paper. CAUTION: Use the knob - Epson LQ 870 | User Manual - Page 94
-release lever back in its original position. 8. See that the paper is not crooked or wrinkled and lock the sprocket units in place. 9. Reinstall the printer cover and the paper guide. Using the Printer Options 4-15 - Epson LQ 870 | User Manual - Page 95
Interface Card _. You can use optional interface cards to supplement your printer's built-in parallel interface. The Epson interfaces below are compatible with your printer. I Model number I Name I If you are unsure whether you need an optional interface or would like to know more about - Epson LQ 870 | User Manual - Page 96
on both sides of the interface compartment. Slide the card in firmly until the connector at the rear of the interface card fits into the printer's internal socket. 4. Replace the cover and secure the screws to complete installation, Note: If the original screws do not fit, use the screws provided in - Epson LQ 870 | User Manual - Page 97
printer. For all other data transfer conventions, such as word structure or communications protocol, see the manual manual. Handshake timing When the vacant area for data in the input buffer drops to 256 bytes, the printer the buffer increases to 528 bytes, the printer outputs an X-ON code or sets the - Epson LQ 870 | User Manual - Page 98
Chapter 5 Maintenance and Transportation Cleaning the Printer 5-2 Replacing the Ribbon Cartridge 5-3 Transporting the Printer 5-4 Maintenance and Transportation 5-1 - Epson LQ 870 | User Manual - Page 99
several times a year. 1. Make sure the printer is turned off. Then remove the paper guide, printer cover, tractor unit, and any installed options. inside of the printer with lubricants; unsuitable oils can damage the mechanism. Contact your dealer or a qualified service person if you think - Epson LQ 870 | User Manual - Page 100
Replacing the Ribbon Cartridge When your printing becomes too faint, you need to replace the ribbon cartridge. The following Epson replacement ribbon cartridges are recommended: Printer LQ-870 LQ-1170 S#tan77d5a3rd fabric # 7754 Film # # 7768 7770 To replace the ribbon cartridge, follow the - Epson LQ 870 | User Manual - Page 101
unit, replace it now according to the instructions in Chapter 2. 6. If your printer had a protective screw, replace it now to protect the printer during shipment. See Chapter 1 for instructions. 7. Repack the printer, ribbon cartridge, paper guide, and power cord in the original packing materials - Epson LQ 870 | User Manual - Page 102
Chapter 6 Troubleshooting Problems and Solutions 6-2 Power Supply 6-3 Printing 6-4 Paper Handling 6-8 Options 6-10 H Troubleshooting 6-1 - Epson LQ 870 | User Manual - Page 103
locate the problem in the list below and then see the appropriate page for the solution. Power supply . Power is not being supplied. See 6-3 Printing l The printer does not print. l The print is faint or uneven. . Dots are missing in the printed characters or graphics. l Printed characters are - Epson LQ 870 | User Manual - Page 104
does not go on. Check that the power cable is plugged into the electrical outlet properly. If the electrical outlet is controlled by an outside switch or automatic timer, use a different outlet. Plug another electrical device into the outlet to determine whether the outlet is operating properly - Epson LQ 870 | User Manual - Page 105
noise, the beeper sounds several times, and the printer stops abruptly. Turn off the printer and check for a paper jam, ribbon jam, or other problems; then try to print again. If the printer still does not print correctly, contact your dealer or a qualified service person. 6-4 Troubleshooting - Epson LQ 870 | User Manual - Page 106
in the printout. The print head is damaged. Stop printing and have your dealer or a qualified service person to replace the print head. l Dots are missing in random positions. There is either slack in the ribbon or the ribbon has come loose. Reinstall the ribbon cartridge. Printed characters are not - Epson LQ 870 | User Manual - Page 107
too high or too low on the page. Adjust the top margin set by your application software. Use Micro-feed to adjust the print position. l All the text is printed on the same line. Set DIP switch 2-4 on so that the printer automatically adds a line-feed code to each carriage return. a The text is - Epson LQ 870 | User Manual - Page 108
not print correctly, try the self test described in Chapter 1. If the self test works properly, the printer is all right and the problem probably lies in the computer, the software, or the cable. If the self test does not work, contact your dealer or a qualified service person. Troubleshooting 6-7 - Epson LQ 870 | User Manual - Page 109
paper guide. l When you insert the paper, the platen rotates but paper does not feed. Reinsert the paper more firmly. l Printing starts too low on the page, or the bottom part of one page is printed at the top of the next page. Be sure to choose the correct printer when you choose a printer from - Epson LQ 870 | User Manual - Page 110
the specified range. See page 7-4. l Make sure the paper is aligned with the edge guides. l The paper does not fully eject. Use the LOAD/EJECT button to eject paper. 1 meter (3 feet) of the printer. The position of your paper supply may be preventing it from feeding straight. Troubleshooting 6-9 - Epson LQ 870 | User Manual - Page 111
the specified range. See page 7-6. l The paper does not eject properly. The page is too long. Tear off the paper and remove it from the printer. Only use paper that is within the specified range. 6-10 Troubleshooting - Epson LQ 870 | User Manual - Page 112
cut-sheet feeder may be incorrectly installed on the printer. See that the paper-release lever is pushed back to the single-sheet position. Paper may be jammed near the print head. You may have loaded too many sheets in . Make sure that your paper is the proper size and quality. Troubleshooting 6-11 - Epson LQ 870 | User Manual - Page 113
aligned. When you use an optional interface, the printer does not operate properly. l The printer does not print or the printout is not what you expected. printer. The computer and printer interface settings may not match. Make sure the settings on the computer and printer match. 6-12 Troubleshooting - Epson LQ 870 | User Manual - Page 114
Chapter 7 Technical Specifications Printer Specifications 7-2 Printing 7-2 Paper 7-4 Mechanical 7-7 Electrical 7-8 Environmental 7-9 Interface Specifications 7-10 Specifications and pin assignments 7-10 Interface timing 7-13 Optional Specifications 7-14 Cut-sheet feeder 7-14 - Epson LQ 870 | User Manual - Page 115
dot matrix Quality High-speed draft Draft Letter quality Characters per inch 10 10 12 15 10 12 15 Characters/second/line 300 275 330 413 92 110 138 Printing direction: Bidirectional logic-seeking for text. Unidirectional for graphics. (Bidirectional for graphics can be selected with DIP switch - Epson LQ 870 | User Manual - Page 116
Printer Specifications Printable columns: Character size I IO cpi Maximum printed characters I LQ-870 I LQ-1170 1 80 136 12 cpi 96 164 15 cpi 120 204 1 17 cpi (10 cpi condensed) 1 137 I 233 I 20 cpi (12 cpi condensed) 1 160 272 Character - Epson LQ 870 | User Manual - Page 117
Printer Specifications Paper Paper size: Paper LQ-870 LQ-1170 Single sheet Width Top insertion Front insertion 148 to 257 mm (5.8 to 10.1 or more: La-870 257 mm (10.1 '7 width paper 25 mm (0.98') or more: LQ-1170 420 mm (16.5") width paper 13.5 mm (0.53'7 or more 7-4 Technical Specifications - Epson LQ 870 | User Manual - Page 118
Printer Specifications Continuous paper 9 mm (0. 35'1 or more 9 mm (0..35') 01 more I.I'I Printable area I'I' I M See the table below LQ-870 Paper width 101 to 241 mm (4 to 9.5 inches) - 254 mm (10 inches) LQ-1170 Paper width 101 to 377.8 mm (4 to 14.575 inches) 381 to 406 mm (15 to 16 inches) - Epson LQ 870 | User Manual - Page 119
forms; Single sheet, front insertion or continuous paper: 1 original plus up to 3 copies Notes: You can use recycled paper with this printer; however, you may notice an increase in ribbon consumption and paper jamming. If this occurs, use a higher grade of paper. 7-6 Technical Specifications - Epson LQ 870 | User Manual - Page 120
, LQ-1170: #7754 Life expectancy In LQ, at 48 dots/character): 2 million characters Film ribbon cartridge LQ-870: #7768, LQ-1170: #7770 Life expectancy In LQ, at 48 dots/character): 0.2 million characters ( # 7768) 0.3 million characters ( # 7770) MCBF: For all components (excluding print head - Epson LQ 870 | User Manual - Page 121
frequency range: Insulation resistance: Dielectric strength (between AC line and chassis): AC 120 V AC 103.5 to 132 V 2.0 A (during self-test printing in draft mode, at 10 cpi) LQ-870: approx. 58 W LQ-1170: approx. 58 W 50 to 60 Hz 49.5 to 60.5 Hz 10 Mohms minimum (at DC 500 V between AC power line - Epson LQ 870 | User Manual - Page 122
Environmental Temperature: Humidity: Printer Specifications Operation: 5" to 35°C (41" to 95°F) Storage: -30" to 60°C (-22" to 140°F) Operation: Storage: 10% to 80% RH without condensation 5% to 85% RH without condensation Technical Specifications 7-9 - Epson LQ 870 | User Manual - Page 123
Interface Specifications Your printer is equipped with a parallel interface Specifications and pin assignments The built-in parallel interface About an 1 l-microsecond pulse. LOW indicates that data has been received and that the printer is ready to accept more data. 7-10 Technical Specifications - Epson LQ 870 | User Manual - Page 124
this signal is LOW, the paper is automatically fed 1 line after printing. (The signal level can be fixed to this by setting DIP switch 2-4 to ON.) 15 - NC Not used. 16 - GND - Logic ground level. 17 - C H A S S I S - Printer's chassis ground, which is GND isolated from the logic ground. 18 - Epson LQ 870 | User Manual - Page 125
interface Specifications Note: l The column heading "Direction" refers to the direction of signal flow as viewed from the printer. . "Return" denotes the twisted-pair return, to be connected at signal ground level. For the interface wiring, be sure to use a twisted-pair cable for - Epson LQ 870 | User Manual - Page 126
Interface Specifications Interface timing The figure below shows the timing for the parallel interface. BUSY AKm D A TA STROBE Technical Specifications 7-13 - Epson LQ 870 | User Manual - Page 127
Option Specifications Cut-sheet feeders Dimensions and weight Dimensions include the printer Bin capacity: Single sheets: Envelopes: MCBF: C806371 and C806391 Up to 50 sheets of 22-lb (82-g/m2) paper C806381 and C806401 Up to 150 - Epson LQ 870 | User Manual - Page 128
30" to 60°C (-22" to 140°F) Operation: 15% to 80% RH Storage: 5% to 85% RH Note: . 24-lb paper printing is available only at normal operating conditions. l Envelope printing is available only with the C806381 or C806401 cut-sheet feeder at normal operating conditions. Technical Specifications 7-15 - Epson LQ 870 | User Manual - Page 129
goes LOW). Software initialization When software sends the ESC @ (initialize ._ the printer) command. Panel initialization When the PAUSE button is and panel initialization do not initialize the printer mechanism or clear the user-defined character set. Also, software initialization does - Epson LQ 870 | User Manual - Page 130
8 Command Summary Using the Command Summary 8-2 Commands Arranged by Topic General operation Paper feeding Page format Print position motion Font selection Font enhancement Spacing Character handling Bit image Graphics 8-3 8-3 8-3 8-4 8-5 8-6 8-7 8-9 8-9 8-11 8-12 Command Summary - Epson LQ 870 | User Manual - Page 131
Using the Command Summary This printer uses the Epson ESC/P 2 printer control language. You can use these commands to produce high quality laser-like printouts. ESC/P 2 commands provide scalable fonts (Epson Roman and Epson Sans Serif) and enhanced graphics. The following section lists and describes - Epson LQ 870 | User Manual - Page 132
operation ASCII Dec. Hex. Description ESC @ 64 40 Initialize Printer ESC U l/O 85 55 Turn Unidirectional Mode On/Off ESC EM n 25 19 Control Paper Loading/Ejecting n = "1" Select bin1 of CSF n = "2" Select bin2 of CSF n = "R" Eject a sheet * For the ESC EM command the variables are the - Epson LQ 870 | User Manual - Page 133
m = m l + m2 X 2 5 6 m: Top margin in defined units n = nl -I- n2 X 256 n: Bottom margin in defined units ESC ( C nn 40 67 28 43 Set Page Length in Defined Units ESC ( C 2 0 nl n2 n = nl i- n2 X 256 n: Number of defined units ESC C n 67 43 Set Page Length in Lines n = number of lines (1-127 - Epson LQ 870 | User Manual - Page 134
in draft and l/180-inch in LQ for this command ESC ( V nn 40 86 28 56 Set Absolute Vertical Print Position ESC ( V 2 0 nl n2 n = nl + n2 X 256 n: Specifies print position from top margin in defined units ESC ( v nn 40 118 28 76 Set Relative Vertical Print Position ESC(v20nln2 n = nl -t n2 X 256 - Epson LQ 870 | User Manual - Page 135
= 0, 21, 42 (for other typeface) * Cancel ESC X with ESC I', M, g, p, !, or @ ESC I' 80 50 Select 10.5 point, 10 cpi ESC M 77 4D Select 10.5 point, 12 cpi ESC g 103 67 Select 10.5 Point, 15 cpi ESC p l/o 112 70 Turn Proportional Mode On/Off ESC x n 120 78 Select Letter Quality or Draft YZ - Epson LQ 870 | User Manual - Page 136
Commands Arranged by Topic ASCII ESC 4 ESC 5 ESC E ESC F ESC ! n Dec. Hex. Description 52 34 Select Italic SI 15 OF Select Condensed Printing DC2 18 12 Cancel Condensed Printing SO 14 OE Select Double-Width Printing (one line) ESCW 1/0 87 57 Turn Double-Width Printing On/Off DC4 20 14 - Epson LQ 870 | User Manual - Page 137
Arranged by Topic ASCII ESC w l/O ESC G ESC H ESC S 0 ESC S 1 ESC T ESC ( - nn ESC - 1/0 ESC q n Dec. Hex. Description 119 77 Turn Double-Height Printing On/Off 71 47 Select Double-Strike Printing 72 48 Cancel Double-Strike Printing 83 53 Select Superscript Printing 83 53 Select Subscript - Epson LQ 870 | User Manual - Page 138
Set Intercharacter Space n = number of units of space added to the space between characters (1-127) Units are l/l20 inch (draft) and l/180 inch (LQ and proportional) ESC ( U nn 40 85 28 55 Define Unit ESC ( U 1 0 n Define positioning unit as n/3600 inch n = 10, 20, 30, 40, 50, 60 n = 10; default - Epson LQ 870 | User Manual - Page 139
by - ESC ( t n = 0, 1, 2, 3, "0", "I", "2", or "3" n = 2: Remaps download characters from O-127 to 128-255 ESC R ESC: 0 n 0 58 3A Copy ROM to RAM n = 0, 1, 2, 3, 4, 5, or 9 n: Typeface ESC % n 37 25 Select User-Defined Set n = 0: Normal set 1: User-defined set ESC 6 54 36 Enable Printing - Epson LQ 870 | User Manual - Page 140
( a nl n2 data n = nl •k n2 x 256 n: amount of data data: n byte data for printing as character Bit image ASCII Dec. Hex. ESC * nn 42 2A Description Select Bit Image ESC * m nl n2 data n = nl + n2 x 256 n: Total columns Total data = (nl -I- n2 X 256) X t 33 120 38 90 39 180 40 360 180 - Epson LQ 870 | User Manual - Page 141
71 28 47 Select Graphics Mode ESC ( G 1 0 n n = 1, or 49 * Cancel Graphics mode with ESC @ ESC. nn 46 2E Print Raster Graphics ESC . c v h m nl n2 data c = 0: Full graphics mode 1: Compressed mode v = 10, 20: Dot density for vertical in 3600/v DPI h = 10, 20: Dot density for horizontal in 3600/h DPI - Epson LQ 870 | User Manual - Page 142
Appendix Character Tables A-2 Italic character table A-2 Graphics character tables A-3 International Character Sets A-6 Appendix A-1 - Epson LQ 870 | User Manual - Page 143
tables are selected by setting DIP switches l-l, 1-2, 1-3, and 1-4, or using the ESC t software command. For the graphics character tables, the ESC 6 and ESC 7 software commands let you select whether hex codes 80 to 9F are characters (ESC 6) or control codes (ESC 7). Italic character table - Epson LQ 870 | User Manual - Page 144
Character Tables Graphics character tables PC 437 (United States) CDDE0123456789ABCDEF 0 NUL SP 0 @ P p(-gQ$LlL.~ l 1 !lAQaqfiaiglfp+ 2 DC2 " 2BRbr&!16 r 1 3 #3CScsd6ti 4 DC4$4DTdtgid 5 §%SEUeu&bfi PC 850 (Multilingual) 0123456789ABCDEF 0 IWL SP 0 @ P pCfi&$LB(j- l 1 ! 1 A Q a - Epson LQ 870 | User Manual - Page 145
Character Tables PC 860 (Portugal) CODE0123456789ABCDEF 0 NUL 1 SP 0 @ P * p c fi 6 g L JL a E !lAQaqfiAi$$lypf 2 DC2 " 2BRbr&&6 r 2 3 #3CScsb6ti 4 DC4$4DTdt&e,A PC 863 (Canada-French) CODE0123456789ABCDEF 0 NUL SPO @ P * p C E ( si:.:s.::i::_. Ly a L 1 2 !lAQaq(i&*sl~pf DC2 " 2BRbr6 - Epson LQ 870 | User Manual - Page 146
available with ESC ( * lo 171 0 1 2 Q) 5 3 0 !! 4 + !I 5+ 6 4- 7 8 9 A B C Q a- D P *) E R A F 0 v cl To print the characters in the table on ;he left you must first send the ESC ( a cdmmand. This command is valid only on printers featuring Epson ESC/P2. Appendix A-5 - Epson LQ 870 | User Manual - Page 147
Character Sets Country 0 USA 1 France 2 Germany 3 U.K. 4 Denmark 5 Sweden 6 Italy 7 Spain ASCII code hex DIP SW 23 24 40 58 5C 5D 5E 60 78 7C 7D 7E l-l 1-2 l-3 # $ @ [ \ 1 character sets by DIP switch. The following eight additional sets are available only when you use ESC R software command - Epson LQ 870 | User Manual - Page 148
to letters and symbols. auto line feed When this feature is selected using a DIP switch, each carriagereturn code (CR) is automatically followed by a line-feed (LF) code. bidirectional printing Printing in which the print head prints from left to right only on every other line. On the other lines - Epson LQ 870 | User Manual - Page 149
automatically feeds single sheets of paper into the printer. data dump A troubleshooting feature that helps advanced users find the cause of communication problems between the printer and the computer. When the printer is in data dump mode, it prints each code it receives in hexadecimal notation and - Epson LQ 870 | User Manual - Page 150
is turned on, reset, or initialized. DIP switches Small switches in a printer that control various printer functions and set the default status of the printer when it is turned on or initialized. DIP stands for dual in-line package. dot matrix A method of printing in which each letter or symbol is - Epson LQ 870 | User Manual - Page 151
three print qualities available on your printer. High-speed draft uses a minimum number of dots per character to produce extremely high-speed printing. See (LQ) One of three print qualities available on your printer. Letter Quality provides better readability and appearance at a reduced print speed - Epson LQ 870 | User Manual - Page 152
defaults by sending a command or an INIT signal or by turning the printer off and then back on. self test A method for checking the operation of the printer. When the self test is run, the printer prints out its current DIP switch settings and the characters that are stored in its ROM. Glossary GL - Epson LQ 870 | User Manual - Page 153
printing Printing in one direction only. Unidirectional printing is useful for printing graphics because it allows more precise vertical alignment than bidirectional printing. user-defined characters Characters that are defined and stored in the printer by the user. Also known as download - Epson LQ 870 | User Manual - Page 154
15 Application program, iii, 1-15 Assembling the printer, 1-6--9 Auto line-feed, 3-7, 3-12 control panel, 3-4 B Baud rate, 4-18 Bidirectional printing, 3-7, 3-10, 7-2 BIN 1, control panel, Ribbon cartridge Character fonts, 3-19-21 pitch, 3-22 D Data dump, 3-23 Default settings, 7-16 DIP switches - Epson LQ 870 | User Manual - Page 155
guides, 2-5 EJECT button, control panel, 3-3 Envelopes, cut-sheet feeder, 4-6--8 loading, 2-28, 4-6--8 specifications, 7-4--6 Epson Consumer Information Center, iv Error handling, 4-18 ESC character tables, A-3--5 Graphics, print direction, 3-7, 3-10 , 7-2 Installing, ribbon cartridge, 1-6--8 options - Epson LQ 870 | User Manual - Page 156
Loading position, adjusting, 3-13-15 M Maintenance, 5-1--3 Manually, feeding single sheets, 2-4-7 MICRO-FEED, control panel 3-4, Print direction, 3-7, 3-10, 7-2 Print head, 1-7, 7-7 Print test, running, 1-11--18 Printer commands, 8-1--12 Printer stand, guidelines, 1-5 Problems, see Troubleshooting - Epson LQ 870 | User Manual - Page 157
-tractor, 2-8, 2-10--11,2-15--17 Ribbon cartridge installing, 1-6, replacing, 5-3 specifications, 7-7 S Safety instructions, Intro 5 Scalable fonts, 3-19--20 printer, 5-4 Troubleshooting, 6-1--12 directory of problems, 6-2 options, 6-11--12 paper handling, 6-8--10 power supply, 6-3 printing problems - Epson LQ 870 | User Manual - Page 158
U Unidirectional printing, 3-7, 3-10, 7-2 Unpacking the printer, 1-2 V Voltage, 1-2, 7-8 W Warnings, cautions, and notes, Intro 3 Weight, 7-7 Where to get help, iv Index IN-5 - Epson LQ 870 | User Manual - Page 159
Epson America, Inc. 20770 Madrona Avenue Torrance, CA 90503 Printed in Japan 92.01-50
-
 1
1 -
 2
2 -
 3
3 -
 4
4 -
 5
5 -
 6
6 -
 7
7 -
8
-
9
-
10
-
11
-
12
-
13
-
14
-
15
-
16
-
17
-
18
-
19
-
20
-
21
-
22
-
23
-
24
-
25
-
26
-
27
-
28
-
29
-
30
-
31
-
32
-
33
-
34
-
35
-
36
-
37
-
38
-
39
-
40
-
41
-
42
-
43
-
44
-
45
-
46
-
47
-
48
-
49
-
50
-
51
-
52
-
53
-
54
-
55
-
56
-
57
-
58
-
59
-
60
-
61
-
62
-
63
-
64
-
65
-
66
-
67
-
68
-
69
-
70
-
71
-
72
-
73
-
74
-
75
-
76
-
77
-
78
-
79
-
80
-
81
-
82
-
83
-
84
-
85
-
86
-
87
-
88
-
89
-
90
-
91
-
92
-
93
-
94
-
95
-
96
-
97
-
98
-
99
-
100
-
101
-
102
-
103
-
104
-
105
-
106
-
107
-
108
-
109
-
110
-
111
-
112
-
113
-
114
-
115
-
116
-
117
-
118
-
119
-
120
-
121
-
122
-
123
-
124
-
125
-
126
-
127
-
128
-
129
-
130
-
131
-
132
-
133
-
134
-
135
-
136
-
137
-
138
-
139
-
140
-
141
-
142
-
143
-
144
-
145
-
146
-
147
-
148
-
149
-
150
-
151
-
152
-
153
-
154
-
155
-
156
-
157
-
158
-
159
 |
 |

LQ-870/1170
U
s
e
r’
s
M
a
n
u
a
I
4000377
rn*
“A