Epson Perfection 636 User Setup Information - PC - Page 3
You see the EPSON TWAIN 3 Setup window.
 |
View all Epson Perfection 636 manuals
Add to My Manuals
Save this manual to your list of manuals |
Page 3 highlights
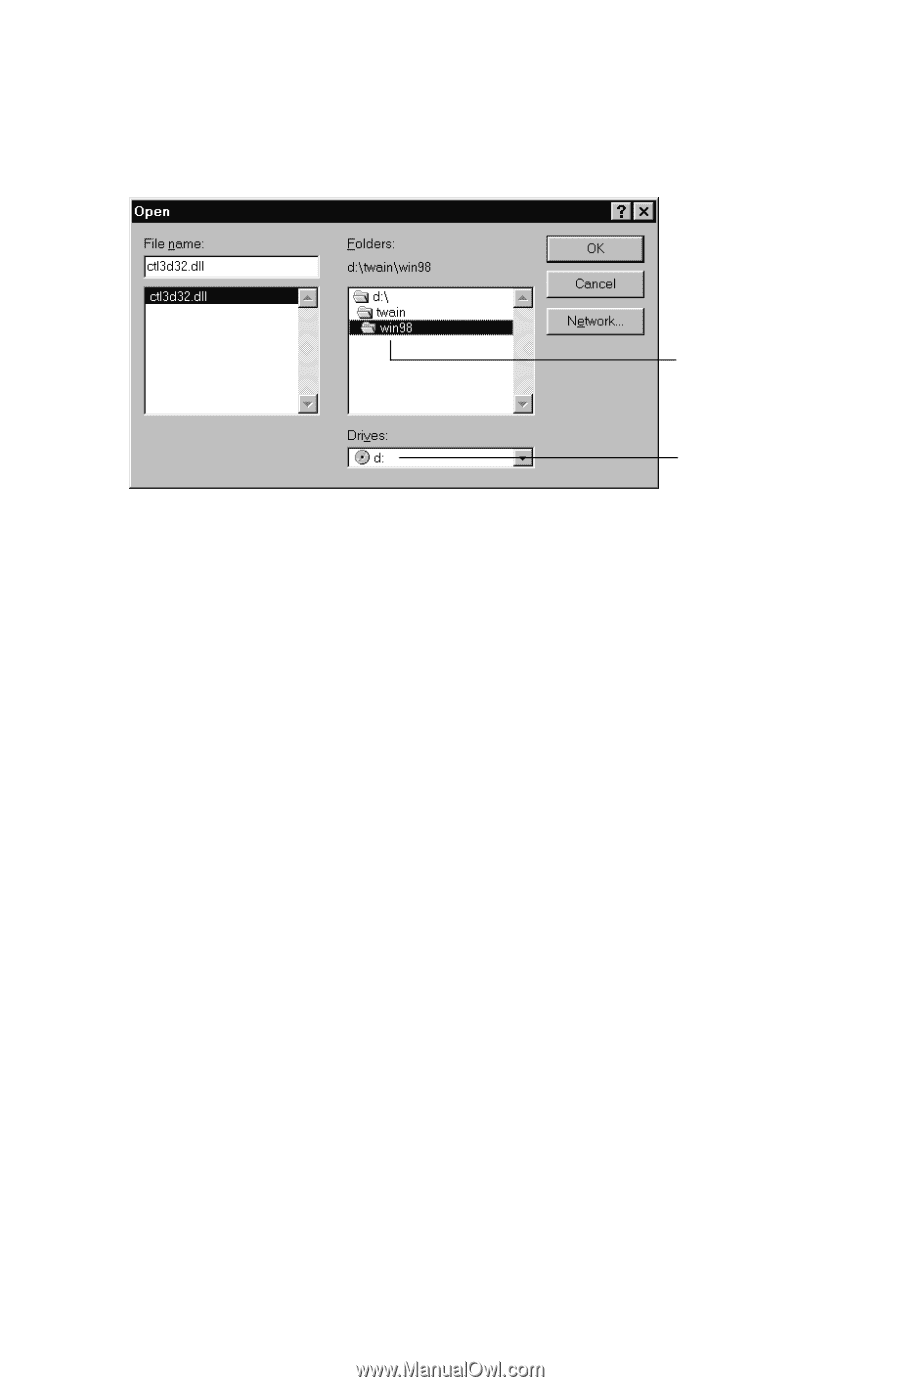
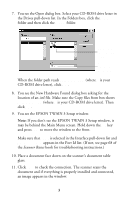
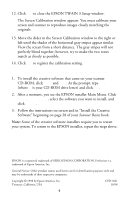
7. You see the Open dialog box. Select your CD-ROM drive letter in the Drives pull-down list. In the Folders box, click the twain folder and then click the win98 folder. Select the twain\win98 folder Select your CD-ROM drive letter When the folder path reads d:\twain\win98 (where d is your CD-ROM drive letter), click OK. 8. You see the New Hardware Found dialog box asking for the location of an .inf file. Make sure the Copy files from box shows d:\twain\win98 (where d is your CD-ROM drive letter). Then click OK. 9. You see the EPSON TWAIN 3 Setup window. Note: If you don't see the EPSON TWAIN 3 Setup window, it may be behind the Main Menu screen. Hold down the Alt key and press Tab to move the window to the front. Make sure that SCSI is selected in the Interface pull-down list and Perfection 636 appears in the Port Id list. (If not, see page 68 of the Scanner Basics book for troubleshooting instructions.) 10. Place a document face down on the scanner's document table glass. 11. Click Test to check the connection. The scanner scans the document and if everything is properly installed and connected, an image appears in the window. 3
-
 1
1 -
 2
2 -
 3
3 -
 4
4
 |
 |