Epson PowerLite 5600p User Manual - Page 84
Installing the Projector, Controlling the Projector from a Computer
 |
View all Epson PowerLite 5600p manuals
Add to My Manuals
Save this manual to your list of manuals |
Page 84 highlights
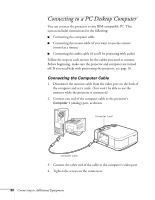
Installing the Projector The projector can be installed for three different viewing setups: front projection, ceiling mounting, or rear projection onto a semi-transparent screen, as shown: front projection note See "Positioning the Projector" on page 10 for more information. ceiling mounting rear projection To project from overhead, you'll need to select Ceiling in the projector's Advanced menu. To project from the rear, select Rear Proj. See "Setting Advanced Features" on page 54. If you're ceiling-mounting the projector and you place it above screen level, you'll have to tilt it down to position the image on-screen. This causes the image to lose its square shape. You can then correct the distortion by using the Keystone function in the projector's menu system (see "Customizing Projector Features" on page 53) or by using the Keystone button on the projector's control panel. If you place the projector's lens so it's level with the top of the screen, the image will be square and you won't have to adjust it. If you place the lens lower than the top of the screen, you'll have to tilt the projector upward if you want to fill the whole screen with the image. Controlling the Projector from a Computer If you want to be able to control the projector's settings from a computer, you can install the EMP Link V program on the Projector Software CD-ROM. You'll also need a serial cable to connect the projector to the computer. 78 Connecting to Additional Equipment
-
 1
1 -
2
-
3
-
4
-
5
-
6
-
7
-
8
-
9
-
10
-
11
-
12
-
13
-
14
-
15
-
16
-
17
-
18
-
19
-
20
-
21
-
22
-
23
-
24
-
25
-
26
-
27
-
28
-
29
-
30
-
31
-
32
-
33
-
34
-
35
-
36
-
37
-
38
-
39
-
40
-
41
-
42
-
43
-
44
-
45
-
46
-
47
-
48
-
49
-
50
-
51
-
52
-
53
-
54
-
55
-
56
-
57
-
58
-
59
-
60
-
61
-
62
-
63
-
64
-
65
-
66
-
67
-
68
-
69
-
70
-
71
-
72
-
73
-
74
-
75
-
76
-
77
-
78
-
 79
79 -
 80
80 -
 81
81 -
 82
82 -
 83
83 -
 84
84 -
 85
85 -
 86
86 -
 87
87 -
 88
88 -
 89
89 -
90
-
91
-
92
-
93
-
94
-
95
-
96
-
97
-
98
-
99
-
100
-
101
-
102
-
103
-
104
-
105
-
106
-
107
-
108
-
109
-
110
-
111
-
112
-
113
-
114
 |
 |
