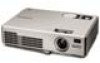
Epson PowerLite 750c Product Information Guide - Page 3
Starting Up the Projector
 |
View all Epson PowerLite 750c manuals
Add to My Manuals
Save this manual to your list of manuals |
Page 3 highlights
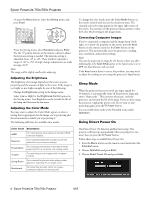
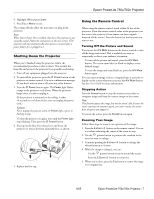
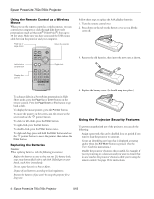
Epson PowerLite 750c/760c Projector Use the figure below as a guideline to help you determine how far from the screen to place the projector. Image size generally increases with distance, but may vary depending on how you position the zoom ring and whether you have adjusted the image size with other settings. 33.1 to 39.7 feet 6.6 to 7.9 feet 3.2 to 3.9 feet To calculate exact measurements, use the following formulas: ❏ To find the projection distance when you know the screen's diagonal dimension: Wide (inches) = ((33.696 × diagonal screen size [inches]) - 21.717) / 25.4 Tele (inches) = ((40.453 × diagonal screen size [inches]) - 22.52) / 25.4 ❏ To find how large a screen's diagonal dimension will be when you know the projection distance: Wide (inches) = (Projection distance [inches] × 0.254 + 0.02171 / 0.033696 Tele (inches) = (Projection distance [inches] × 0.0254 + 0.02252) / 0.040453 If you place the projector below the level of the screen, you'll have to tilt it up by extending the front adjustable foot, as shown. This causes the image to lose its rectangular shape, but you can correct the distortion by pressing the keystone buttons on the projector. See page 5 for detailed information about correcting the image shape. Starting Up the Projector Make sure your projector and other equipment are set up and connected correctly. Then turn on the projector, as described below. If you turn on your connected computer or video equipment before starting the projector, the projector automatically detects and displays the image source. If you turn on the projector first, or have multiple pieces of connected equipment, you may have to select the image source manually. See "Selecting the Image Source" on page 4. Follow these steps to plug in and turn on the projector: 1. Remove the lens cap. Caution: Do not use the projector with the lens cap in place. The heat generated by the lamp can damage the cap. 2. Connect one end of the power cord to the projector's power inlet. Then connect the other end to an electrical outlet. The Power light on top of the projector turns orange, indicating that the projector is in standby mode. 3. Press the P Power button on top of the projector or on the remote control. Power button Projector Remote control The projector beeps once and the Power light flashes green as the projector warms up, then an image begins to appear. When the Power light stops flashing and remains green, the projector is ready for use. Warning: Never look into the lens when the lamp is on. This can damage your eyes, and is especially dangerous for children. If you place the projector level with the bottom of the screen, the image will be rectangular and you won't have to adjust it. If you place the projector higher than the bottom of the screen, the image will still be rectangular, but you won't be able to fill the whole screen with the image. 8/05 Epson PowerLite 750c/760c Projector - 3
-
 1
1 -
 2
2 -
 3
3 -
 4
4 -
 5
5 -
 6
6 -
 7
7 -
 8
8 -
 9
9 -
10
-
11
-
12
-
13
 |
 |
