Epson PowerLite 9100NL User Manual - Page 20
Setting Up the Projector, or from EPSON., See If you'll be projecting from overhead
 |
View all Epson PowerLite 9100NL manuals
Add to My Manuals
Save this manual to your list of manuals |
Page 20 highlights
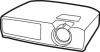
When projecting from a table, the ideal arrangement is to set the projector flat on its surface. This way, you can use the lens shift knob (instead of raising the projector's feet) to position the image on-screen. This delivers the best-looking picture. You won't need to tilt the projector upward as long as you position it so that its lens is at least as high as the bottom of the screen, but no higher than the middle of the screen, as shown: no higher than middle of screen no lower than bottom of screen ideal range note After positioning the projector, you may wish to connect a Kensington security lock to the hole on the projector's left side. This can be purchased from your computer or electronics dealer or from EPSON. (See page 4.) (If you have to raise the front of the projector, you can use the projector's keystone correction to eliminate distortion caused by tilting the projector upward. But you'll still get a better picture if you can leave the projector flat on the table, without extending its feet.) If you'll be projecting from overhead, you can get the best-looking picture by mounting the projector parallel to the ceiling, with its lens at least as high as the middle of the screen, but no higher than the top of the screen. Then use the height adjustment knob to position the image on-screen. You'll also need to select ceiling projection in the projector's Advanced menu. See page 71. 14 Setting Up the Projector
-
 1
1 -
2
-
3
-
4
-
5
-
6
-
7
-
8
-
9
-
10
-
11
-
12
-
13
-
14
-
 15
15 -
 16
16 -
 17
17 -
 18
18 -
 19
19 -
 20
20 -
 21
21 -
 22
22 -
 23
23 -
 24
24 -
 25
25 -
26
-
27
-
28
-
29
-
30
-
31
-
32
-
33
-
34
-
35
-
36
-
37
-
38
-
39
-
40
-
41
-
42
-
43
-
44
-
45
-
46
-
47
-
48
-
49
-
50
-
51
-
52
-
53
-
54
-
55
-
56
-
57
-
58
-
59
-
60
-
61
-
62
-
63
-
64
-
65
-
66
-
67
-
68
-
69
-
70
-
71
-
72
-
73
-
74
-
75
-
76
-
77
-
78
-
79
-
80
-
81
-
82
-
83
-
84
-
85
-
86
-
87
-
88
-
89
-
90
-
91
-
92
-
93
-
94
-
95
-
96
-
97
-
98
-
99
-
100
-
101
-
102
-
103
-
104
-
105
-
106
-
107
-
108
-
109
-
110
-
111
-
112
-
113
-
114
-
115
-
116
-
117
-
118
-
119
-
120
-
121
-
122
 |
 |
