Epson PowerLite Home Cinema 3010 User's Guide - Page 49
Selecting Memory Settings and Resetting the Projector, Creating Memory Settings
 |
View all Epson PowerLite Home Cinema 3010 manuals
Add to My Manuals
Save this manual to your list of manuals |
Page 49 highlights
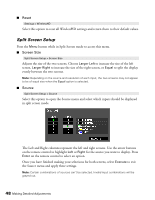
■ Swap Screens Split Screen Setup > Swap Screens Select this option to quickly switch the images on the left and right sides of the split screen display. ■ Audio Source Split Screen Setup > Audio Source Use this setting to select which screen's audio you want to hear while in split screen mode. Note: Select Auto to hear audio from either the largest screen or the screen on the left (depending on the Screen Size setting). Selecting Memory Settings and Resetting the Projector Your projector comes with 8 memory locations that are reserved for color mode calibration by installers. In addition, there are 2 memory locations where you can save other customized settings to obtain the best picture quality for each of your video inputs. Note: Certain menu options may not be available when Auto is selected as the Color Mode. Creating Memory Settings Memory settings can be used to store most of the picture quality settings on page 41 and color settings on page 43. Before saving them to memory, adjust the settings to the desired levels. 1. Press the Memory button on the remote control. 2. Select Save Memory. 3. Select the memory name you want to use, then press the Enter button to save your settings. Note: Saved settings are indicated by a green highlight next to the memory name. If you select a name that is already in use, the existing settings will be erased and new ones saved in their place. Making Detailed Adjustments 49
-
 1
1 -
2
-
3
-
4
-
5
-
6
-
7
-
8
-
9
-
10
-
11
-
12
-
13
-
14
-
15
-
16
-
17
-
18
-
19
-
20
-
21
-
22
-
23
-
24
-
25
-
26
-
27
-
28
-
29
-
30
-
31
-
32
-
33
-
34
-
35
-
36
-
37
-
38
-
39
-
40
-
41
-
42
-
43
-
 44
44 -
 45
45 -
 46
46 -
 47
47 -
 48
48 -
 49
49 -
 50
50 -
 51
51 -
 52
52 -
 53
53 -
 54
54 -
55
-
56
-
57
-
58
-
59
-
60
-
61
-
62
-
63
-
64
-
65
-
66
-
67
-
68
-
69
-
70
-
71
-
72
-
73
-
74
-
75
-
76
-
77
-
78
-
79
-
80
-
81
-
82
-
83
-
84
-
85
-
86
-
87
-
88
 |
 |
