Epson PowerLite Home Cinema 400 User Manual - Page 35
Adjusting the Picture Quality, Input Brightness Settings
 |
View all Epson PowerLite Home Cinema 400 manuals
Add to My Manuals
Save this manual to your list of manuals |
Page 35 highlights
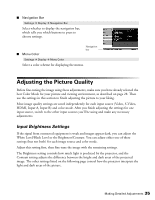
■ Navigation Bar Settings Æ Display Æ Navigation Bar Select whether to display the navigation bar, which tells you which buttons to press to choose settings. ■ Menu Color Navigation bar Settings Æ Display Æ Menu Color Select a color scheme for displaying the menus. Adjusting the Picture Quality Before fine-tuning the image using these adjustments, make sure you have already selected the best Color Mode for your picture and viewing environment, as described on page 28. Then use the settings in this section to finish adjusting the picture to your liking. Most image quality settings are saved independently for each input source (Video, S-Video, HDMI, Input A, Input B) and color mode. After you finish adjusting the settings for one input source, switch to the other input sources you'll be using and make any necessary adjustments. Input Brightness Settings If the signal from connected equipment is weak and images appear dark, you can adjust the White Level/Black Level or the Brightness/Contrast. You can adjust either one of these settings (but not both) for each image source and color mode. Adjust this setting first, then fine-tune the image with the remaining settings. The Brightness setting controls how much light is produced by the projector, and the Contrast setting adjusts the difference between the bright and dark areas of the projected image. The other settings listed on the following page control how the projector interprets the light and dark areas of the picture. Making Detailed Adjustments 35
-
 1
1 -
2
-
3
-
4
-
5
-
6
-
7
-
8
-
9
-
10
-
11
-
12
-
13
-
14
-
15
-
16
-
17
-
18
-
19
-
20
-
21
-
22
-
23
-
24
-
25
-
26
-
27
-
28
-
29
-
 30
30 -
 31
31 -
 32
32 -
 33
33 -
 34
34 -
 35
35 -
 36
36 -
 37
37 -
 38
38 -
 39
39 -
 40
40 -
41
-
42
-
43
-
44
-
45
-
46
-
47
-
48
-
49
-
50
-
51
-
52
-
53
-
54
-
55
-
56
-
57
-
58
-
59
-
60
-
61
-
62
-
63
-
64
-
65
-
66
-
67
-
68
-
69
-
70
-
71
-
72
-
73
-
74
-
75
-
76
 |
 |
