Epson PowerLite Home Cinema 725HD Operation Guide - EasyMP Network Projection - Page 22
Connecting to the Projector and Projecting Images, Connection Methods
 |
View all Epson PowerLite Home Cinema 725HD manuals
Add to My Manuals
Save this manual to your list of manuals |
Page 22 highlights
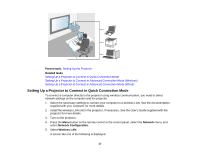
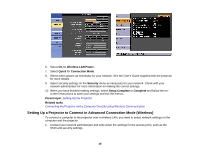
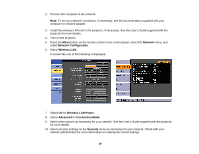
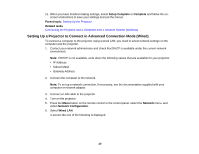
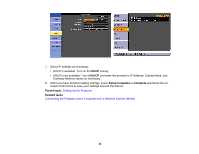
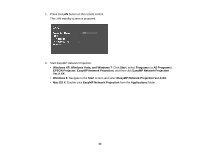
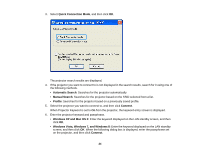
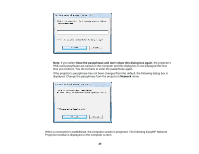
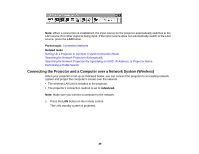
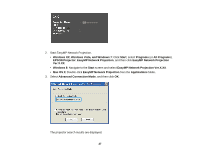
Connecting to the Projector and Projecting Images Follow these instructions to connect the computer and the projector over a network, and to project images from your computer's screen using the projector. Make sure you have already set up EasyMP Network Projection and selected a connection mode for the projector. Connection Methods Changing the Projector Search Method Controlling the Projected Display Finishing Projecting Images Related topics Installing the Software Setting Up the Projector Connection Methods You can select a suitable method to connect the computer and the projector over a network depending on your network environment. Connecting the Projector and a Computer Directly Using Wireless Communication Connecting the Projector and a Computer over a Network System (Wireless) Connecting the Projector and a Computer over a Network System (Wired) Parent topic: Connecting to the Projector and Projecting Images Connecting the Projector and a Computer Directly Using Wireless Communication When your projector is set up as indicated below, you can connect the projector and a computer directly using wireless communication to project the computer's screen. • The wireless LAN unit is installed in the projector. • The projector's connection method is set to Quick. Note: • When you connect the projector and a computer directly using wireless communication, the connection between the computer and an access point is disconnected. • Make sure you turn on your computer's wireless communication function. 22
-
 1
1 -
2
-
3
-
4
-
5
-
6
-
7
-
8
-
9
-
10
-
11
-
12
-
13
-
14
-
15
-
16
-
 17
17 -
 18
18 -
 19
19 -
 20
20 -
 21
21 -
 22
22 -
 23
23 -
 24
24 -
 25
25 -
 26
26 -
 27
27 -
28
-
29
-
30
-
31
-
32
-
33
-
34
-
35
-
36
-
37
-
38
-
39
-
40
-
41
-
42
-
43
-
44
-
45
-
46
-
47
-
48
-
49
-
50
-
51
-
52
-
53
-
54
-
55
-
56
-
57
-
58
-
59
-
60
-
61
-
62
-
63
-
64
-
65
-
66
-
67
-
68
-
69
-
70
-
71
-
72
-
73
-
74
-
75
-
76
-
77
-
78
-
79
-
80
-
81
-
82
-
83
-
84
-
85
-
86
-
87
-
88
-
89
-
90
-
91
-
92
-
93
-
94
-
95
-
96
-
97
-
98
-
99
-
100
-
101
-
102
-
103
-
104
-
105
-
106
-
107
-
108
-
109
 |
 |