Epson PowerLite Pro Cinema 4040 Users Guide - Page 30
Connecting to a Computer for HDMI Video, Attaching and Removing the Cable Clips, Opt.HDMI 300mA
 |
View all Epson PowerLite Pro Cinema 4040 manuals
Add to My Manuals
Save this manual to your list of manuals |
Page 30 highlights
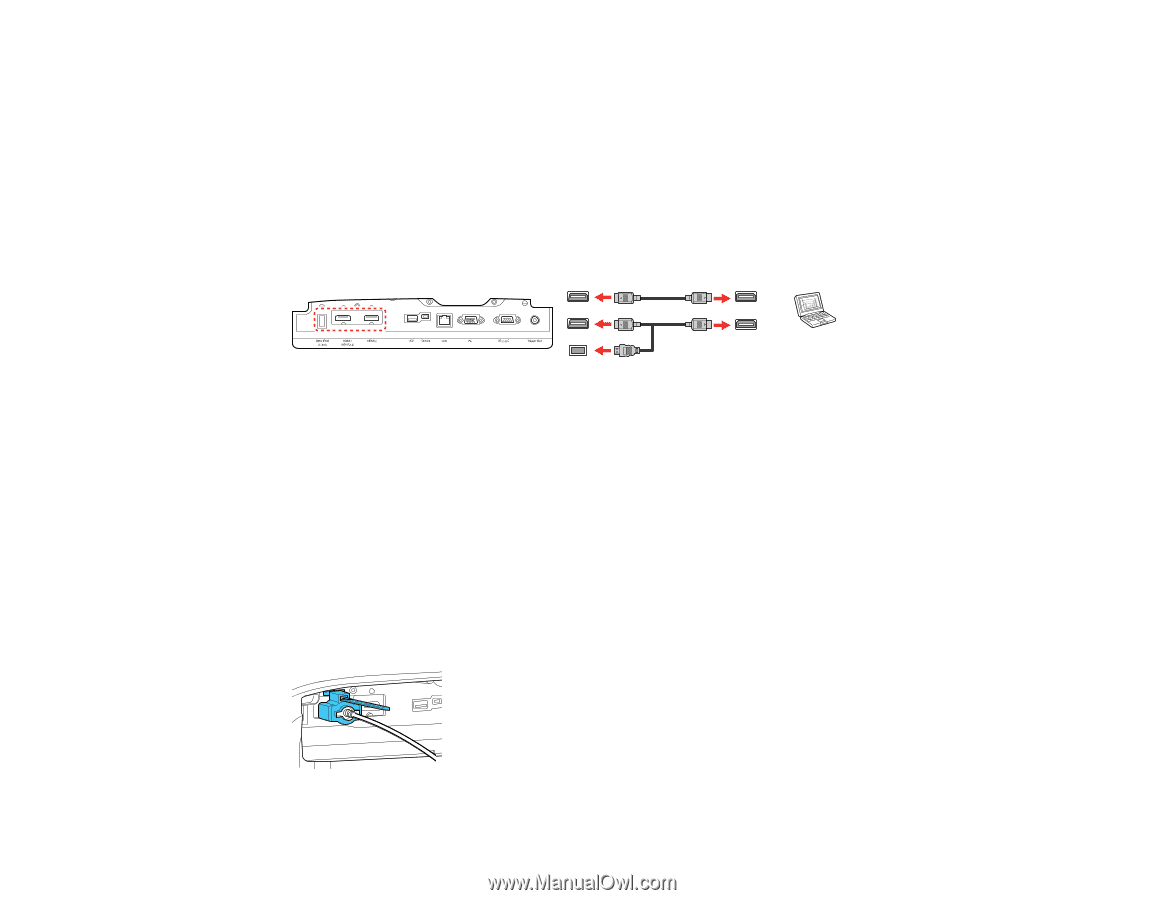
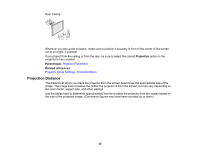
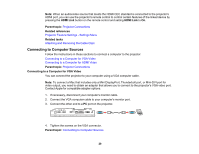
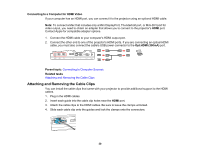
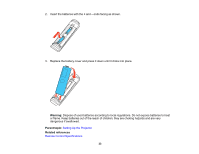
Connecting to a Computer for HDMI Video If your computer has an HDMI port, you can connect it to the projector using an optional HDMI cable. Note: To connect a Mac that includes only a Mini DisplayPort, Thunderbolt port, or Mini-DVI port for video output, you need to obtain an adapter that allows you to connect to the projector's HDMI port. Contact Apple for compatible adapter options. 1. Connect the HDMI cable to your computer's HDMI output port. 2. Connect the other end to one of the projector's HDMI ports. If you are connecting an optical HDMI cable, you must also connect the cable's USB power connector to the Opt.HDMI (300mA) port. Parent topic: Connecting to Computer Sources Related tasks Attaching and Removing the Cable Clips Attaching and Removing the Cable Clips You can install the cable clips that came with your projector to provide additional support to the HDMI cables. 1. Plug in the HDMI cables. 2. Insert each guide into the cable clip holes near the HDMI port. 3. Attach the cable clips to the HDMI cables. Be sure to leave the clamps unlocked. 4. Slide each cable clip onto the guides and lock the clamps onto the connectors. 30
-
 1
1 -
2
-
3
-
4
-
5
-
6
-
7
-
8
-
9
-
10
-
11
-
12
-
13
-
14
-
15
-
16
-
17
-
18
-
19
-
20
-
21
-
22
-
23
-
24
-
 25
25 -
 26
26 -
 27
27 -
 28
28 -
 29
29 -
 30
30 -
 31
31 -
 32
32 -
 33
33 -
 34
34 -
 35
35 -
36
-
37
-
38
-
39
-
40
-
41
-
42
-
43
-
44
-
45
-
46
-
47
-
48
-
49
-
50
-
51
-
52
-
53
-
54
-
55
-
56
-
57
-
58
-
59
-
60
-
61
-
62
-
63
-
64
-
65
-
66
-
67
-
68
-
69
-
70
-
71
-
72
-
73
-
74
-
75
-
76
-
77
-
78
-
79
-
80
-
81
-
82
-
83
-
84
-
85
-
86
-
87
-
88
-
89
-
90
-
91
-
92
-
93
-
94
-
95
-
96
-
97
-
98
-
99
-
100
-
101
-
102
-
103
-
104
-
105
-
106
-
107
-
108
-
109
-
110
-
111
-
112
-
113
-
114
-
115
-
116
-
117
-
118
-
119
-
120
-
121
-
122
-
123
-
124
-
125
-
126
-
127
-
128
-
129
-
130
-
131
-
132
-
133
-
134
-
135
-
136
-
137
-
138
-
139
-
140
-
141
-
142
-
143
-
144
-
145
-
146
-
147
-
148
-
149
-
150
-
151
-
152
-
153
-
154
-
155
-
156
-
157
-
158
-
159
-
160
-
161
-
162
-
163
-
164
-
165
-
166
-
167
-
168
-
169
-
170
-
171
-
172
-
173
-
174
-
175
-
176
-
177
-
178
-
179
-
180
-
181
-
182
-
183
-
184
-
185
-
186
-
187
-
188
-
189
-
190
-
191
-
192
-
193
-
194
-
195
-
196
-
197
-
198
-
199
-
200
-
201
-
202
-
203
-
204
-
205
-
206
-
207
-
208
 |
 |