Epson R320 Product Information Guide - Page 4
Printable area, Borderless Photos, Loading CDs and DVDs - print cd
 |
UPC - 010343851825
View all Epson R320 manuals
Add to My Manuals
Save this manual to your list of manuals |
Page 4 highlights
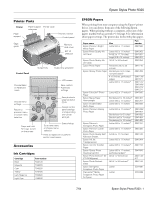
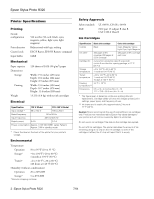
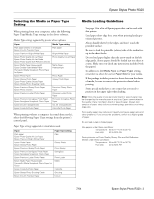
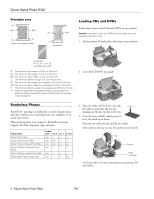
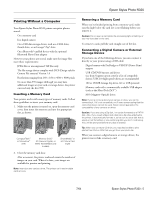
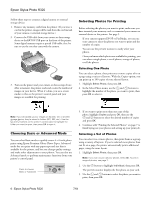
Epson Stylus Photo R320 Printable area A B-L B-R C single sheets/index cards A D-L D-R E envelopes Loading CDs and DVDs Follow these steps to load CDs and DVDs in your printer. Caution: If you don't insert the CD/DVD tray correctly, you may damage the printer or tray. 1. Lift the printer lid and push in the output tray extension. borderless (4 × 6, 5 × 7, 8 × 10, and letter-size only) A: The minimum top margin is 0.12 inch (3.0 mm). B-L: The minimum left margin is 0.12 inch (3.0 mm) B-R: The minimum right margin is 0.12 inch (3.0 mm) C: The minimum bottom margin is 0.12 inch (3.0 mm) D-L: The minimum left margin for envelopes is 0.12 inch (3.0 mm) D-R: The minimum right margin for envelopes is 0.12 inch (3.0 mm) E: The minimum bottom margin for envelopes is 0.55 inch (14 mm) ** When printing with the borderless setting, print quality may decline in the top and bottom areas of the printout, or the area may be smeared. 2. Lower the CD/DVD tray guide. Borderless Photos BorderFree™ printing is available for a variety of paper types and sizes, whether you're printing from your computer or in stand-alone mode. When printing from your computer, BorderFree printing supports the following paper types and sizes: Paper name Epson Photo Paper Epson Glossy Photo Paper Epson Premium Glossy Photo Paper Epson Premium Semigloss Photo Paper Epson Premium Luster Photo Paper Epson Matte Paper Heavyweight Letter size 4 × 6 yes - yes yes yes yes yes - 5 × 7 - - yes - 8 × 10 - - yes - yes - - - yes - - yes 3. Place the CD or DVD on the tray with the white or printable side face-up, making sure the disc lies flat in the tray. 4. Insert the tray carefully, making sure it is level, not tilted up or down. Push the tray under the tab and the two rollers. Don't push in the tray too far; line up the arrows exactly. Tab Arrows Keep tray level See Printer Basics for more information on printing CDs and DVDs. 4 - Epson Stylus Photo R320 7/04
-
 1
1 -
 2
2 -
 3
3 -
 4
4 -
 5
5 -
 6
6 -
 7
7 -
 8
8 -
 9
9 -
 10
10 -
11
-
12
 |
 |
