Epson R320 Start Here Card - Page 6
Print - stylus photo software
 |
UPC - 010343851825
View all Epson R320 manuals
Add to My Manuals
Save this manual to your list of manuals |
Page 6 highlights
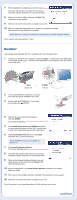
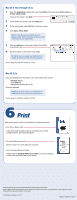
Mac OS X 10.2.x through 10.3.x 1 Open the Applications folder, then open the Utilities folder and select Print Center, or Printer Setup Utility. If you see this screen, click Add. 2 On the Printer List screen, click the Add button. 3 On the next screen, select USB from the pop-up menu. 4 Click Stylus Photo R320. NOTE: If the Stylus Photo R320 doesn't appear, make sure it is turned on and securely connected to your Macintosh. 5 Click the Add button. You see the Stylus Photo R320 in the Printer List. 6 Quit Print Center or the Printer Setup Utility. NOTE: Be sure to restart your Macintosh to enable all of your printer software features. You're ready to print! See section 6, "Print." Mac OS 9.2.x Open the Chooser from the Apple® menu, then select these options: • SP R320 Series • Your USB port • Background printing (on or off) Close the Chooser. NOTE: Be sure to restart your Macintosh to enable all of your printer software features. You're ready to print! See section 6, "Print." 6 Print Now you're ready to print. For instructions, use these resources: • Your Printer Basics book Learn about loading paper, printing, maintaining your printer, solving problems, and contacting Epson. • Your Quick Reference card See how easy it is to print without a computer. • Your on-screen Reference Guide Double-click the ESPR320 Reference Guide icon on your desktop to view more information about your printer. Epson and Epson Stylus are registered trademarks of Seiko Epson Corporation. General Notice: Other product names are for identification purposes only and may be trademarks of their respective owners. Epson disclaims any and all rights in those marks. © 2004 Epson America, Inc. 7/04 Printed in XXXXXX XX-XX.XX
-
 1
1 -
 2
2 -
 3
3 -
 4
4 -
 5
5 -
 6
6
 |
 |
