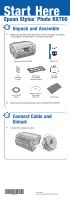
Epson RX700 Start Here Card - Page 6
Selecting the RX700, Install, Agree, Applications, Utilities, Print Center, Printer Setup Utility - stylus photo printer
 |
UPC - 010343853775
View all Epson RX700 manuals
Add to My Manuals
Save this manual to your list of manuals |
Page 6 highlights
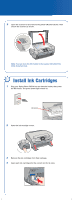
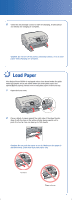
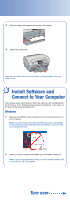
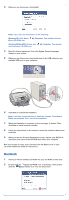
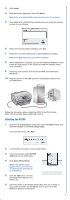
3 Click Install. 4 Read the license agreement, then click Agree. Note: Enter your administrator name and password, if necessary. 5 Click Install at the EPSON Scan Installer screen to install the scanner portion of your software. 6 When the software finishes installing, click Quit. 7 Follow the on-screen instructions to install additional software. Note: Click Quit when each part finishes installing. 8 When installation is complete, you see the Additional Software screen. Follow the instructions on the screen to install the software. When done, click Exit. 9 Close any open screens, remove the CD-ROM, and restart your Macintosh. 10 Plug the flat end of the USB cable into any available USB port on your Macintosh. Follow the instructions below to add the RX700 to the Print Center (OS X 10.2.x) or Printer Setup Utility (OS X 10.3.x). Selecting the RX700 1 Open the OS X Applications folder, then open the Utilities folder and start Print Center or the Printer Setup Utility. If you see this screen, click Add. 2 On the Printer List screen, click the Add button. 3 On the next screen, select EPSON USB from the pull-down menu. 4 Click Stylus Photo RX700. Note: If the RX700 doesn't appear, make sure it is turned on and securely connected to your Macintosh. 5 Click the Add button. You see the Stylus Photo RX700 in the Printer List. 6 Quit Print Center or the Printer Setup Utility. Now you're ready to copy, scan, and print. See the Basics book or your on-screen Reference Guide for instructions. continue
-
 1
1 -
 2
2 -
 3
3 -
 4
4 -
 5
5 -
 6
6 -
 7
7 -
 8
8
 |
 |
