Epson Stylus 1000 Product Information Guide - Page 10
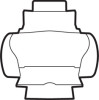
Loading Paper Manually - cartridge
 |
View all Epson Stylus 1000 manuals
Add to My Manuals
Save this manual to your list of manuals |
Page 10 highlights
EPSON STYLUS 1000 t The printer has a minimum and maximum loading position. If you try to move the loading position beyond these limits, the printer beeps and the paper stops moving. t When the paper reaches the factory-set loading position, the printer beeps. Use the factory setting as a reference point when adjusting the loading position. t The pointer on the print head indicates the base line of printed characters. (You may have to experiment a few times to get the results you want.) ink cartridge t When you adjust the loading position for single-sheet paper, the printer remembers the new position only until you turn off the power. The loading position returns to the factory setting when the power is turned on again. Loading Paper Manually You can load single sheets of paper or envelopes from the manual feed slot without removing the paper supply from the paper feeder. Printing on single sheets Follow these steps to load a single sheet in the manual feed slot: 1. Turn on the printer. Lower both sides of the paper eject guide. 2. Insert a single sheet of paper into the slot until it meets resistance, aligning the right edge of the paper with the arrow mark on the printer. When you insert paper 420 mm (16.5 inches) wide, align the right edge of the paper with the right end. The printer automatically loads the sheet. Note: If the sheet does not load straight, press the LOAD/EJECT button to eject it. Then try loading it again. 3. Send data from the computer to the printer to start printing. When the printer finishes printing, it ejects the sheet automatically. If the sheet does not come all the way out, press the LOAD/EJECT button. Press the LOAD/EJECT button or send data to the printer without inserting a sheet in the manual slot to switch back to the paper feeder. The page eject guides rise automatically. The printer then loads a sheet of paper from the paper feeder. Note: If the ink does not dry fast enough, try removing sheets one at a time as they finish printing. Printing on envelopes You can also use the manual feed slot to print on individual envelopes. 1. Turn on the printer and open the printer cover. 2. Turn the paper-thickness lever clockwise as far as it will go. 3. Close the printer cover. 4. Lower both sides of the paper eject guide. 5. Insert an envelope into the manual feed slot with the wide end entering the printer first, printable side face up, until it meets resistance. The printer loads the envelope to the print position automatically. 6. Send data from your computer. The printer ejects the envelope automatically when it is finished printing. Note: t Make sure your software keeps the printing entirely within the printable area of the envelope. t Use envelopes only under normal operating conditions. t If the ink is not drying fast enough, try removing envelopes one at a time as they finish printing. EPSON STYLUS 1000-10 4/26/94 Ink Jet Printers
-
 1
1 -
2
-
3
-
4
-
 5
5 -
 6
6 -
 7
7 -
 8
8 -
 9
9 -
 10
10 -
 11
11 -
 12
12
 |
 |
