Epson Stylus 1500 User Manual - Page 40
Removing Continuous Paper, button. The printer advances
 |
View all Epson Stylus 1500 manuals
Add to My Manuals
Save this manual to your list of manuals |
Page 40 highlights
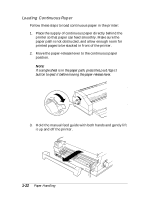
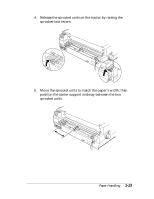
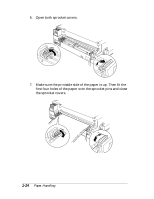
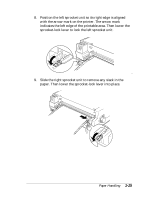
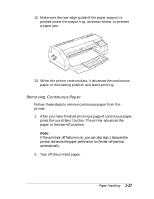
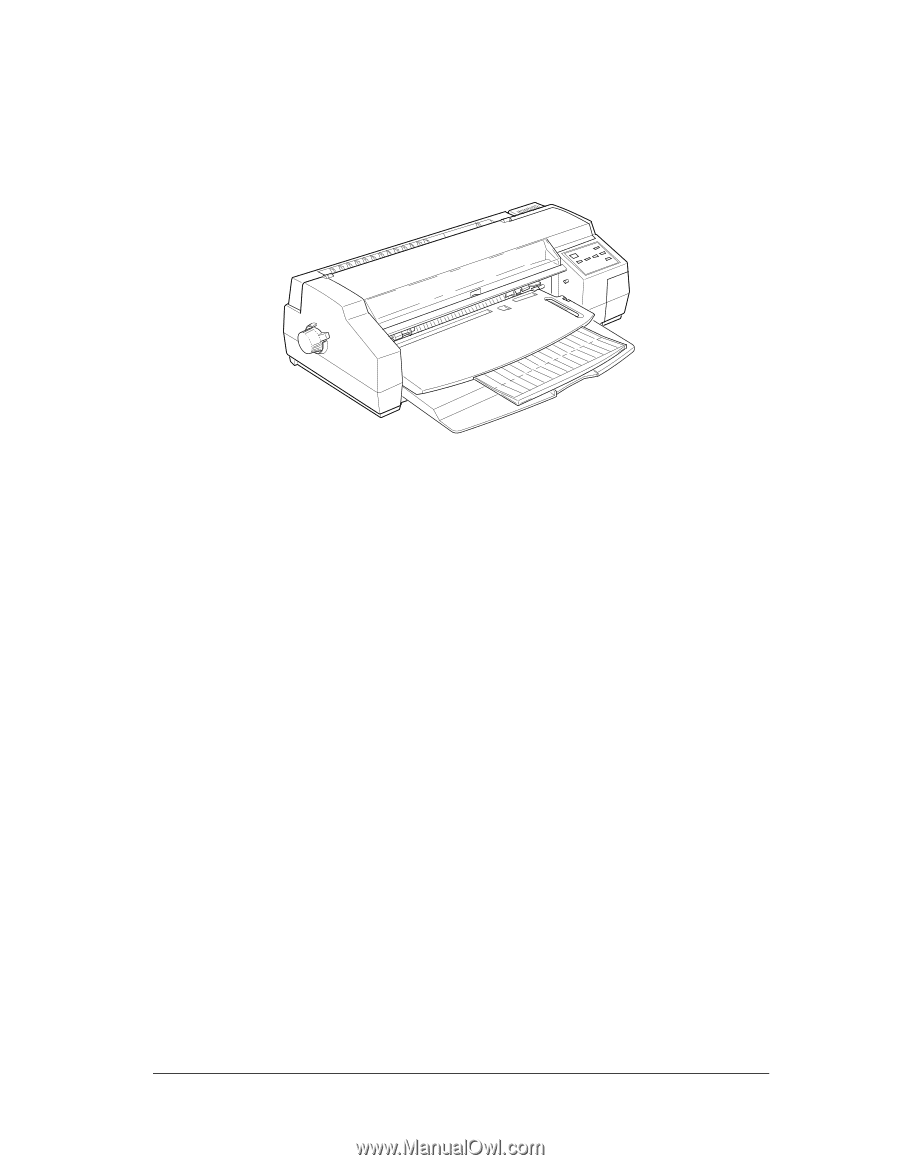
12. Make sure the rear edge guide of the paper support is pushed under the output tray, as shown below, to prevent a paper jam. 13. When the printer receives data, it advances the continuous paper to the loading position and starts printing. Removing Continuous Paper Follow these steps to remove continuous paper from the printer: 1. After you have finished printing a page of continuous paper, press the Load/Eject button. The printer advances the paper to the tear-off position. Note: If the auto tear-off feature is on, you can skip step 1 because the printer advances the paper perforation to the tear-off position automatically. 2. Tear off the printed pages. Paper Handling 1-27
-
 1
1 -
2
-
3
-
4
-
5
-
6
-
7
-
8
-
9
-
10
-
11
-
12
-
13
-
14
-
15
-
16
-
17
-
18
-
19
-
20
-
21
-
22
-
23
-
24
-
25
-
26
-
27
-
28
-
29
-
30
-
31
-
32
-
33
-
34
-
 35
35 -
 36
36 -
 37
37 -
 38
38 -
 39
39 -
 40
40 -
 41
41 -
 42
42 -
 43
43 -
 44
44 -
 45
45 -
46
-
47
-
48
-
49
-
50
-
51
-
52
-
53
-
54
-
55
-
56
-
57
-
58
-
59
-
60
-
61
-
62
-
63
-
64
-
65
-
66
-
67
-
68
-
69
-
70
-
71
-
72
-
73
-
74
-
75
-
76
-
77
-
78
-
79
-
80
-
81
-
82
-
83
-
84
-
85
-
86
-
87
-
88
-
89
-
90
-
91
-
92
-
93
-
94
-
95
-
96
-
97
-
98
-
99
-
100
-
101
-
102
-
103
-
104
-
105
-
106
-
107
-
108
-
109
-
110
-
111
-
112
-
113
-
114
-
115
-
116
-
117
-
118
-
119
 |
 |
12.
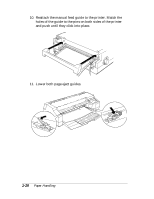
Make sure the rear edge guide of the paper support is
pushed under the output tray, as shown below, to prevent
a paper jam.
13.
When the printer receives data, it advances the continuous
paper to the loading position and starts printing.
Removing Continuous Paper
Follow these steps to remove continuous paper from the
printer:
1.
After you have finished printing a page of continuous paper,
press the
Load/Eject
button. The printer advances the
paper to the tear-off position.
Note:
If the auto tear-off feature is on, you can skip step 1 because the
printer advances the paper perforation to the tear-off position
automatically.
2.
Tear off the printed pages.
Paper Handling
1-27