Epson Stylus 1500 User Setup Information - PC - Page 36
Installing the Driver for Windows 95, You see the Install From Disk screen.
 |
View all Epson Stylus 1500 manuals
Add to My Manuals
Save this manual to your list of manuals |
Page 36 highlights
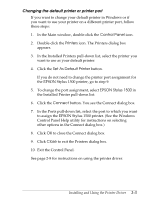
Installing the Driver for Windows 95 Follow these steps to install the printer software for Windows 95. First you'll install the driver using the Windows 95 plug and-play capabilities; then you'll run the EPSON Printer Driver Setup program to install the printer driver utilities and create an EPSON folder on your hard disk. Note: If you originally installed the Stylus 1500 driver under Windows 3.1, you must reinstall the driver under Windows 95. 1. Make sure plain paper is loaded and the printer is connected to the computer's parallel port. (The paper is used to perform a test print in step 12.) 2. Turn off the printer and your computer, if necessary. 3. Turn on the printer first; then turn on the computer. Your computer begins loading Windows 95. 4. If you defined a password in Windows 95, enter it at the prompt. You see the New Hardware Found screen. 5. Your printer model name is displayed on the screen. Click the Driver from disk provided by hardware manufacturer button. Do not select any of the other buttons. 6. Click OK. You see the Install From Disk screen. 7. Insert the Windows printer driver diskette that came with your printer in a diskette drive. 8. If you inserted the diskette in drive A, click OK. Otherwise, change the drive letter in the Copy manufacturer's files from box and click OK. You see the Select Device screen. 2-4 Installing and Using the Printer Driver
-
 1
1 -
2
-
3
-
4
-
5
-
6
-
7
-
8
-
9
-
10
-
11
-
12
-
13
-
14
-
15
-
16
-
17
-
18
-
19
-
20
-
21
-
22
-
23
-
24
-
25
-
26
-
27
-
28
-
29
-
30
-
 31
31 -
 32
32 -
 33
33 -
 34
34 -
 35
35 -
 36
36 -
 37
37 -
 38
38 -
 39
39 -
 40
40 -
 41
41 -
42
-
43
-
44
-
45
-
46
-
47
-
48
-
49
-
50
-
51
-
52
-
53
-
54
-
55
-
56
-
57
-
58
-
59
-
60
-
61
-
62
-
63
-
64
-
65
 |
 |
