Epson Stylus COLOR 800N User Manual - Page 68
Using the Print Head Alignment Utility, Using the Control Panel To Align the Print Heads
 |
View all Epson Stylus COLOR 800N manuals
Add to My Manuals
Save this manual to your list of manuals |
Page 68 highlights
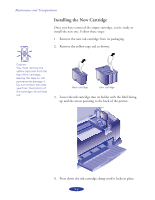
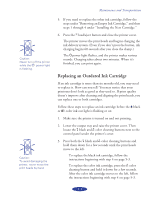
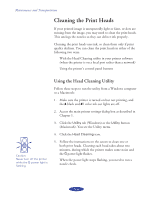
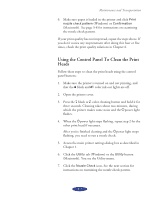
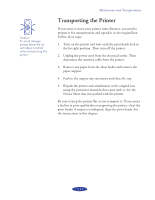
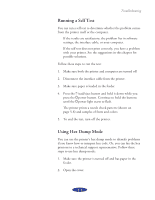
Caution: Load paper that's at least 8.27 inches (210 mm) wide. This prevents ink from spraying inside the printer and smudging your printouts. Maintenance and Transportation Using the Print Head Alignment Utility Follow these steps to run the utility from a Windows computer or a Macintosh: 1. Make sure the printer is turned on and paper is loaded. 2. Access the main printer settings dialog box as described in Chapter 1. 3. Click the Utility tab (Windows) or the Utility button (Macintosh). You see the Utility menu. 4. Click the Print Head Alignment icon. 5. Follow the instructions on the screen to print a test page and select the correct alignment. Using the Control Panel To Align the Print Heads Follow these steps to align the print heads using the control panel buttons: 1. Make sure the printer is turned off and paper is loaded. 2. Open the printer cover. 3. Hold down the E load/eject button and the Y black cleaning button and turn on the printer. Then release the buttons. The printer prints an instruction sheet that tells you how to align the print heads. 4. Follow the instructions on the printed sheet. 5. When you're finished, turn off the printer to exit the alignment mode. 5-9
-
 1
1 -
2
-
3
-
4
-
5
-
6
-
7
-
8
-
9
-
10
-
11
-
12
-
13
-
14
-
15
-
16
-
17
-
18
-
19
-
20
-
21
-
22
-
23
-
24
-
25
-
26
-
27
-
28
-
29
-
30
-
31
-
32
-
33
-
34
-
35
-
36
-
37
-
38
-
39
-
40
-
41
-
42
-
43
-
44
-
45
-
46
-
47
-
48
-
49
-
50
-
51
-
52
-
53
-
54
-
55
-
56
-
57
-
58
-
59
-
60
-
61
-
62
-
 63
63 -
 64
64 -
 65
65 -
 66
66 -
 67
67 -
 68
68 -
 69
69 -
 70
70 -
 71
71 -
 72
72 -
 73
73 -
74
-
75
-
76
-
77
-
78
-
79
-
80
-
81
-
82
-
83
-
84
-
85
-
86
-
87
-
88
-
89
-
90
-
91
-
92
-
93
-
94
-
95
-
96
-
97
-
98
-
99
-
100
-
101
-
102
-
103
-
104
-
105
-
106
 |
 |
