Epson Stylus COLOR 800N User Setup Information - Page 17
The NetWare Config dialog box appears again., can set a level from 1 to 10, with 1 having the highest
 |
View all Epson Stylus COLOR 800N manuals
Add to My Manuals
Save this manual to your list of manuals |
Page 17 highlights
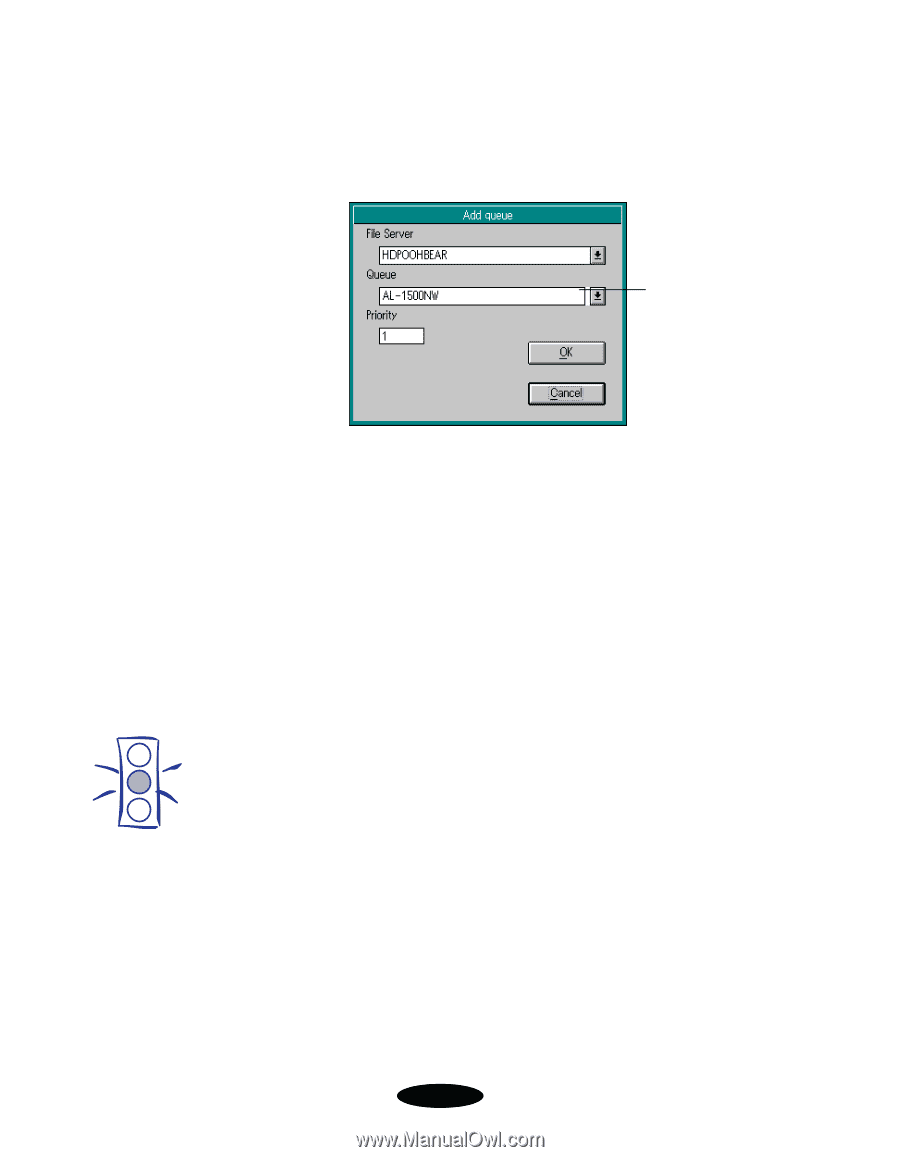
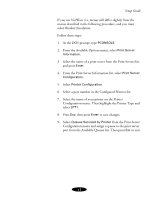
Setup Guide 6. Click Add at the bottom of the dialog box to assign a print queue to your print server. The Add Queue dialog box appears: This list indicates which queues are available on this NetWare file server. Caution: Once you make changes to the Ethernet card, wait for at least five minutes before turning off or restarting your printer. 7. For Print Server mode, select the file server where the print queue will reside, then select a print queue from the list. You can create a new queue by entering its name in the Queue box. Then continue with step 8. For Auto, assign the same print queues to the printer that are assigned to the NetWare print server. Make any additional configuration changes for either Print Server mode or Remote Printer mode. Then click Save to save your settings. 8. Select a priority level for the queue in the Priority box. You can set a level from 1 to 10, with 1 having the highest priority. 9. Click OK. The NetWare Config dialog box appears again. 10. Repeat steps 6 through 8 if you want to add more print queues to the print server. Click Save in the NetWare Config dialog box to save your settings. After you configure your printer, you need to install EPSON Status Monitor 2. See page 24 for instructions. 14
-
 1
1 -
2
-
3
-
4
-
5
-
6
-
7
-
8
-
9
-
10
-
11
-
 12
12 -
 13
13 -
 14
14 -
 15
15 -
 16
16 -
 17
17 -
 18
18 -
 19
19 -
 20
20 -
 21
21 -
 22
22 -
23
-
24
-
25
-
26
-
27
-
28
-
29
-
30
-
31
-
32
 |
 |