Epson Stylus Pro 5500 Product Support Bulletin(s) - Page 39
Power ON, Installation Procedure for Epson Status, Monitor 3
 |
View all Epson Stylus Pro 5500 manuals
Add to My Manuals
Save this manual to your list of manuals |
Page 39 highlights
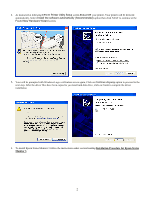
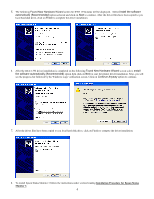
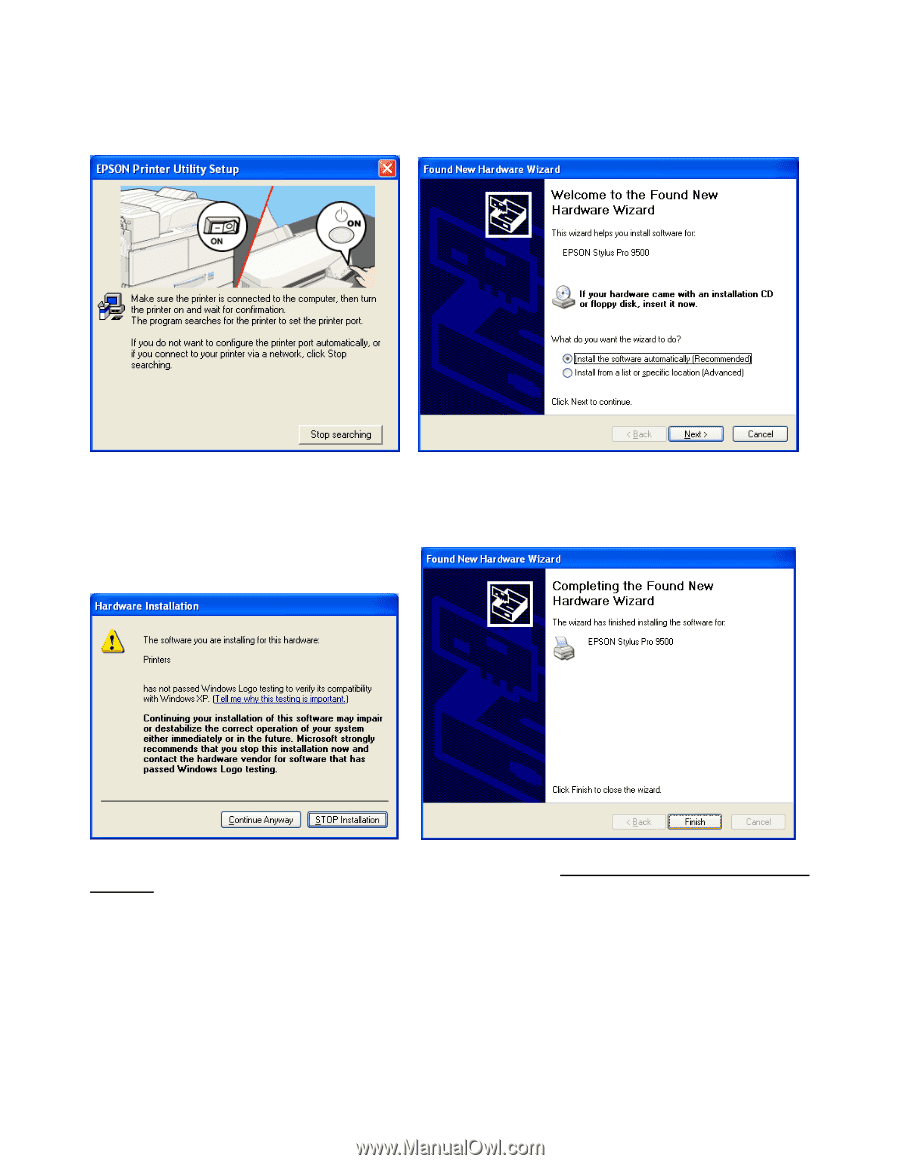
2. As instructed at following EPSON Printer Utility Setup screen Power ON your printer. Your printer will be detected automatically. Select Install the software automatically (Recommended) option then click NEXT to continue at the Found New Hardware Wizard screen. 3. Your will be prompted with Windows Logo verification screen again, Click on Continue Anyway option to proceed to the next step. After the driver files have been copied to you local hard disk drive, click on Finish to compete the driver installation. 4. To install Epson Status Monitor 3 follow the instructions under section heading Installation Procedure for Epson Status Monitor 3. 2
-
 1
1 -
2
-
3
-
4
-
5
-
6
-
7
-
8
-
9
-
10
-
11
-
12
-
13
-
14
-
15
-
16
-
17
-
18
-
19
-
20
-
21
-
22
-
23
-
24
-
25
-
26
-
27
-
28
-
29
-
30
-
31
-
32
-
33
-
 34
34 -
 35
35 -
 36
36 -
 37
37 -
 38
38 -
 39
39 -
 40
40 -
 41
41 -
 42
42 -
 43
43 -
 44
44 -
45
-
46
-
47
-
48
-
49
-
50
-
51
-
52
 |
 |
2
2.
As instructed at following EPSON
Printer Utility Setup
screen
Power ON
your printer. Your printer will be detected
automatically. Select
Install the software automatically (Recommended)
option then click NEXT to continue at the
Found New Hardware Wizard
screen.
3.
Your will be prompted with Windows Logo verification screen again, Click on
Continue Anyway
option to proceed to the
next step. After the driver files have been copied to you local hard disk drive, click on Finish to compete the driver
installation.
4.
To install Epson Status Monitor 3 follow the instructions under section heading
Installation Procedure for Epson Status
Monitor 3
.