Epson U300C Operation Manual - Page 6
CONTENTS, Unpacking the Printer, Connecting the Cables, Installing the Printer Parts
 |
View all Epson U300C manuals
Add to My Manuals
Save this manual to your list of manuals |
Page 6 highlights
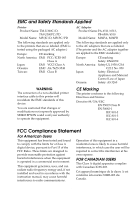
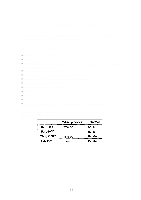
CONTENTS Chapter 1 Unpacking the Printer 1 1-1 Checking the Contents of the Printer Box 1 1-2 Choosing a Place for the Printer 2 1-3 Removingthe Transportation Damper 2 1-4 Part Names and Functions 3 Chapter 2 Connecting the Cables 5 2-1 Connecting the AC Adapter to the Printer 5 2-2 Connecting the Host Computer to the Printer 6 Chapter 3 Installing the Printer Parts 8 3-1 Installing the Ribbon Cassette 8 3-2 Installing the Paper Roll 1 1 3-3 Adjusting the Paper Near-End Detector Location 19 3-4 Inserting a Cut Sheet (Validation Pape.r 21 Chapter 4 Setting the DIP Switches 23 Chapter 5 The Self Test 26 Chapter 6 Removing Jammed Paper 27 6-1 Removing Jammed Paper 27 Appendix ...28 Appendix A. Specifications 28
-
 1
1 -
 2
2 -
 3
3 -
 4
4 -
 5
5 -
 6
6 -
 7
7 -
 8
8 -
 9
9 -
 10
10 -
 11
11 -
 12
12 -
13
-
14
-
15
-
16
-
17
-
18
-
19
-
20
-
21
-
22
-
23
-
24
-
25
-
26
-
27
-
28
-
29
-
30
-
31
-
32
-
33
-
34
-
35
-
36
-
37
-
38
-
39
-
40
 |
 |

CONTENTS
Chapter
1
Unpacking the Printer
...........................................................................
1
1-1
Checking the Contentsof the Printer Box
...................................................
1
1-2
Choosing a Place for thePrinter
...................................................................
2
1-3
Removingthe Transportation Damper
.. .......................................................
2
1-4
Part Names and Functions
............................................................................
3
Chapter
2
Connecting the Cables
..........................................................................
5
2-1
Connecting the AC Adapter to the Printer
................................................
5
2-2
Connecting the Host Computer to the Printer
..........................................
6
Chapter
3
Installing the Printer Parts
....................................................................
8
3-1
Installing the Ribbon Cassette
......................................................................
8
3-2
Installing the Paper Roll
...............................................................................
11
3-3
Adjusting the Paper Near-End Detector Location
........................................
19
3-4
Inserting a Cut Sheet (Validation
Paper)
.
.
..................................................
21
Chapter
4
Setting the
DIP
Switches
.....................................................................
23
Chapter
5
The Self Test
. . . . . . . . . . . . . . . . . . . . . . . . . . . . . . . . . . . . . . . . . . . . . . . . . . . . . . . . . . . . . . . . . . . . . . . . . . . . . . . . . . . .
26
Chapter
6
Removing Jammed Paper
...................................................................
27
6-1
Removing Jammed Paper
.
.........................................................................
27
Appendix
.................................................................................................................
28
Appendix
A.
Specifications
.............................................................................
28