Fisher and Paykel E522BRXU2 ActiveSmart Ice & Water Refrigerator User Guid - Page 13
Important
 |
View all Fisher and Paykel E522BRXU2 manuals
Add to My Manuals
Save this manual to your list of manuals |
Page 13 highlights
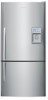
Installation instructions 11 US CA 23 Press until the Ice menu is highlighted then press to turn on the ice maker. Press together to force a cycle. The ice tray will flip. Force another cycle. The ice tray will flip and spill the water into the ice bin. Empty water and replace bin. 24 You are now ready to enjoy chilled water and ice dispensing from your Active Smart™ refrigerator. Please note that once installation is complete a few drips may appear out of the dispenser over the next few days as the remaining trapped air is cleared. Important! ■■ All connections must be checked for leaks. ■■ Ensure white ¼" (6 mm) tubing is routed away from sharp objects, sharp corners (beware of kinking tube as this will stop water flow), clear of the refrigerator unit compartment and not in a location where it can be squashed. ■■ Ensure all push-fit connections are firmly pushed into place. The tube should push in ¾" (20 mm) before reaching the stop. ■■ If tubing is removed at any point, re-cut the end and re-insert. Tubing must be fully inserted to avoid leaks. ■■ To remove tube from connection points, turn off the isolating faucet, push in the collet and gently pull tubing at the same time, as shown in Diagram 11. Diagram 11 Fig.9 Connection to water supply Diagram 12 System tested and certified by NSF International against NSF/ANSI Standard 53 for the reduction of Asbestos, Atrazine, Benzene, Cyst, Carbofuran, Lead, Lindane, Mercury, P-Dichlorobenzene, Toxaphene & Turbidity; against Standard NSF/ANSI 42 for the reduction of Chlorine Taste and Odor and Nominal Particulate Class I to a capacity of 750 gallons (2,838 liters).
-
 1
1 -
2
-
3
-
4
-
5
-
6
-
7
-
 8
8 -
 9
9 -
 10
10 -
 11
11 -
 12
12 -
 13
13 -
 14
14 -
 15
15 -
 16
16 -
 17
17 -
 18
18 -
19
-
20
-
21
-
22
-
23
-
24
-
25
-
26
-
27
-
28
-
29
-
30
-
31
-
32
-
33
-
34
-
35
-
36
-
37
-
38
-
39
-
40
-
41
-
42
-
43
-
44
-
45
-
46
-
47
-
48
-
49
-
50
-
51
-
52
-
53
-
54
-
55
-
56
-
57
-
58
-
59
-
60
-
61
-
62
-
63
-
64
-
65
-
66
-
67
-
68
-
69
-
70
-
71
-
72
-
73
-
74
-
75
-
76
-
77
-
78
-
79
-
80
-
81
-
82
-
83
-
84
-
85
-
86
-
87
-
88
-
89
-
90
-
91
-
92
 |
 |
