Fisher and Paykel E522BRXU2 ActiveSmart Ice & Water Refrigerator User Guid - Page 14
Installation, Leveling of refrigerator door, RF201A only
 |
View all Fisher and Paykel E522BRXU2 manuals
Add to My Manuals
Save this manual to your list of manuals |
Page 14 highlights
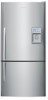
US 12 Installation instructions CA 4. Installation Your Fisher & Paykel Active Smart™ refrigerator is fitted with front and rear rollers, designed for moving the product in the forwards and backwards direction. Avoid moving the product in a sideways direction as this may damage the rollers or the floor covering/surface. A Your refrigerator will arrive with the front feet wound up making moving the product into its final location a simple task. Lower the front of the refrigerator Raise the front of the refrigerator Fig.10 Refrigerator feet B Roll the refrigerator into its final position making sure there is the correct air gap between the product and surrounding cabinetry. See minimum clearance in cabinetry dimensions table (refer to page 7). (RF201A only) C Adjust the front feet down until the refrigerator is leaning backward with the front approximately 3/8" (10 mm) higher than the back. This will ensure a good door closing action (refer to Fig.10). D Aligning your refrigerator with cabinetry. ■■ Align the sides of the refrigerator with the cabinetry by adjusting the hinge side front foot. ■■ Adjust the handle side foot until it touches the floor and takes a small amount of weight. ■■ Once the refrigerator is in place and aligned with cupboards/alcove, push gently on the front top and check if the product is rocking or stable. 5. Leveling of refrigerator door (RF201A only) ■■ For uneven surfaces, front feet can be used to align the 2 doors. ■■ If left hand door is too low, then unscrew the left hand foot to lift up the cabinet until the two doors top edges are aligned. ■■ If right hand door is higher, then adjust the right hand foot in the same way. Fig.11 Uneven door alignment Fig.12 Even door alignment
-
 1
1 -
2
-
3
-
4
-
5
-
6
-
7
-
8
-
 9
9 -
 10
10 -
 11
11 -
 12
12 -
 13
13 -
 14
14 -
 15
15 -
 16
16 -
 17
17 -
 18
18 -
 19
19 -
20
-
21
-
22
-
23
-
24
-
25
-
26
-
27
-
28
-
29
-
30
-
31
-
32
-
33
-
34
-
35
-
36
-
37
-
38
-
39
-
40
-
41
-
42
-
43
-
44
-
45
-
46
-
47
-
48
-
49
-
50
-
51
-
52
-
53
-
54
-
55
-
56
-
57
-
58
-
59
-
60
-
61
-
62
-
63
-
64
-
65
-
66
-
67
-
68
-
69
-
70
-
71
-
72
-
73
-
74
-
75
-
76
-
77
-
78
-
79
-
80
-
81
-
82
-
83
-
84
-
85
-
86
-
87
-
88
-
89
-
90
-
91
-
92
 |
 |
