Fluke 87V-MAX Product Manual - Page 20
Summary of Power-On Options, Digital and Analog Displays
 |
View all Fluke 87V-MAX manuals
Add to My Manuals
Save this manual to your list of manuals |
Page 20 highlights
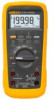
L C Relative Readings Press Cto enter the Relative mode, zero the display, and store the displayed reading as a reference value. The relative mode annunciator (∆) is displayed. Press Cagain to exit the relative mode. In the Relative mode, the value shown on the LCD is always the difference between the stored reference value and the present reading. For example, if the reference value is 15.00V and the present reading is 14.10V, the display will indicate -0.90V. If the new reading is the same as the reference value, the display will be zero. M F Frequency Counter Mode and Duty Cycle Press the Fto select the Frequency Counter mode; press again to select duty cycle (the alternate counter function); press again to exit. The analog display does not operate in either the Frequency Counter mode or duty cycle. In Frequency Counter mode, the Hz annunciator is displayed. The frequency function autoranges over How to Use the Meter five ranges: 199.99 Hz, 1999.9 Hz, 19.999 kHz, 199.99 kHz, and greater than 200 kHz. The RANGE button manually selects the voltage or current input range. If duty cycle is selected, readings from 0.1 through 99.9 are displayed. The "Hz" annunciator turns off and "%" turns on. Power-On Option: High Input Impedance Mode The input impedance of the l function (400 mV range) is changed from 10 megohms to greater than 4000 megohms. Summary of Power-On Options You can select a number of options each time you turn the meter on. These power-on options (also listed on the rear of the meter) are selected b holding down one or more of the pushbuttons for approximately 2 second while turning the function switch to any ON position. All power-on option are only disabled when the rotary switch is turned to OFF. Each power-o option is discussed in detail under "Pushbuttons" and summarized in Table 4. Digital and Analog Displays Items 14-19 describe the digital and analog displays and LCD annunciators. 13 MyFlukeStore Find QuaSlhitoypPforordFulucktespOrondliuncetsato:nline awt:ww.wGwlo. balTestSupply.com.com [email protected]
-
 1
1 -
2
-
3
-
4
-
5
-
6
-
7
-
8
-
9
-
10
-
11
-
12
-
13
-
14
-
 15
15 -
 16
16 -
 17
17 -
 18
18 -
 19
19 -
 20
20 -
 21
21 -
 22
22 -
 23
23 -
 24
24 -
 25
25 -
26
-
27
-
28
-
29
-
30
-
31
-
32
-
33
-
34
-
35
-
36
-
37
-
38
-
39
-
40
-
41
-
42
-
43
-
44
-
45
-
46
-
47
-
48
-
49
-
50
 |
 |
