Foxconn B75MX-D User manual - Page 19
Installing a Memory, Place the memory module onto the socket, then put
 |
View all Foxconn B75MX-D manuals
Add to My Manuals
Save this manual to your list of manuals |
Page 19 highlights
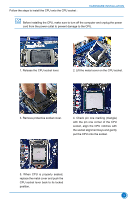
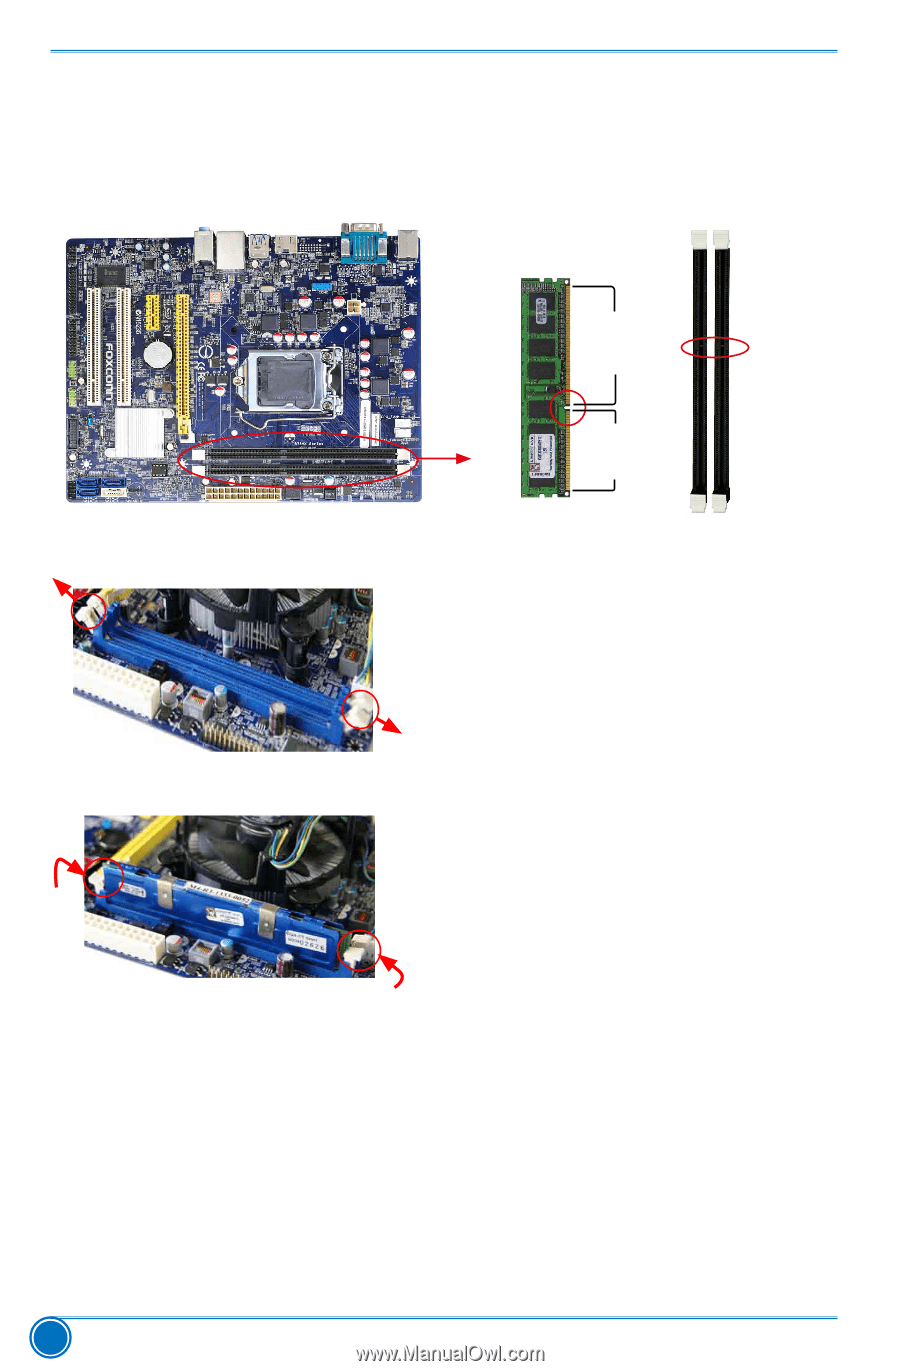
144-Pin 96-Pin HARDWARE INSTALLATION Installing a Memory If you take a look at front side of memory module, it has asymmetric pin counts on both sides separated by a notch in the middle, so it can only fit in one direction. Follow the steps below to correctly install your memory modules into the sockets. Notch Step 1: Spread the clips at both ends of the memory socket. Place the memory module onto the socket, then put your fingers on top edge of the module, and push it down firmly and seat it vertically into the memory socket. Step 2: The clips at both ends of the socket will snap into place when the memory module is securely inserted. 12
-
 1
1 -
2
-
3
-
4
-
5
-
6
-
7
-
8
-
9
-
10
-
11
-
12
-
13
-
 14
14 -
 15
15 -
 16
16 -
 17
17 -
 18
18 -
 19
19 -
 20
20 -
 21
21 -
 22
22 -
 23
23 -
 24
24 -
25
-
26
-
27
-
28
-
29
-
30
-
31
-
32
-
33
-
34
-
35
-
36
-
37
-
38
-
39
-
40
-
41
-
42
-
43
-
44
-
45
-
46
-
47
-
48
-
49
-
50
-
51
-
52
-
53
-
54
-
55
-
56
-
57
-
58
-
59
-
60
-
61
-
62
-
63
-
64
-
65
-
66
-
67
-
68
-
69
-
70
-
71
-
72
-
73
 |
 |
HARDWARE INSTALLATION
12
Installing a Memory
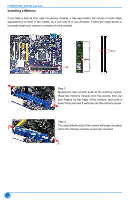
If you take a look at front side of memory module, it has asymmetric pin counts on both sides
separated by a notch in the middle, so it can only fit in one direction. Follow the steps below to
correctly install your memory modules into the sockets.
Step 1:
Spread the clips at both ends of the memory socket.
Place the memory module onto the socket, then put
your fingers on top edge of the module, and push it
down firmly and seat it vertically into the memory socket.
Step 2:
The clips at both ends of the socket will snap into place
when the memory module is securely inserted.
96-Pin
144-Pin
Notch