Frigidaire FEB24S5AS Installation Instructions (All Languages) - Page 7
Typical Under Counter Installation Of An Electric Built-in Oven
 |
UPC - 057112080680
View all Frigidaire FEB24S5AS manuals
Add to My Manuals
Save this manual to your list of manuals |
Page 7 highlights
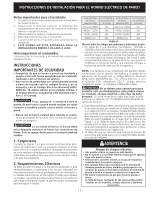
ELECTRIC WALL OVEN INSTALLATION INSTRUCTIONS 3.Insert the unit into the cabinet opening. Slide unit inward leaving 1 3/8" (3.5 cm) clearance between the oven decorative trim and cabinet. Pull the armored cable through the hole in the floor and toward the junction box while moving the appliance inward. Use the second set of holes in the side frame of the unit as a guide to find the position of the mounting brackets on the sides of the cabinet opening. Mark the position of the mounting brackets as shown in Figure 8 or 9. 4.Pull out the oven approximately 1 foot (30.5 cm) away from the cabinet. Reposition each bracket on the cabinet and drill 1/8" pilot holes. Fasten the brackets in place using the 2 screws supplied (#10 x 1 1/4" long). If needed, add wood spacers at the mounting bracket locations to reduce the cabinet opening to 28 1/2" (72.4 cm). Now push the unit in and against the cabinet, then attach the unit to the mounting brackets using the 2 screws removed earlier from the side frame. Side filler panels are necessary to isolate the unit from adjoining cabinets. To reduce the risk of personal injury and tipping the wall oven, the wall oven must be secured to the cabinet(s) by properly installed mounting screws or brackets. G 4 1/2" (11.4 cm) Max. 36" Min. (91.4 cm) H F Use 3/4" (1.9 cm) plywood, installed on two runners, flush with toe plate. Must be capable of supporting 150 pounds. (68 kg). Cut an opening in wood base minimum 9" x 9" (23 x 23 cm), 2" (5 cm) from left side filler panel, to route armored cable to the wall outlet or junction box. CUTOUT DIMENSIONS F.WIDTH G.DEPTH H.HEIGHT 30" (76.2 cm) 28 1/2" (72.4 cm) Min. Wall Oven 29" (73.7 cm) Max. 24" (61 cm) Min. 28 1/4" (71.8 cm) Min. 28 7/8" (73.3 cm) Max. Figure 10 - TYPICAL UNDER COUNTER INSTALLATION OF AN ELECTRIC BUILT-IN OVEN 30" SINGLE WALL OVEN ONLY 7
-
 1
1 -
 2
2 -
 3
3 -
 4
4 -
 5
5 -
 6
6 -
 7
7 -
 8
8 -
 9
9 -
 10
10 -
 11
11 -
 12
12 -
13
-
14
-
15
-
16
-
17
-
18
-
19
-
20
-
21
-
22
-
23
-
24
 |
 |
