Frigidaire FGGF304DLF Complete Owner's Guide (English) - Page 10
Before Setting Oven Controls
 |
UPC - 057112105550
View all Frigidaire FGGF304DLF manuals
Add to My Manuals
Save this manual to your list of manuals |
Page 10 highlights
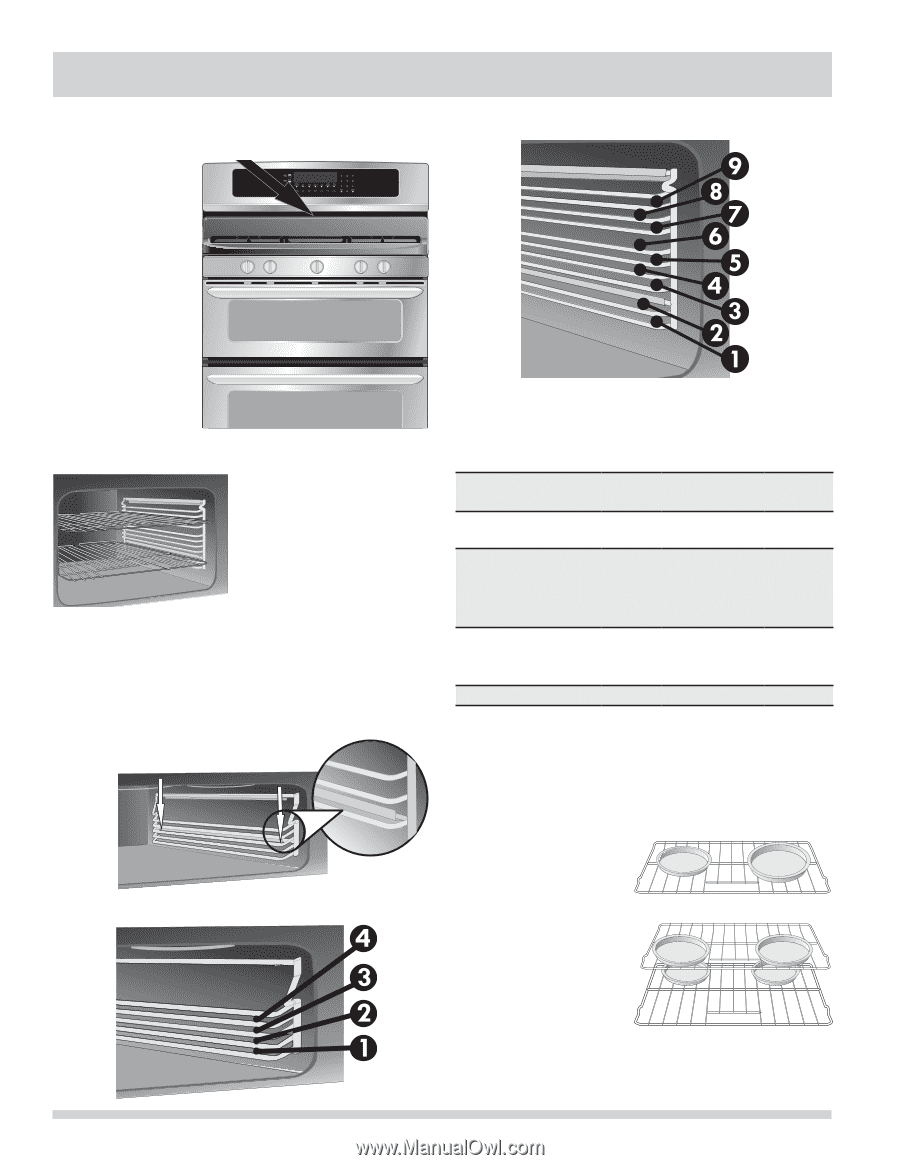
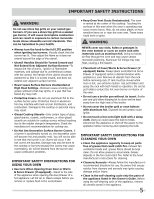
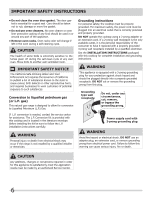
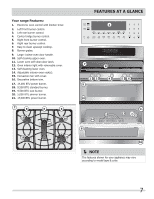
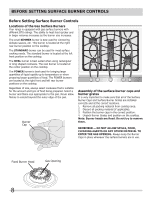
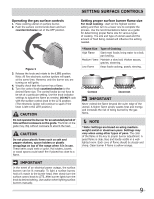
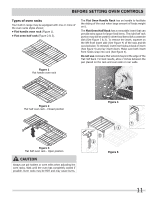
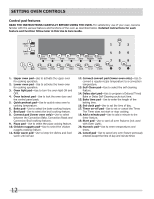
BEFORE SETTING OVEN CONTROLS Oven Vent Location See illustration for venting location of each oven. When the oven is on, warm air is released through the vent. This venting is necessary for proper air circulation in the oven and good baking results. DO NOT block the vent. Doing so may cause cooking failures, fire or damage to the appliance. Upper & Lower Oven Vents Removing & Replacing Oven Racks To remove an oven rack, pull the rack forward until it stops. Lift up front of rack and slide out. To replace an oven rack, fit the rack onto the guides on the oven walls. Tilt the front of the rack upward and slide the rack back into place. Installing Oven Rack Supports To install oven rack support, insert it into the two brackets on the oven wall interior and push down as shown in the illustration to the right. To remove the oven rack support for a self-clean cycle, pull up the support to disengage it from the brackets. Upper Oven Rack Positions 10 Lower Oven Rack Positions Arranging Oven Racks & Supports Always arrange oven racks when the oven is cool (Prior to operating the oven). RECOMMENDED RACK POSITIONS FOR BAKING Food Rack Positions Lower Upper Broiling meats, chicken or N/A 1 or 2 fish Baking To bake on: 1 rack 6 3 2 racks 3 & 8 N/A 3 racks 2, 5 & 9 N/A Frozen pies, angel food cake, yeast, bread, casseroles, 5 or 6 3 small cuts of meat or poultry Turkey, roast or ham 1 N/A Note: Always use oven mitts when removing food. Note: It is recommended not to introduce food into the oven until the preheat cycle time is complete. Unsatisfactory cooking performance or scorching of food may occur if placed in oven prior to preheat cycle completion. Air Circulation in the Oven If using 1 rack, place in center of oven. If using multiple racks, stagger cookware as shown. For best air circulation and baking results allow 2-4" (5-10cm) around the cookware for proper air circulation and be sure pans and cookware do not touch each other, the oven door, sides or back of the oven cavity. The 1 Oven Rack Multiple Oven Racks (lower oven) hot air must circulate around the pans and cookware in the oven for even heat to reach around the food.
-
 1
1 -
2
-
3
-
4
-
 5
5 -
 6
6 -
 7
7 -
 8
8 -
 9
9 -
 10
10 -
 11
11 -
 12
12 -
 13
13 -
 14
14 -
 15
15 -
16
-
17
-
18
-
19
-
20
-
21
-
22
-
23
-
24
-
25
-
26
-
27
-
28
-
29
-
30
-
31
-
32
-
33
-
34
-
35
-
36
 |
 |