Fujitsu T4220 T4220 User's Guide - Page 111
Network Name SSID, Profile Name
 |
View all Fujitsu T4220 manuals
Add to My Manuals
Save this manual to your list of manuals |
Page 111 highlights
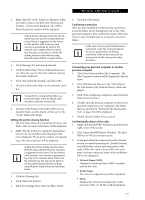
Wireless LAN User's Guide 3. Right-click the "work" folder (or whichever folder you want to share), and then click [Sharing and Security...] in the menu displayed. The [Folder Name Properties] window will be displayed. Setting the file-sharing function for the file which has been used to execute Network Setup Wizard is suggested on the screen. For the wireless LAN, however, since security is guaranteed by entry of the network name (SSID) and the network key, the steps to be taken to set the filesharing function easily without using Network Setup Wizard are given below. 4. Click [Sharing] if it isn't already selected. 5. Click the link stating "If you understand the security risks, but want to share files without running the wizard, click here". 6. Click "Just enable file sharing" and click [OK]. 7. Check the [Share this folder on the network] check box. To specify the corresponding folder as a read-only folder, select the [Read only] checkbox under the General tab. 8. Click the [OK] button. The folder will be set as a sharable folder, and the display of the icon for the "work." folder will change. Setting the printer-sharing function 1. Click the [Start] button first and then [Printers and FAX]. A list of connected printers will be displayed. 2. Right-click the printer for which the sharing function is to be set, and then click [Sharing] in the menu displayed. The property window corresponding to the selected printer will be displayed. Setting the printer-sharing function when Network Setup Wizard has been executed is suggested on the screen. For the wireless LAN, however, since security is guaranteed by entry of the network name (SSID) and the network key, the steps to be taken to set the printer-sharing function without using Network Setup Wizard are laid down below. 3. Click the [Sharing] tab. 4. Click [Share this printer]. 5. Enter the sharing printer name in [Share name]. 6. Click the [OK] button. Confirming connection After you have finished the network setup operations, access the folder whose sharing has been set for other personal computers. Also, confirm the status of the radio waves in case of trouble such as a network connection failure. In the case of access point (infrastructure) connection, enter the necessary data for the access point before confirming connection. Refer to the manual of the access point for the access point setup procedure. Connecting your personal computer to another personal computer 1. Click [Start] first and then [My Computer]. The [My Computer] window will be displayed in the left frame. 2. Click [My Network Places] in the "Other Places" list. The window [My Network Places] will be displayed. 3. Click [View workgroup computers] under Network Tasks in the left frame. 4. Double-click the personal computer to which your personal computer is to be connected. The folder that was specified in "Setting the file-sharing function" on page 102 will be displayed. 5. Double-click the folder to be accessed. Confirming the status of the radio 1. Right-click the Intel PRO Wireless icon in the lower right corner of the screen. 2. Click [Open Intel PROSet for Wireless]. The Intel PROSet for Wireless window opens. 3. Contained within the General tab and the Details section (accessed by pressing the [Details] button), you will find the current operating status of the radio. (When the radio is turned off or the computer is not yet connected, some of the conditions will not be displayed.) ■ Network Name (SSID) Displays the Network Name (SSID) currently used by the radio. ■ Profile Name The current configuration profile is displayed. ■ Mode Displays the current operating mode. [Infrastructure (AP)] or [Ad Hoc] will be displayed. 103
-
 1
1 -
2
-
3
-
4
-
5
-
6
-
7
-
8
-
9
-
10
-
11
-
12
-
13
-
14
-
15
-
16
-
17
-
18
-
19
-
20
-
21
-
22
-
23
-
24
-
25
-
26
-
27
-
28
-
29
-
30
-
31
-
32
-
33
-
34
-
35
-
36
-
37
-
38
-
39
-
40
-
41
-
42
-
43
-
44
-
45
-
46
-
47
-
48
-
49
-
50
-
51
-
52
-
53
-
54
-
55
-
56
-
57
-
58
-
59
-
60
-
61
-
62
-
63
-
64
-
65
-
66
-
67
-
68
-
69
-
70
-
71
-
72
-
73
-
74
-
75
-
76
-
77
-
78
-
79
-
80
-
81
-
82
-
83
-
84
-
85
-
86
-
87
-
88
-
89
-
90
-
91
-
92
-
93
-
94
-
95
-
96
-
97
-
98
-
99
-
100
-
101
-
102
-
103
-
104
-
105
-
 106
106 -
 107
107 -
 108
108 -
 109
109 -
 110
110 -
 111
111 -
 112
112 -
 113
113 -
 114
114 -
 115
115 -
 116
116 -
117
-
118
-
119
-
120
-
121
-
122
-
123
-
124
-
125
-
126
-
127
-
128
-
129
-
130
-
131
-
132
-
133
-
134
-
135
-
136
 |
 |
