Garmin Dash Cam 55 Owners Manual - Page 5
Installing the Memory Card, Device Overview, Installing the Mount onto Your Windshield, Installing - camera
 |
View all Garmin Dash Cam 55 manuals
Add to My Manuals
Save this manual to your list of manuals |
Page 5 highlights
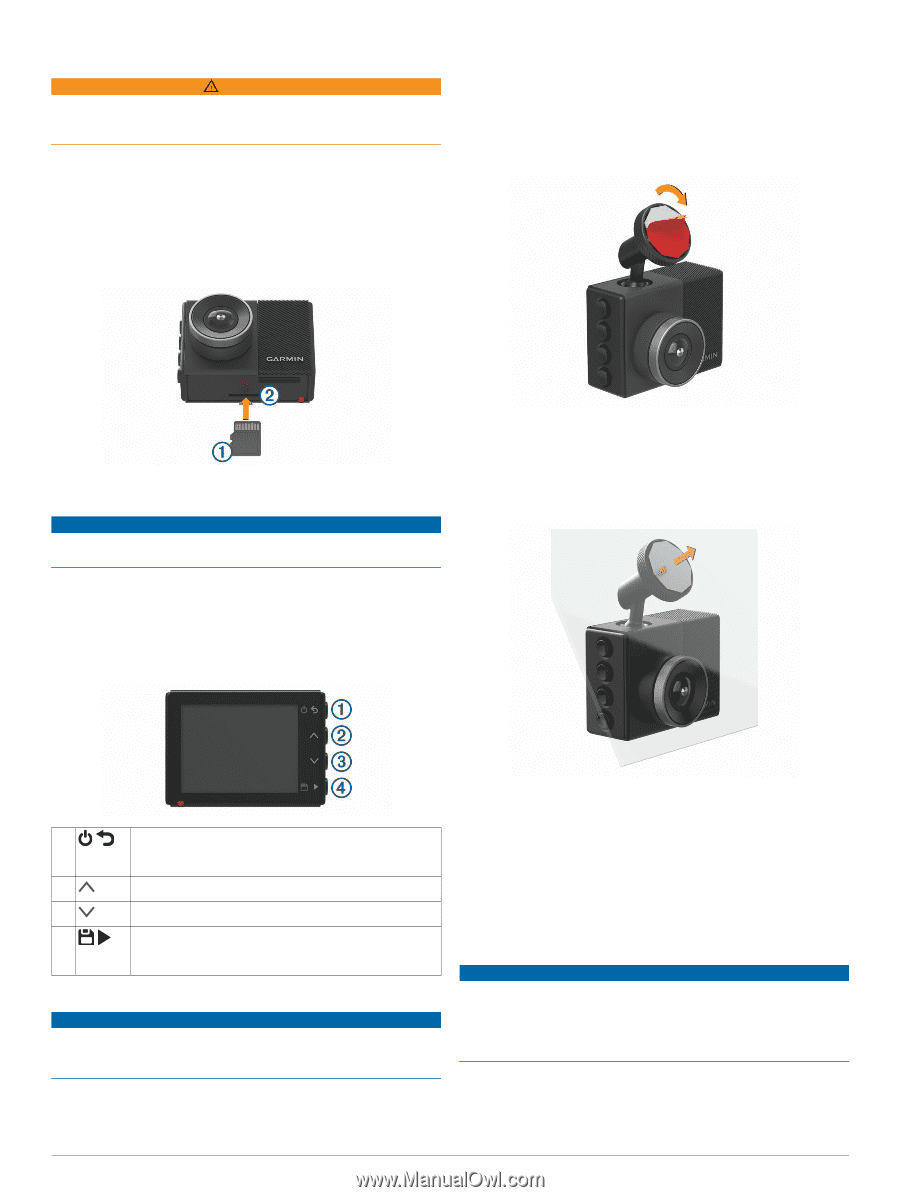
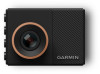
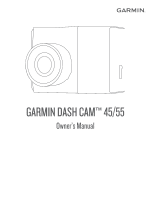
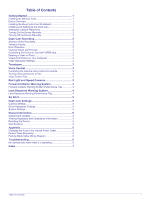
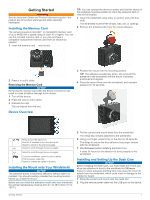
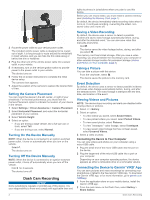
Getting Started WARNING See the Important Safety and Product Information guide in the product box for product warnings and other important information. Installing the Memory Card The camera requires a microSD™ or microSDHC memory card of up to 64GB with a speed rating of class 10 or higher. You can use the included memory card, or you can purchase a compatible replacement memory card from an electronics supplier. 1 Insert the memory card into the slot . À Á TIP: You can connect the device to power and hold the device in the preferred mounting location to check the camera's field of view at that location. 1 Clean the windshield using water or alcohol, and a lint-free cloth. The windshield must be free of dust, wax, oils, or coatings. 2 Remove the protective film from the mount adhesive. 2 Press it in until it clicks. Removing the Memory Card NOTICE Removing the memory card while the device is turned on can result in a loss of data or damage to the device. 1 Turn off the device. 2 Press the card in until it clicks. 3 Release the card. The card ejects from the slot. Device Overview 3 Position the mount over the mounting location. TIP: The adhesive is extremely sticky. Do not touch the adhesive to the windshield until the mount is properly positioned and aligned. 4 Press the mount firmly onto the windshield, and maintain pressure for 30 seconds. Press to turn the device on. À Hold for 3 seconds to turn the device off. Select to return to the previous page. Select to scroll through menus or pages. Á Select to scroll through menus or pages. Â From the viewfinder, select to save a photo. Ã Hold to save a video clip. Select to choose an option in a menu. Installing the Mount onto Your Windshield NOTICE The adhesive mount is extremely difficult to remove after it is installed. You should carefully consider the mounting location before you install the mount. Before you can install the adhesive mount onto your windshield, the ambient temperature must be from 21° to 38°C (from 70° to 100°F). 5 Pull the camera and mount away from the windshield. The metal disc remains attached to the windshield. 6 Using your finger, press firmly on the disc for 30 seconds. This helps to ensure the disc adhesive has proper contact with the windshield. 7 Wait 24 hours before installing the Dash Cam. It takes 24 hours for the adhesive to bond properly to the windshield. Installing and Setting Up the Dash Cam NOTICE Before installing the Dash Cam, you must install the mount and allow the adhesive to bond to the windshield for 24 hours. Failure to allow adequate bonding time may cause the mount to detach from the windshield, which could result in damage to the product or mount. 1 Place the camera and mount onto the metal disc. 2 Plug the vehicle power cable into the USB port on the device. Getting Started 1
-
 1
1 -
 2
2 -
 3
3 -
 4
4 -
 5
5 -
 6
6 -
 7
7 -
 8
8 -
 9
9 -
 10
10 -
 11
11 -
12
 |
 |