Garmin Drive 52 and Traffic Owners Manual - Page 20
Installing a Memory Card for Maps and Data
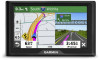 |
View all Garmin Drive 52 and Traffic manuals
Add to My Manuals
Save this manual to your list of manuals |
Page 20 highlights
• Verify the interior temperature of the vehicle is within the charging temperature range indicated in the specifications. • Verify the fuse is not broken in the vehicle power outlet. My battery does not stay charged for very long • Decrease the screen brightness (Display Settings, page 13). • Shorten the display timeout (Display Settings, page 13). • Decrease the volume (Adjusting the Volume, page 2). • Put the device in power saving mode when not in use (Turning the Device On or Off, page 1). • Keep your device away from extreme temperatures. • Do not leave your device in direct sunlight. Appendix Installing a Memory Card for Maps and Data You can install a memory card to increase the storage space for maps and other data on your device. You can purchase memory cards from an electronics supplier, or go to www.garmin.com /maps to purchase a memory card with pre-loaded Garmin mapping software. The device supports microSD memory cards from 4 to 32 GB. 1 Locate the map and data memory card slot on your device (Garmin Drive 52 / Garmin Drive 5 Pro Device Overview, page 1). 2 Insert a memory card into the slot. 3 Press it in until it clicks. Data Management You can store files on your device. The device has a memory card slot for additional data storage. NOTE: The device is not compatible with Windows 95, 98, Me, Windows NT®, and Mac OS 10.3 and earlier. About Memory Cards You can purchase memory cards from an electronics supplier, or purchase pre-loaded Garmin mapping software (www.garmin.com). In addition to map and data storage, the memory card can be used to store files such as maps, images, geocaches, routes, waypoints, and custom POIs. Connecting the Device to Your Computer You can connect the device to your computer using a USB cable. 1 Plug the small end of the USB cable into the port on the device. 2 Plug the larger end of the USB cable into a port on your computer. 3 When your Garmin Drive device prompts you to enter file transfer mode, select Continue. A picture of your device connected to a computer appears on the device screen. Depending on your computer operating system, the device appears as either a portable device, a removable drive, or a removable volume. Transferring Data From Your Computer 1 Connect the device to your computer (Connecting the Device to Your Computer, page 16). Depending on your computer operating system, the device appears as either a portable device, a removable drive, or a removable volume. 2 On your computer, open the file browser. 3 Select a file. 4 Select Edit > Copy. 5 Browse to a folder on the device. NOTE: For a removable drive or volume, you should not place files in the Garmin folder. 6 Select Edit > Paste. Disconnecting the USB Cable If your device is connected to your computer as a removable drive or volume, you must safely disconnect your device from your computer to avoid data loss. If your device is connected to your Windows computer as a portable device, it is not necessary to safely disconnect the device. 1 Complete an action: • For Windows computers, select the Safely Remove Hardware icon in the system tray, and select your device. • For Apple computers, select the device, and select File > Eject. 2 Disconnect the cable from your computer. Viewing GPS Signal Status Hold for three seconds. Purchasing Additional Maps 1 Go to your device product page at garmin.com. 2 Click the Maps tab. 3 Follow the on-screen instructions. Purchasing Accessories Go to garmin.com/accessories. 16 Appendix
-
 1
1 -
2
-
3
-
4
-
5
-
6
-
7
-
8
-
9
-
10
-
11
-
12
-
13
-
14
-
 15
15 -
 16
16 -
 17
17 -
 18
18 -
 19
19 -
 20
20 -
 21
21 -
 22
22 -
 23
23 -
 24
24
 |
 |
