Garmin DriveAssist 51 LMT-S Owners Manual - Page 12
Changing Your Active Route, Stopping the Route, Using Suggested Routes, Avoiding Delays, Tolls,
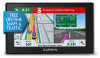 |
View all Garmin DriveAssist 51 LMT-S manuals
Add to My Manuals
Save this manual to your list of manuals |
Page 12 highlights
The destination indicator shows the direction of your À destination relative to the direction you are moving . When Á the destination indicator appears at the top of the circle, you are heading toward your destination. The remaining distance to your destination appears below the circle. The progress  bar shows your progress toward your destination. à Changing Your Active Route Adding a Location to Your Route Before you can add a location to your route, you must be navigating a route (Starting a Route, page 6). You can add locations to the middle or end of your route. For example, you can add a fuel station as the next destination in your route. TIP: To create complex routes with multiple destinations or scheduled stops, you can use the trip planner to plan, schedule, and save a trip (Planning a Trip, page 20). 1 From the map, select > Where To?. 2 Search for a location (Finding and Saving Locations, page 9). 3 Select a location. 4 Select Go!. 5 Select an option: • To add the location as the next destination in your route, select Add As Next Stop. • To add the location to the end of your route, select Add As Last Stop. • To add the location and edit the order of destinations in your route, select Add to Active Route. The device re-calculates the route to include the added location and guides you to the destinations in order. Shaping Your Route Before you can shape your route, you must start a route (Starting a Route, page 6). You can manually shape your route to change its course. This allows you to direct the route to use a certain road or go through a certain area without adding a destination to the route. 1 Touch anywhere on the map. 2 Select . The device enters route shaping mode. 3 Select a location on the map. TIP: You can select to zoom in on the map and select a more precise location. The device recalculates the route to travel through the selected location. 4 If necessary, select an option: • To add more shaping points to the route, select additional locations on the map. • To remove a shaping point, select . 5 When you are finished shaping the route, select Go!. 8 Taking a Detour You can take a detour for a specified distance along your route or detour around specific roads. This is useful if you encounter construction zones, closed roads, or poor road conditions. 1 From the map, select > Change Route. TIP: If the Change Route tool is not in the map tools menu, you can add it (Enabling Map Tools, page 13). 2 Select an option: • To detour your route for a specific distance, select Detour by Distance. • To detour around a specific road on the route, select Detour by Road. • To find a new route, select Detour. Changing the Route Calculation Mode 1 Select Settings > Navigation > Calculation Mode. 2 Select an option: • Select Faster Time to calculate routes that are faster to drive but can be longer in distance. • Select Off Road to calculate point-to-point routes (without roads). • Select Shorter Distance to calculate routes that are shorter in distance but can take more time to drive. Stopping the Route From the map, select > Stop. Using Suggested Routes Before you can use this feature, you must save at least one location and enable the travel history feature (Device and Privacy Settings, page 23). Using the myTrends™ feature, your device predicts your destination based on your travel history, the day of the week, and the time of day. After you have driven to a saved location several times, the location may appear in the navigation bar on the map, along with the estimated time of travel, and traffic information. Select the navigation bar to view a suggested route to the location. Avoiding Delays, Tolls, and Areas Avoiding Traffic Delays on Your Route Before you can avoid traffic delays, you must be receiving traffic information (Receiving Traffic Data Using Smartphone Link, page 17). By default, the device optimizes your route to avoid traffic delays automatically. If you have disabled this option in the traffic settings (Traffic Settings, page 22), you can view and avoid traffic delays manually. 1 While navigating a route, select > Traffic. 2 Select Alternate Route, if available. 3 Select Go!. Avoiding Toll Roads Your device can avoid routing you through areas that require tolls, such as toll roads, toll bridges, or congestion areas. The device may still include a toll area in your route if no other reasonable routes are available. 1 Select Settings > Navigation. 2 Select an option: NOTE: The menu changes based on your area and the map data on your device. • Select Toll Roads. • Select Tolls and Fees > Toll Roads. Navigating to Your Destination
-
 1
1 -
2
-
3
-
4
-
5
-
6
-
 7
7 -
 8
8 -
 9
9 -
 10
10 -
 11
11 -
 12
12 -
 13
13 -
 14
14 -
 15
15 -
 16
16 -
 17
17 -
18
-
19
-
20
-
21
-
22
-
23
-
24
-
25
-
26
-
27
-
28
-
29
-
30
-
31
-
32
-
33
-
34
 |
 |
