Garmin Edge 20 Owners Manual - Page 5
Installing the Standard Mount, Going for a Ride, Charging the Device
 |
View all Garmin Edge 20 manuals
Add to My Manuals
Save this manual to your list of manuals |
Page 5 highlights
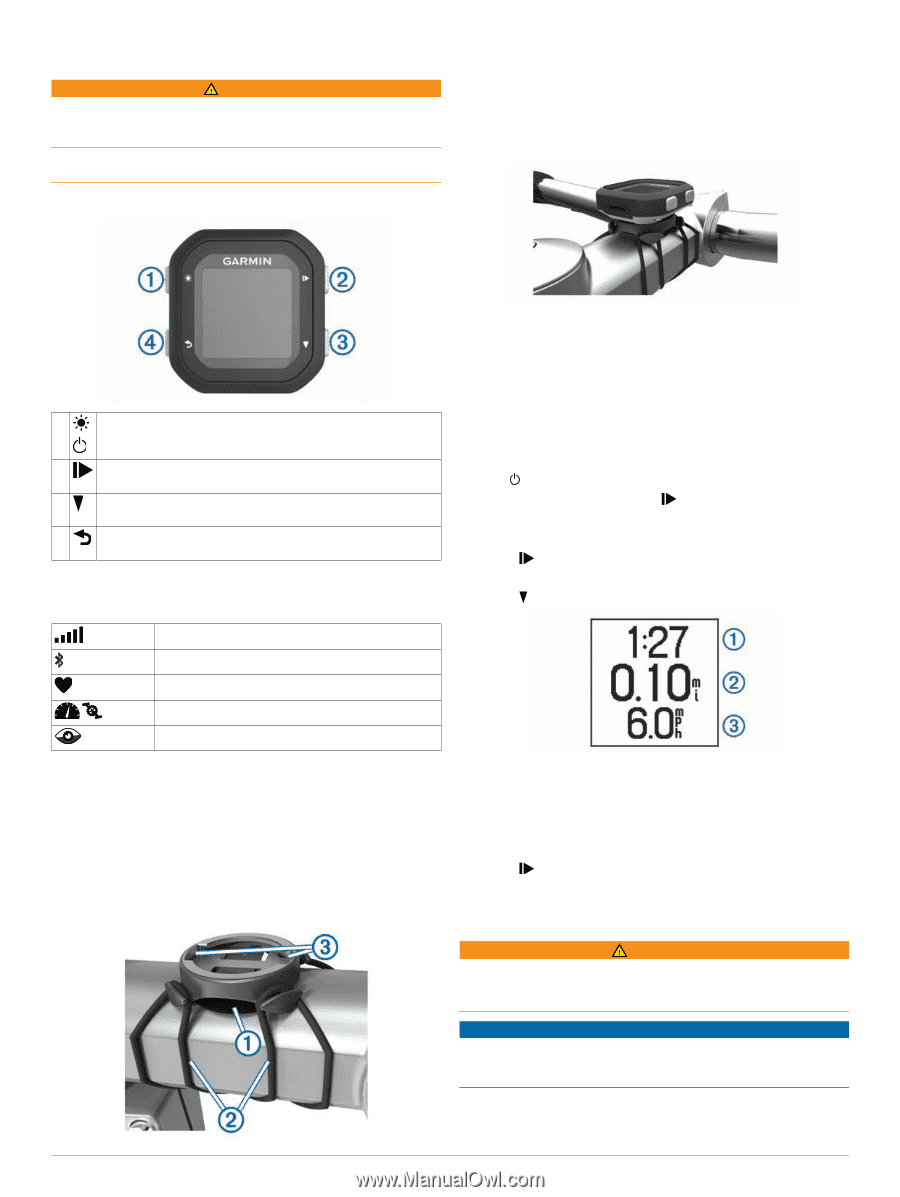
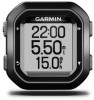
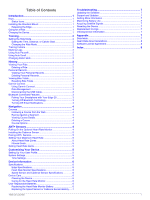
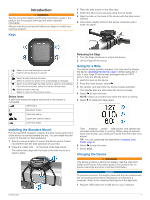
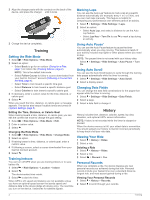
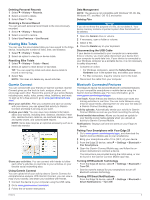
Introduction WARNING See the Important Safety and Product Information guide in the product box for product warnings and other important information. Always consult your physician before you begin or modify any exercise program. Keys 3 Place the bike mount on the bike stem. 4 Attach the bike mount securely using the two bands . Á 5 Align the tabs on the back of the device with the bike mount notches . Â 6 Press down slightly and turn the device clockwise until it locks into place. Select to turn the backlight on and off. À Hold to turn the device on and off. Select to start and stop the timer. Á Select to choose an option or to acknowledge a message. Select to scroll through the data screens, options, and settings. Â From the home screen, select to view the device menu. Select to mark a new lap. Ã Select to return to the previous screen. Status Icons A solid icon means the signal was found or the sensor is connected. GPS status Bluetooth® status Heart rate status Speed and cadence status LiveTrack status Releasing the Edge 1 Turn the Edge clockwise to unlock the device. 2 Lift the Edge off the mount. Going for a Ride The device comes partially charged. You may need to charge the device (Charging the Device, page 1) before going for a ride. If your Edge 25 device was packaged with an ANT+® sensor, they are already paired. 1 Hold to turn on the device. 2 From the home screen, select . 3 Go outside, and wait while the device locates satellites. The satellite bars are solid when the device is ready. 4 Select to start the timer. NOTE: History is recorded only while the timer is running. 5 Select for additional data pages. Installing the Standard Mount For the best GPS reception, position the bike mount so the front of the device is oriented toward the sky. You can install the bike mount on the stem or the handlebars. 1 Select a secure location to mount the device where it does not interfere with the safe operation of your bike. 2 Place the rubber disk on the back of the bike mount. À The rubber tabs align with the back of the bike mount so it stays in place. Time , distance , speed , total ascent, and calories are À Á Â recorded while the timer is running. When using an optional heart rate monitor, your beats per minute and heart rate zone appear. TIP: You can customize the data fields (Changing Data Fields, page 2). 6 Select to stop the timer. 7 Select Save. Charging the Device WARNING This device contains a lithium-ion battery. See the Important Safety and Product Information guide in the product box for product warnings and other important information. NOTICE To prevent corrosion, thoroughly clean and dry the contacts and the surrounding area before charging or connecting to a computer. Refer to the cleaning instructions in the appendix. 1 Plug the USB cable into a USB port on your computer. Introduction 1
-
 1
1 -
 2
2 -
 3
3 -
 4
4 -
 5
5 -
 6
6 -
 7
7 -
 8
8 -
 9
9 -
 10
10 -
 11
11 -
12
-
13
-
14
 |
 |