Garmin Edge 20 Owners Manual - Page 6
Training, History - cycling gps
 |
View all Garmin Edge 20 manuals
Add to My Manuals
Save this manual to your list of manuals |
Page 6 highlights
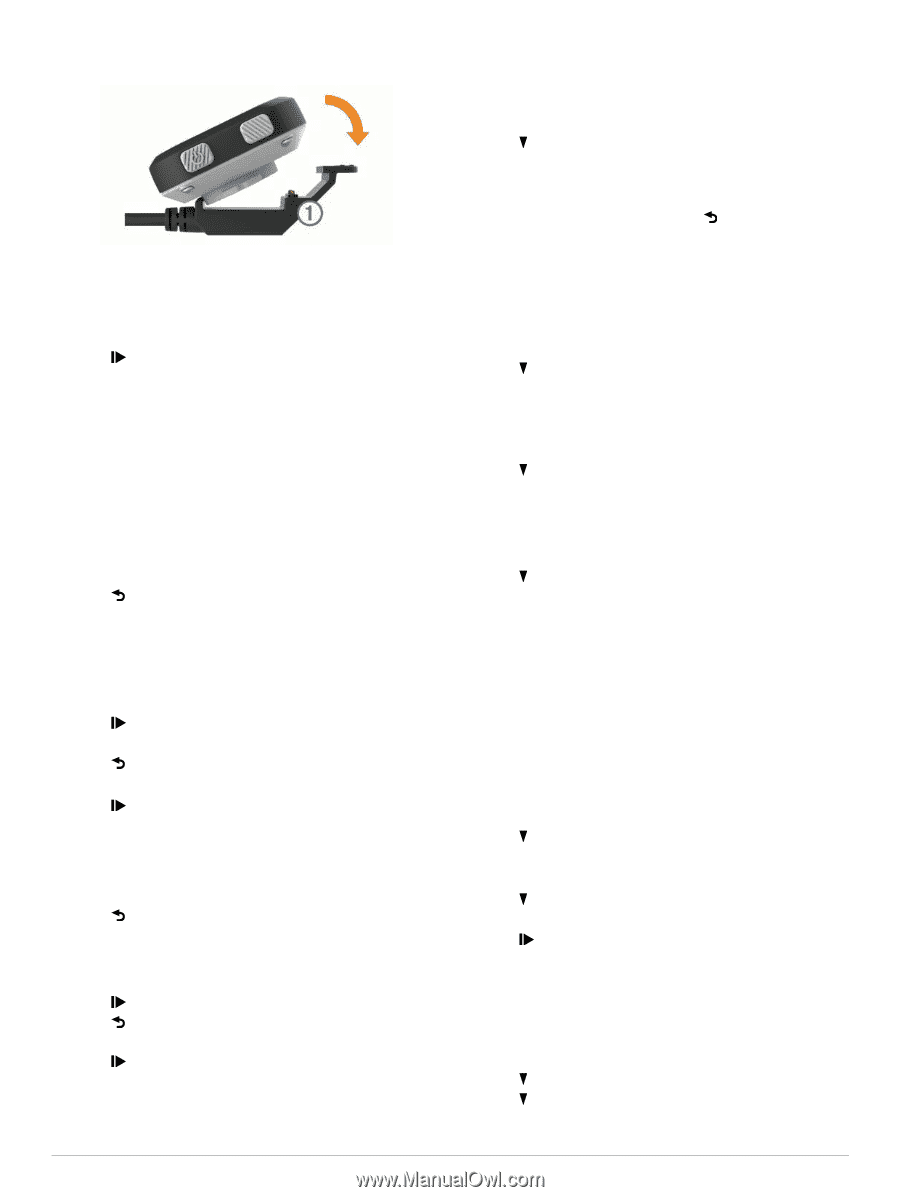
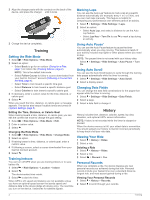
2 Align the charger posts with the contacts on the back of the device, and press the charger until it clicks. À 3 Charge the device completely. Training Setting the Ride Mode 1 Select > Ride Options > Ride Mode. 2 Select an option: • Select Basic to go for an outdoor (Going for a Ride, page 1) or indoor ride (Training Indoors, page 2). NOTE: This is the default ride mode. • Select Follow Course to follow a course downloaded from your Garmin Connect™ account (Following a Course from the Web, page 4). • Select Time to train toward a specific time goal. • Select Distance to train toward a specific distance goal. • Select Calories to train toward a specific calorie goal. 3 If necessary, enter a custom value for the time, distance, or calorie goal. 4 Select . When you reach the time, distance, or calorie goal, a message appears. The device also beeps if audible tones are turned on (System Settings, page 5). Editing the Time, Distance, or Calorie Goal When training toward a time, distance, or calorie goal, you can edit the current ride mode to change the goal setting. 1 Select > Ride Options > Ride Mode > Edit. 2 Enter a custom value. 3 Select . Changing the Ride Mode 1 Select > Ride Options > Ride Mode > Change Mode. 2 Select an option. 3 If training toward a time, distance, or calorie goal, enter a custom value. 4 If following a course, select a course downloaded from your Garmin Connect account. 5 Select . Training Indoors You can turn off GPS when you are training indoors or to save battery life. 1 Select > Ride Options > Location > Indoor. 2 Select . The device enters timer mode. 3 Select to start the timer. When GPS is off, speed and distance are not available unless you have an optional speed sensor that sends speed and distance data to the device (Edge 25 device only). The next time you turn on the device, it searches for satellite signals. Marking Laps You can use the Auto Lap® feature to mark a lap at a specific distance automatically (for example, every 1 mi. or 5 km), and you can mark laps manually. This feature is helpful for comparing your performance over different parts of an activity. 1 Select > Settings > Ride Settings > Laps. 2 Select an option: • Select Auto Lap, and select a distance to use the Auto Lap feature. • Select Lap Key > Turn On to use to mark a lap during an activity. Using Auto Pause® You can use the Auto Pause feature to pause the timer automatically when you stop moving. This feature is helpful if your activity includes stop lights or other places where you need to stop. NOTE: The paused time is not saved with your history data. Select > Settings > Ride Settings > Auto Pause > Turn On. Using Auto Scroll You can use the Auto Scroll feature to cycle through the training data pages automatically while the timer is running. 1 Select > Settings > Ride Settings > Auto Scroll. 2 Select a display speed. Changing Data Fields You can change the data field combinations for the pages that appear while the timer is running. 1 Select > Settings > Ride Settings > Data Fields. 2 Select a page. 3 Select a data field to change it. History History includes time, distance, calories, speed, lap data, elevation, and optional ANT+ sensor information. NOTE: History is not recorded while the timer is stopped or paused. When the device memory is full, your oldest data is overwritten. You should upload your history to Garmin Connect periodically to keep track of all your ride data. Viewing Your Ride 1 Select > History > Rides. 2 Select a ride. Deleting a Ride 1 Select > History > Rides. 2 Select a ride. 3 Select > Discard > Yes. Personal Records When you complete a ride, the device displays any new personal records you achieved during that ride. Personal records include your fastest time over a standard distance, longest ride, and most ascent gained during a ride. Viewing Your Personal Records 1 Select > History > Records. 2 Select to scroll through your records. 2 Training
-
 1
1 -
 2
2 -
 3
3 -
 4
4 -
 5
5 -
 6
6 -
 7
7 -
 8
8 -
 9
9 -
 10
10 -
 11
11 -
 12
12 -
13
-
14
 |
 |