Garmin Edge 20 Owners Manual - Page 9
Installing the Cadence Sensor, Pairing ANT+ Sensors, Setting Your Maximum Heart Rate, Setting Heart
 |
View all Garmin Edge 20 manuals
Add to My Manuals
Save this manual to your list of manuals |
Page 9 highlights
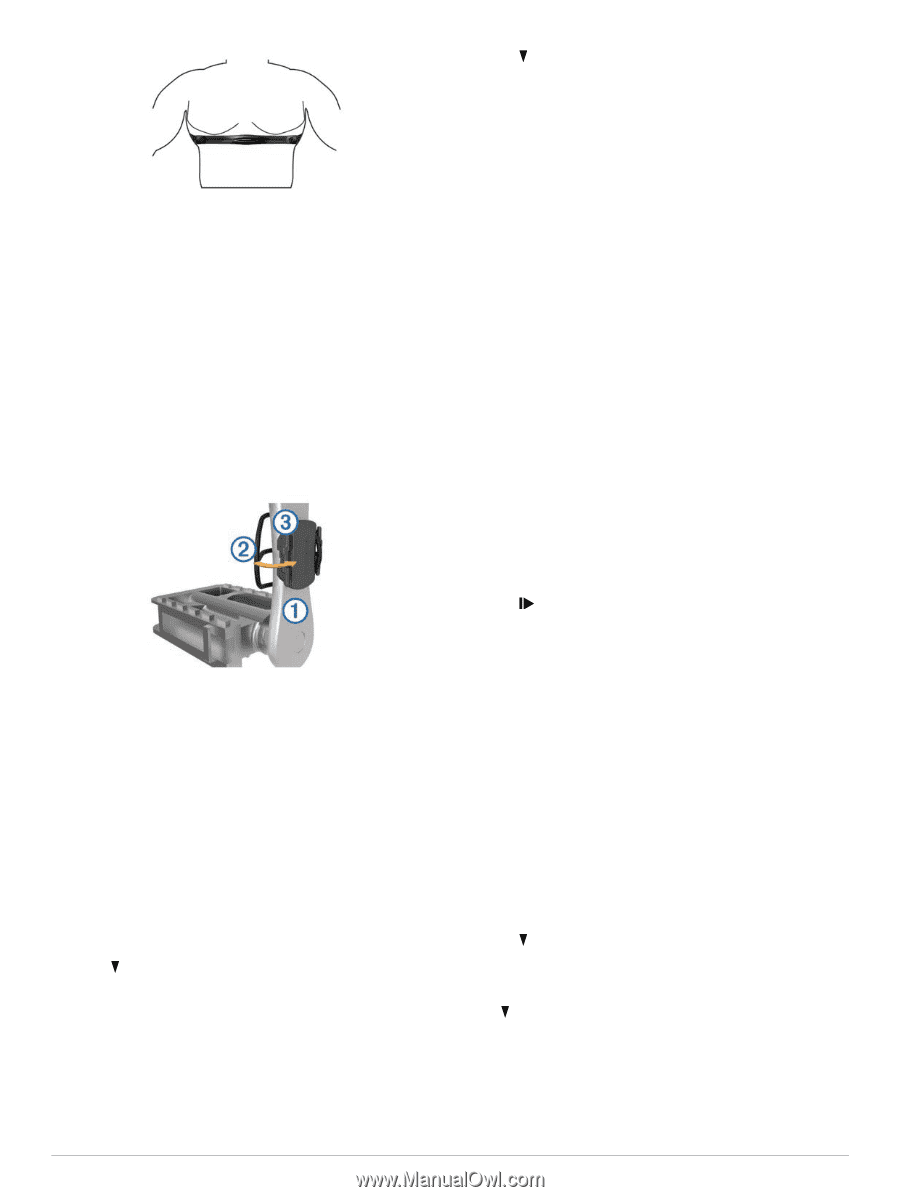
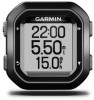
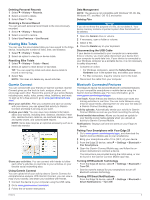
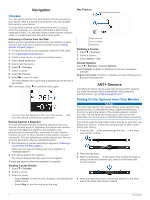
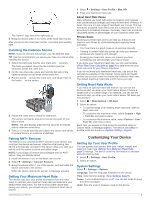
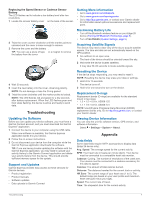
The Garmin® logo should be right-side up. 5 Bring the device within 3 m (10 ft.) of the heart rate monitor. After you put on the heart rate monitor, it is active and sending data. Installing the Cadence Sensor NOTE: If you do not have this sensor, you can skip this task. TIP: Garmin recommends you secure your bike on a stand while installing the sensor. 1 Select the band size that fits your crank arm securely. À The band you select should be the smallest one that stretches across the crank arm. 2 On the non-drive side, place and hold the flat side of the cadence sensor on the inside of the crank arm. 3 Pull the bands around the crank arm, and attach them to Á the hooks on the sensor. Â 4 Rotate the crank arm to check for clearance. The sensor and bands should not contact any part of your bike or shoe. NOTE: The LED flashes green for five seconds to indicate activity after two revolutions. 5 Take a 15 minute test ride and inspect the sensor and bands to ensure there is no evidence of damage. Pairing ANT+ Sensors The first time you connect an ANT+ sensor to your device, you must pair the device and sensor. After the initial pairing, the device automatically connects to the sensor when you start your activity and the sensor is active and within range. NOTE: If your Edge 25 device was packaged with an ANT+ sensor, they are already paired. 1 Install the sensor or put on the heart rate monitor. 2 Select > Settings > Connect Sensors. 3 Bring the device within 1 cm of the sensor, and wait while the device connects to the sensor. When the device detects the sensor, a message appears. Setting Your Maximum Heart Rate The device uses your user profile information from the initial setup to estimate your maximum heart rate and determine your default heart rate zones. For the most accurate calorie data during your activity, you should set your maximum heart rate (if known). 1 Select > Settings > User Profile > Max. HR. 2 Enter your maximum heart rate. About Heart Rate Zones Many athletes use heart rate zones to measure and increase their cardiovascular strength and improve their level of fitness. A heart rate zone is a set range of heartbeats per minute. The five commonly accepted heart rate zones are numbered from 1 to 5 according to increasing intensity. Generally, heart rate zones are calculated based on percentages of your maximum heart rate. Fitness Goals Knowing your heart rate zones can help you measure and improve your fitness by understanding and applying these principles. • Your heart rate is a good measure of exercise intensity. • Training in certain heart rate zones can help you improve cardiovascular capacity and strength. • Knowing your heart rate zones can prevent you from overtraining and can decrease your risk of injury. If you know your maximum heart rate, you can use the table (Heart Rate Zone Calculations, page 8) to determine the best heart rate zone for your fitness objectives. If you do not know your maximum heart rate, use one of the calculators available on the Internet. Some gyms and health centers can provide a test that measures maximum heart rate. The default maximum heart rate is 220 minus your age. Setting Heart Rate Alerts If you have an optional heart rate monitor, you can set the device to alert you when your heart rate is above or below a target zone or a custom range. For example, you can set the device to alert you when your heart rate is below 150 beats per minute (bpm). 1 Select > Ride Options > HR Alert. 2 Select an option: • To use the range of an existing heart rate zone, select a heart rate zone. • To customize the maximum value, select Custom > High > Turn On, and enter a value. • To customize the minimum value, select Custom > Low > Turn On, and enter a value. Each time you exceed or drop below the specified range or custom value, a message appears. The device also beeps if audible tones are turned on (System Settings, page 5). Customizing Your Device Setting Up Your User Profile You can update your gender, birth year, height, weight, and maximum heart rate (Setting Your Maximum Heart Rate, page 5) settings. The device uses this information to calculate accurate training data. 1 Select > Settings > User Profile. 2 Select an option. System Settings Select > Settings > System. Language: Sets the language displayed on the device. Time: Sets the time settings (Time Settings, page 6). Tones: Turns audible tones on or off. You can set tones for keys and alert messages. Units: Sets the units of measure used on the device. Customizing Your Device 5
-
 1
1 -
2
-
3
-
 4
4 -
 5
5 -
 6
6 -
 7
7 -
 8
8 -
 9
9 -
 10
10 -
 11
11 -
 12
12 -
 13
13 -
 14
14
 |
 |