Garmin GDL 52 Installation Manual - Page 25
Post Installation Checkout, Power On Check, Connext Data Link Check
 |
View all Garmin GDL 52 manuals
Add to My Manuals
Save this manual to your list of manuals |
Page 25 highlights
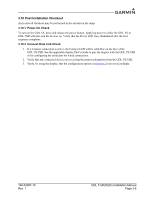
3.10 Post Installation Checkout An in-aircraft checkout may be performed in the aircraft on the ramp. 3.10.1 Power On Check To turn on the GDL 5X, press and release the power button. Applying power to either the GDL 5X or GDL 5XR will also turn the devices on. Verify that the Power LED stays illuminated after the boot sequence completes. 3.10.2 Connext Data Link Check 1. If a Connext connection is active, the Connext LED will be solid blue on the face of the GDL 5X/5XR. See the applicable display Pilot's Guide to pair the display with the GDL 5X/5XR or for configuring the serial port for wired connections. 2. Verify that any connected devices are receiving the proper information from the GDL 5X/5XR. 3. Verify, by using the display, that the configuration options in Section 2.9 are set accordingly. 190-02087-10 Rev. 1 GDL 51(R)/52(R) Installation Manual Page 3-6
-
 1
1 -
2
-
3
-
4
-
5
-
6
-
7
-
8
-
9
-
10
-
11
-
12
-
13
-
14
-
15
-
16
-
17
-
18
-
19
-
 20
20 -
 21
21 -
 22
22 -
 23
23 -
 24
24 -
 25
25 -
 26
26 -
 27
27 -
 28
28 -
 29
29 -
 30
30 -
31
-
32
-
33
-
34
-
35
-
36
-
37
 |
 |