Garmin GHP Reactor Hydraulic Autopilot Installation Instructions - Page 10
Appendix
 |
View all Garmin GHP Reactor Hydraulic Autopilot manuals
Add to My Manuals
Save this manual to your list of manuals |
Page 10 highlights
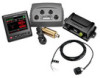
Advanced Configuration Settings You can run the autotune process, calibrate the compass, and define north on the autopilot without running the wizards. You can also define each setting individually, without running the configuration processes. Running the Automated Configuration Processes Manually 1 Enable Dealer Mode (Enabling Dealer Configuration). 2 From the heading screen, select Menu > Setup > Dealer Autopilot Setup. 3 Select an automated process: • Select Compass Setup > Calibrate Compass to start the compass calibration procedures (Calibrating the Compass). • Select Compass Setup > Set North to start the procedures to define north (Setting North). • Select Autopilot Tuning > Autotune to start the automatic autopilot tuning procedures (Performing the Autotune Procedure). 4 Follow the on-screen instructions. Defining Individual Configuration Settings Manually Configuring certain configuration settings may require you to modify other settings. Review the "Detailed Configuration Settings" section (Detailed Configuration Settings) prior to modifying any settings. 1 Enable Dealer Mode (Enabling Dealer Configuration). 2 From the heading screen, select Menu > Setup > Dealer Autopilot Setup. 3 Select a setting category. 4 Select a setting to configure. Descriptions of each setting are available in the appendix (Detailed Configuration Settings). 5 Configure the value of the setting. Appendix NMEA 0183 Connection Diagrams These wiring diagrams are examples of different situations you may encounter when connecting your NMEA 0183 device to the helm control. NMEA 0183 Connection Considerations • The installation instructions provided with your NMEA 0183 compatible device should contain the information you need to identify the transmitting (Tx) and receiving (Rx) A (+) and B (-) wires. • When connecting NMEA 0183 devices with two transmitting and two receiving wires, it is not necessary for the NMEA 2000 bus and the NMEA 0183 device to connect to a common ground. • When connecting a NMEA 0183 device with only one transmitting (Tx) wire or with only one receiving (Rx) wire, the NMEA 2000 bus and the NMEA 0183 device must be connected to a common ground. Two-Way NMEA 0183 Communication NMEA 2000 network (provides power to the helm control) À 12 Vdc power source Á Helm control  NMEA 0183-compatible device à Wire Helm Control Wire Color - Function N/A Ê N/A Ë Blue - Tx/A (+) Ì White - Tx/B (-) Í Brown - Rx/A (+) Î Green - Rx/B (-) Ï NMEA 0183-Compatible Device Wire Function Power NMEA 0183 ground Rx/A (+) Rx/B (-) Tx/A (+) Tx/B (-) NOTE: When connecting a NMEA 0183 device with two transmitting and two receiving lines, it is not necessary for the NMEA 2000 bus and the NMEA 0183 device to connect to a common ground. Only One Receiving Wire If your NMEA 0183-compatible device has only one receiving wire (Rx), it must be connected to the blue wire (Tx/A) from the helm control, and the white wire (Tx/B) from the helm control must remain unconnected. NMEA 2000network (provides power to the helm control) À 12 Vdc power source Á Helm control  NMEA 0183-compatible device à Wire Helm Control Wire Color - Function N/A Ê N/A Ë Blue - Tx/A (+) Ì White - unconnected Í Brown - Rx/A (+) Î Green - Rx/B (-) Ï NMEA 0183-Compatible Device Wire Function Power NMEA 0183 ground Rx N/A Tx/A (+) Tx/B (-) NOTE: When connecting a NMEA 0183 device with only one receiving (Rx) line, the NMEA 2000 bus and the NMEA 0183 device must be connected to a common ground. Only One Transmitting Wire If your NMEA 0183-compatible device has only one transmitting wire (Tx), it must be connected to the brown wire (Rx/A) from the helm control, and the green wire (Rx/B) from the helm control must be connected to NMEA 0183 ground. 10
-
 1
1 -
2
-
3
-
4
-
 5
5 -
 6
6 -
 7
7 -
 8
8 -
 9
9 -
 10
10 -
 11
11 -
 12
12 -
 13
13 -
 14
14
 |
 |
