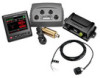
Garmin GHP Reactor Hydraulic Autopilot Installation Instructions - Page 8
The Sea Trial Wizard
 |
View all Garmin GHP Reactor Hydraulic Autopilot manuals
Add to My Manuals
Save this manual to your list of manuals |
Page 8 highlights
The Sea Trial Wizard The Sea Trial Wizard configures the fundamental sensors on the autopilot, and it is extremely important to complete the wizard in conditions appropriate for your boat. Important Sea Trial Wizard Considerations The Sea Trial Wizard must be completed in calm water. Because the nature of calm water is relative to the size and shape of the boat, before you begin the Sea Trial Wizard, the boat must be in an appropriate location. • The boat must not rock while sitting still or moving very slowly. • The boat must not be significantly affected by the wind. While completing the Sea Trial Wizard, observe these considerations. • Weight on the boat must remain balanced. While completing any of the steps in the Sea Trial Wizard, do not move around on the boat. Performing the Sea Trial Wizard 1 Drive your boat to an open area of calm water. 2 Select Menu > Setup > Dealer Autopilot Setup > Wizards > Sea Trial Wizard. 3 If necessary, configure the planing RPM. This step applies only to planing-hull power boats with the speed source set to Tach. - NMEA 2000 or Proprietary. 4 If necessary, configure the planing speed. This step applies only to planing-hull power boats with the speed source set to GPS. 5 If necessary, configure the high RPM limit. This step applies only to power boats with the speed source set to Tach. - NMEA 2000 or Proprietary or GPS. 6 If necessary, configure the maximum speed. This step applies only to power boats with the speed source set to GPS. 7 Calibrate the compass (Calibrating the Compass). 8 Perform the Autotune procedure (Performing the Autotune Procedure). 9 Set north (Setting North) if GPS-heading information is available, or set the fine heading adjustment (Setting the Fine Heading Adjustment) if GPS-heading information is not available. Calibrating the Compass 1 Select an option: • If you are performing this procedure as part of the Sea Trial Wizard, select Begin. • If you are performing this procedure outside of the Sea Trial Wizard, from the heading screen, select Menu > Setup > Dealer Autopilot Setup > Compass Setup > Calibrate Compass > Begin. 2 Follow the directions on the helm control until calibration is complete, taking care to keep the boat as steady and flat as possible. The boat should not list during calibration. 3 Select an option: • If the calibration completes successfully, select Done. • If the calibration is not successful, select Retry and repeat steps 1 through 3. When the calibration is complete, calibration values are displayed. You can use these values to determine the quality of the calibration procedure. Compass-Calibration Values After the compass calibration process is complete, you can review the results provided on the helm control to determine the successfulness of the calibration. Magnetic Environment: Indicates the level of distortion of the Earth's magnetic field at the mounting location. • A value of 100 indicates the device experiences no magnetic interference at the mounting location. • If this value is low, you might need to move the CCU and calibrate the compass again. • A value of 100 is ideal, but it is not necessary for the autopilot to function correctly. If the CCU is mounted in an optimal location on your boat, you should continue configuring the autopilot and evaluate the performance again later. Spin Quality: Represents how level the boat remained during the compass-calibration process. • A value of 100 indicates the boat remained perfectly level during compass calibration. • If this value is low, you might need to calibrate the compass again. Performing the Autotune Procedure Before you can begin this procedure, you must have a large stretch of open water available. 1 Adjust the throttle so the boat travels at a typical cruising speed that provides responsive steering. 2 Select an option: • If you are performing this procedure as part of the Sea Trial Wizard, select Begin. • If you are performing this procedure outside of the Sea Trial Wizard, from the heading screen, select Menu > Setup > Dealer Autopilot Setup > Autopilot Tuning > Autotune > Begin. The boat performs various zigzag motions while the Autotune is in progress. 3 After the procedure is finished, follow the on-screen instructions. 4 Select an option: • If the Autotune procedure is not successful, but you have not reached maximum cruising speed, increase the speed and repeat steps 1 through 3 until the Autotune procedure completes successfully. • If the Autotune procedure is not successful, and you have reached maximum cruising speed, reduce your speed to the initial Autotune speed and select Alternate Autotune to begin an alternate procedure. When the Autotune procedure is complete, gain values are displayed. You can use these values to determine the quality of the Autotune procedure. Autotune Gain Values After the autotune procedure is complete, you can review the gain values provided on the helm control. You can record these numbers for reference if you want to run the autotune procedure at a later time or if you want to manually adjust the gain settings (not recommended) (Adjusting the Autopilot Gain Settings). Gain: Sets how tightly the autopilot holds the heading and how aggressively it makes turns. Counter Gain: Sets how aggressively the autopilot adjusts any over-steering after making a turn. Setting North Before you can begin this procedure, you must have a large stretch of open water available. NOTE: If you followed the guidelines when mounting the CCU, this procedure may not be necessary (CCU Mounting and Connection Considerations). This procedure appears if the autopilot is connected to an optional GPS device (Connecting Optional NMEA 2000 Devices to the Autopilot System), and the device has acquired a GPS 8
-
 1
1 -
2
-
 3
3 -
 4
4 -
 5
5 -
 6
6 -
 7
7 -
 8
8 -
 9
9 -
 10
10 -
 11
11 -
 12
12 -
 13
13 -
14
 |
 |
