Garmin GHS 20 Installation Instructions - Page 4
About the GHS 20 Battery, Installing the GHS 20/20i, Charging Cradle, Installing the GWH 20
 |
View all Garmin GHS 20 manuals
Add to My Manuals
Save this manual to your list of manuals |
Page 4 highlights
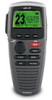
About the GHS 20 Battery The GHS 20 contains a Lithium-ion battery that charges when the handset is placed in the properly installed cradle. An LED above the Channel knob on the GHS 20/20i indicates the charging status: • Off-Not charging • Solid-Charging • Slow blink (1 blink/second)-The battery temperature is outside the safe charging temperature (page 7). • Fast blink (6 blinks/second)-The battery cannot charge, and must be replaced. Installing the GHS 20/20i Charging Cradle 1. Determine a location to mount the charging cradle where the cradle can be connected to the boat battery. 2. Using the cradle as a template, mark the two screw locations on the surface. 3. Use a ⅛ in. (3 mm) drill bit to drill the two pilot holes. 4. Use the included 25 mm M4.2 × 1.4 panhead screws to attach the cradle to the surface. EN-4 5. Route the power cable from the cradle to the boat battery or fuse block. If it is necessary to extend the wires, use 18 AWG wire. 6. Connect the red wire to the positive terminal on the battery or fuse block, and connect the black wire to the negative terminal. Installing the GWH 20 NOTE: Metal and other dense materials may inhibit communication between the GWH 20 and the GHS 20. Test the location to make sure the GWH 20 reliably communicates with the GHS 20 everywhere you plan to use it on the boat. 1. Determine a location to mount the GWH 20. If it is necessary to extend the GWH 20 cable, 5 m and 10 m extensions are available from your Garmin dealer. 2. Using the GWH 20 as a template, mark the two screw locations on the surface. GHS 20/20i Installation Instructions
-
 1
1 -
 2
2 -
 3
3 -
 4
4 -
 5
5 -
 6
6 -
 7
7 -
 8
8 -
 9
9 -
 10
10 -
11
-
12
-
13
-
14
-
15
-
16
-
17
-
18
-
19
-
20
-
21
-
22
-
23
-
24
-
25
-
26
-
27
-
28
 |
 |
