Garmin GPSMAP 8012 MFD Owner's Manual - Page 7
GPSMAP 8000 Series Front View, Inserting a Memory Card, Using the Touchscreen, Tips and Shortcuts,
 |
View all Garmin GPSMAP 8012 MFD manuals
Add to My Manuals
Save this manual to your list of manuals |
Page 7 highlights
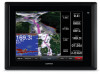
Introduction WARNING See the Important Safety and Product Information guide in the product box for product warnings and other important information. GPSMAP 8000 Series Front View The location of items varies based upon the model. This image and table are representations of the GPSMAP 8000 series devices. À Power key Á Automatic backlight sensor  Touchscreen Inserting a Memory Card You can use optional memory cards in the chartplotter. Map cards allow you to view high-resolution satellite imagery and aerial reference photos of ports, harbors, marinas, and other points of interest. You can use blank memory cards to transfer data such as waypoints, routes, and tracks to another compatible Garmin chartplotter or a computer. 1 Open the door À on the memory card reader. 2 Insert the memory card Á with the label facing away from the door. 3 Press the card in until it clicks. 4 Close the card reader door. Using the Touchscreen • Tap the screen to select an item. • Drag or swipe your finger across the screen to pan or scroll. • Pinch two fingers together to zoom out. • Spread two fingers apart to zoom in. Locking the Touchscreen You can lock the touchscreen to prevent inadvertent screen touches. 1 Select . 2 Select Lock Touchscreen. Tips and Shortcuts • Select Home from any screen to return to the Home screen. • Select Menu from any main screen to access additional settings about that screen. • Press to adjust the backlight and lock the touchscreen. • Hold to turn the chartplotter on or off. GPS Satellite Signals When you turn on the chartplotter, the GPS receiver must collect satellite data and establish the current location. When the chartplotter acquires satellite signals, appears at the top of the Home screen. When the chartplotter loses satellite signals, disappears and a flashing question mark appears over on the chart. For more information about GPS, go to www.garmin.com / aboutGPS. Stations and Station Layouts When multiple displays are installed on the Garmin® Marine Network, you can group them together into a station. A station enables the displays to work together, rather than as several separate displays. When you select Home on one display, each display in the station returns to the Home screen. With the SmartMode™ feature, when a button is selected from the Home screen, each display in the station can show unique information. For example, when Cruising is selected from the Home screen, one display can show the Navigation chart and another display can show the Radar screen. You can customize the layout of the pages on each display, making each page different on each display. When you change the layout of a page in one display, the changes appear only on that display. When you change the name and symbol of the layout, those changes appear on all displays in the station, to maintain a consistent appearance. Customizing the Home Screen You can add items to and remove items from the Home screen. Any customization made to one Home screen in the station appears on all displays in the station. 1 From the Home screen, select Menu. 2 Select an option: • To add an item to the Home screen, select Add Layout, and select the item to add. • To remove an item, select Delete Layout, and select the item to remove. Customizing the Layout of a Page When you are using a multi-display station and you change the layout of a page in the display you are interacting with, the changes appear only on that display, except for the name and symbol. If you change the name or symbol for the layout, that change appears on all displays in the station. 1 From the Home screen, select an item to edit. 2 Select Menu > Edit Layout. 3 Select an option: • To change the name of the layout, select Name & Symbol > Name, enter a new name, and select Done. • To change the symbol for the layout, select Name & Symbol > Symbol, and select a new symbol. • To change the number of functions shown, select Functions, and select a number. • To change the vertical or horizontal orientation of a multifunction display, select Split, and select an option. • To change how data appears on the page, select Overlays, and select an option. Introduction 1
-
 1
1 -
 2
2 -
 3
3 -
 4
4 -
 5
5 -
 6
6 -
 7
7 -
 8
8 -
 9
9 -
 10
10 -
 11
11 -
 12
12 -
13
-
14
-
15
-
16
-
17
-
18
-
19
-
20
-
21
-
22
-
23
-
24
-
25
-
26
-
27
-
28
-
29
-
30
-
31
-
32
-
33
-
34
-
35
-
36
 |
 |
