Garmin Instinct Solar - Camo Edition Owners Manual - Page 5
Getting Started, Pairing Your Smartphone with Your Device, Charging the Device
 |
View all Garmin Instinct Solar - Camo Edition manuals
Add to My Manuals
Save this manual to your list of manuals |
Page 5 highlights
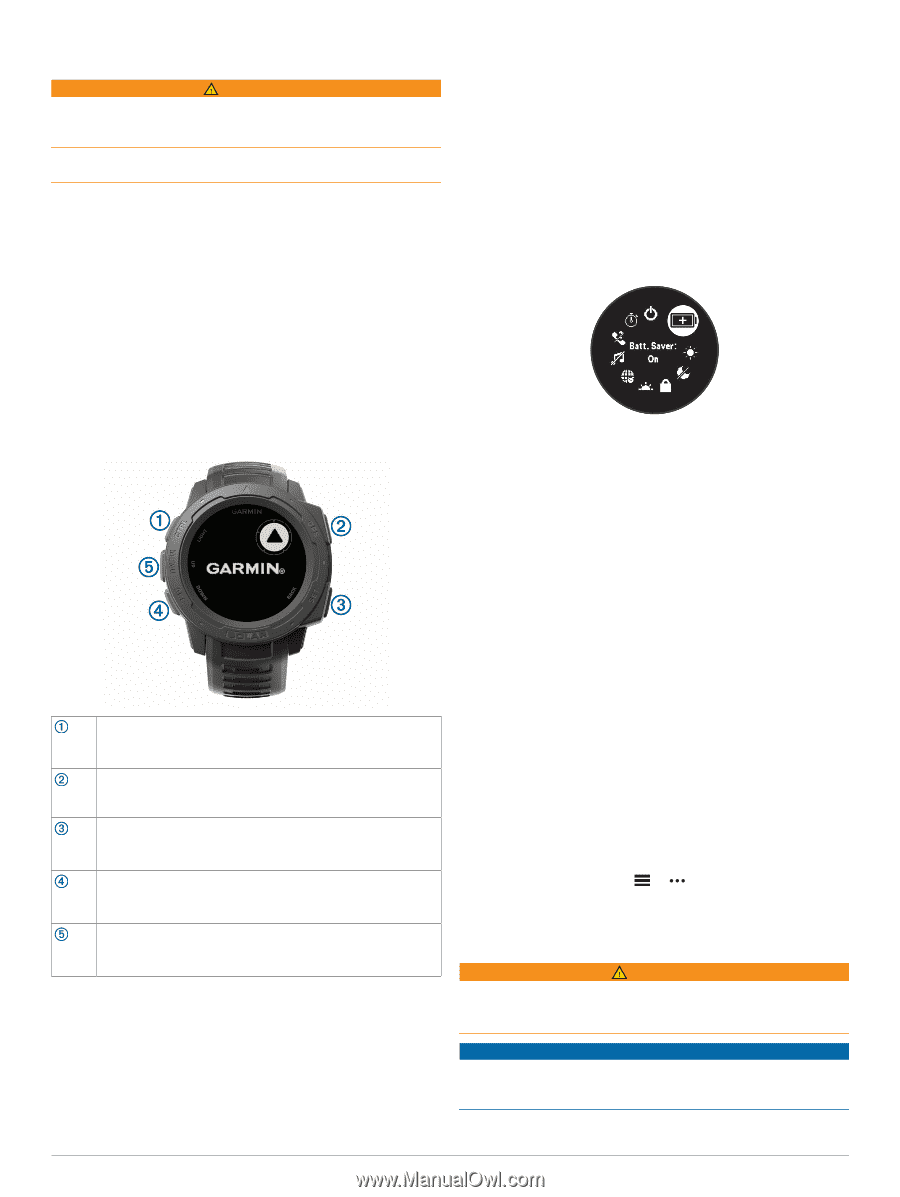
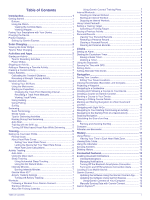
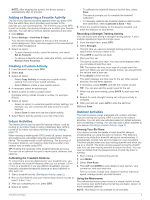
Introduction WARNING See the Important Safety and Product Information guide in the product box for product warnings and other important information. Always consult your physician before you begin or modify any exercise program. Getting Started When using your watch the first time, you should complete these tasks to set it up and get to know the basic features. 1 Press CTRL to turn on the watch (Buttons, page 1). 2 Follow the on-screen instructions to complete the initial setup. During the initial setup, you can install the Garmin Connect™ app and pair your smartphone with your watch to receive notifications and more (Pairing Your Smartphone with Your Device, page 1). 3 Charge the device completely (Charging the Device, page 1). 4 Start an activity (Starting an Activity, page 2). Buttons Your watch comes preloaded with widgets that provide at-aglance information. More widgets are available when you pair your watch with a smartphone. • From the watch face, press GPS to start an activity or open an app (Starting an Activity, page 2). • Hold MENU to customize the watch face, adjust settings, and pair wireless sensors. Viewing the Controls Menu The controls menu contains options, such as turning on do not disturb mode, locking the keys, and turning the device off. NOTE: You can add, reorder, and remove the options in the controls menu (Customizing the Controls Menu, page 20). 1 From any screen, hold CTRL. 2 Press UP or DOWN to scroll through the options. Viewing Widgets Your device comes preloaded with several widgets, and more are available when you pair your device with a smartphone. • Press UP or DOWN. The device scrolls through the widget loop. • Press GPS to view additional options and functions for a widget. Press to turn the backlight on and off. LIGHT Press to turn the device on. CTRL Hold to view the controls menu. GPS Press to view the activity list and start or stop an activity. Press to choose an option in a menu. Hold to view GPS coordinates and save your location. Press to return to the previous screen. BACK Hold to view the clock menu. SET Press to scroll through the widget loop and menus. DOWN ABC Hold to view the altimeter, barometer, and compass (ABC) screen. Press to scroll through the widget loop and menus. UP Hold to view the menu. MENU Using the Watch • Hold CTRL to view the controls menu. The controls menu provides quick access to frequently used functions, such as turning on do not disturb mode, turning on the battery saver feature, and turning the watch off. • From the watch face, press UP or DOWN to scroll through the widget loop. Pairing Your Smartphone with Your Device To use the connected features of the Instinct device, it must be paired directly through the Garmin Connect app, instead of from the Bluetooth® settings on your smartphone. 1 From the app store on your smartphone, install and open the Garmin Connect app. 2 Bring your smartphone within 10 m (33 ft.) of your device. 3 Press CTRL to turn on the device. The first time you turn on the device, it is in pairing mode. TIP: To manually enter pairing mode, you can hold MENU, and select Settings > Pair Phone. 4 Select an option to add your device to your Garmin Connect account: • If this is the first time you are pairing a device with the Garmin Connect app, follow the on-screen instructions. • If you already paired another device with the Garmin Connect app, from the or menu, select Garmin Devices > Add Device, and follow the on-screen instructions. Charging the Device WARNING This device contains a lithium-ion battery. See the Important Safety and Product Information guide in the product box for product warnings and other important information. NOTICE To prevent corrosion, thoroughly clean and dry the contacts and the surrounding area before charging or connecting to a computer. Refer to the cleaning instructions in the appendix. Introduction 1
-
 1
1 -
 2
2 -
 3
3 -
 4
4 -
 5
5 -
 6
6 -
 7
7 -
 8
8 -
 9
9 -
 10
10 -
 11
11 -
12
-
13
-
14
-
15
-
16
-
17
-
18
-
19
-
20
-
21
-
22
-
23
-
24
-
25
-
26
-
27
-
28
-
29
-
30
-
31
-
32
-
33
-
34
-
35
-
36
 |
 |