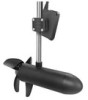
Garmin Panoptix PS21-TR Forward Trolling Motor Mount Transducer Installation I - Page 4
Calibrating the Compass, Maintenance, Specifications
 |
View all Garmin Panoptix PS21-TR Forward Trolling Motor Mount Transducer manuals
Add to My Manuals
Save this manual to your list of manuals |
Page 4 highlights
cable. You can purchase grommets from your Garmin dealer or directly from Garmin at www.garmin.com. Installing Locking Rings on the Cables Before you install locking rings on the cables, you must route the cables. To help make the cable-routing process easier, the locking rings are packaged separately from the cables. Each locking ring is packaged in a small bag with a number on the label for easy identification. 1 Separate the two halves of the locking ring . À Maintenance Cleaning the Transducer Aquatic fouling accumulates quickly and can reduce your device's performance. 1 Remove the fouling with a soft cloth and mild detergent. 2 If the fouling is severe, use a scouring pad or putty knife to remove growth. 3 Wipe the device dry. Anti-Fouling Paint To prevent corrosion on metal hulls and to slow the growth of organisms that can affect a vessel's performance and durability, you should apply a water-based anti-fouling paint to the hull of your vessel every six months. NOTE: Never apply ketone-based anti-fouling paint to your vessel, because ketones attack many types of plastic and could damage or destroy your transducer. 2 Insert the o-ring into the end of the connector. Á 3 Align the two halves of the locking ring over the cable and  snap them together. Installation Diagram Specifications Specification Dimensions (W x H x L) Weight Max. power usage Operating voltage Operating temperature range Storage temperature range Material Maximum range* Frequency Fuse rating Measurement 32 x 118 x 84 mm (1.3 x 4.6 x 3.3 in.) 340 g (.75 lb.) 8 W From 10 to 35 Vdc From 0 to 40°C (from 32 to 104°F) From -40 to 70°C (from -40 to 158°F) ASA plastic 91.4 m (300 ft.) 417 kHz 4.0 A mini 32 Vdc + - *Dependent upon transducer placement, water salinity, bottom type, and other water conditions. Garmin® and the Garmin logo are trademarks of Garmin Ltd. or its subsidiaries, registered in the USA and other countries. Panoptix™ is a trademark of Garmin Ltd. or its subsidiaries. These trademarks may not be used without the express permission of Garmin. Item À Á  Description Chartplotter Panoptix PS21-TR Power source (switch is optional) Calibrating the Compass Before you can calibrate the compass, the transducer must be installed on the shaft far enough away from the trolling motor to avoid magnetic interference, and deployed in the water. Calibration must be of sufficient quality to enable the internal compass. NOTE: To use the compass, you must mount the transducer on the shaft. The compass does not work when you mount the transducer on the motor. You can begin turning your boat before calibrating, but you must fully rotate your boat 1.5 times during calibration. 1 From a ForwardVü or LiveVü Forward sonar page, select MENU > Sonar Setup > Installation. 2 If necessary, select Use AHRS. 3 Select Calibrate Compass. 4 Follow the on-screen instructions. © 2016 Garmin Ltd. or its subsidiaries www.garmin.com/support
-
 1
1 -
 2
2 -
 3
3 -
 4
4
 |
 |
