Garmin echo 150 Installation Instructions - Page 5
TestinG the Installation - instructions
 |
View all Garmin echo 150 manuals
Add to My Manuals
Save this manual to your list of manuals |
Page 5 highlights
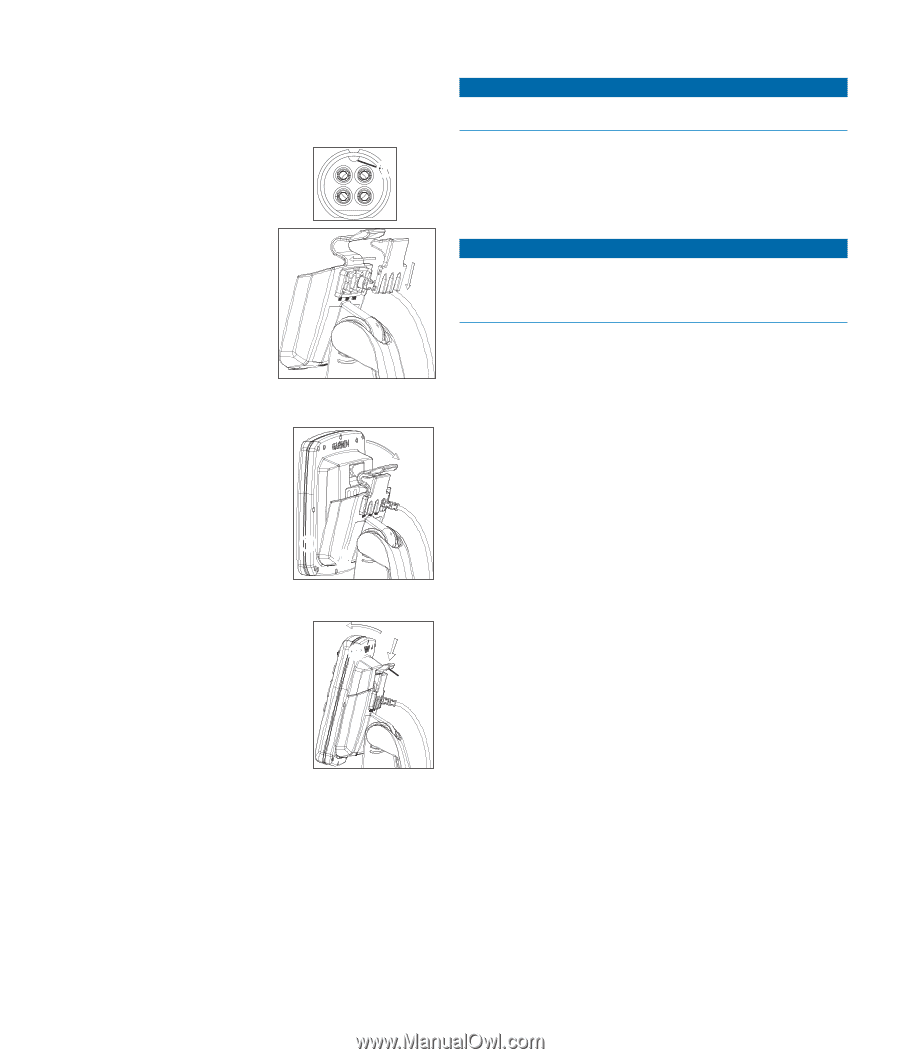
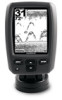
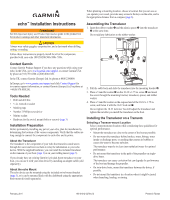
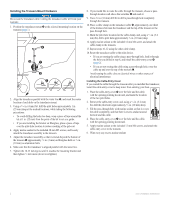
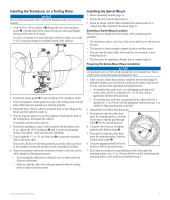
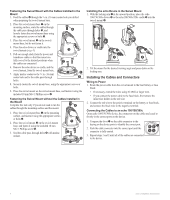
Connecting the Cables to an echo 200/500c/550c On an echo 200/500c/550c device, the connectors on the cables are keyed to fit only in the correct ports on the cradle. The connected cables are then held in place by a locking bracket. No cables connect directly to an echo 200/500c/550c device. 1 Compare the divot ➊ on the cable connector to the keying on the cradle ports to identify the ➊ correct port. 2. Push the cable connector into the correct port until it rests firmly in the port. 3. Repeat steps 1 and 2 until all of the cables are connected to the cradle ➋. ➌ 4. Place the locking bracket ➌ over the cables and slide it down to lock them ➋ in place on the cradle. You will hear an audible click when the locking bracket is correctly installed. Placing an echo 200/500c/550c in the Cradle After you have connected the cables to the cradle, you can quickly place the echo device in the cradle without plugging in any cables. 1. Place the base of the echo ➊ in the bottom of the cradle ➋. 2. Tilt the echo toward the cradle until it fastens in place. You will hear an audible click when the device is secured in the cradle. ➊ ➋ Removing an echo 200/500c/550c From the Cradle After you have connected the cables to the cradle, you can quickly remove the echo from the cradle without unplugging any cables. ➋ 1. Press the release lever ➊ on the cradle until the echo device ➋ is released. ➊ 2. Tilt the echo device forward and lift it out of the cradle. Testing the Installation Notice Do not leave your boat in the water for an extended period of time without checking for leaks. Because water is necessary to carry the sonar signal, the transducer must be in the water to work properly. You cannot get a depth or distance reading when out of the water. When you place your boat in the water, check for leaks around any screw holes that were added below the water line. Testing the Transom Mount Transducer Installation Notice When adjusting the depth of the transducer, make the adjustments in small increments. Placing the transducer too deep can adversely affect the performance of the boat and put the transducer at risk of striking underwater objects. Test the transom mount transducer installation in open water free of obstacles. Pay attention to your surroundings as you test the transducer. 1. With the boat in the water, turn on the echo device. 2. Drive the boat at a slow speed. If the echo device appears to be working properly, gradually increase speed while observing the echo device. If the sonar signal is suddenly lost or the bottom return is severely degraded, note the speed at which this occurs. 3. Return the boat to the speed at which the signal was lost, and make moderate turns in both directions while observing the echo device. 4. If the signal strength improves while turning, adjust the transducer so that it extends another 1/8 in. (3 mm) below the transom of the boat. 5. Repeat steps 2-4 until the degradation is eliminated. 6. If the signal does not improve, move the transducer to a different location on the transom. echo Installation Instructions 5
-
 1
1 -
 2
2 -
 3
3 -
 4
4 -
 5
5 -
 6
6
 |
 |