Gastroback 40998 User Manual - Page 10
Speed Level, Switch Position, Function, Exsamples - mixer
 |
View all Gastroback 40998 manuals
Add to My Manuals
Save this manual to your list of manuals |
Page 10 highlights
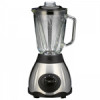
Speed Level Switch Position Function, Exsamples Use Pulse operation PULSE-switch M ice crushing & short, power- Crushing Ice: place 1 to 12 ice cubes in the blender ful impulse movements; jug and hold the switch at position M until the ice Creaming butter/margarine cubes have the desired size. Slow 1 Puree; Prepare baby food Cook food, let it cool and place with sufficient liquid into the blender jug. Foaming; for whipped cream Add sugar or flavorings according to taste. Mixing; Stiring cream soups Insert the liquid first, then the other ingredients. Quick 2 Whisking; for fruit dishes Insert fresh fruit with yogurt, cream or sour milk. juicing; Cut fresh fruit into 2 cm pieces and insert into the for juice / puree from fresh blender jug. fruits Working with the Vital Mixer WARNING: Always remove the blender jug from the motor base before opening the lid or checking the contents. 1. Place the ingredients in the blender jug. Important: Pre-cooked ingredients should cool down before processing. If possible fill in the liquid ingredients first. Cut solid ingredients before placing into the blender jug into 2 cm pieces. Do not fill the blender jug too full. Otherwise, the content may overflow or spray out and the engine could get stuck. 2. Place the lid on the blender jar and press down firmly. Close the central opening of the lid with the transparent beaker. The has beaker two small guide pins that fit into the slots on the cover on both sides. Slide the beaker into the lid all the way down and turn it clockwise to lock. WARNING: While the appliance is operating never remove the blender jug, remove the lid or insert wooden spoon or other foreign objects into the blender jug. Be sure to turn ON/OFF-switch to position ›0‹ to turn off the appliance and wait until the motor has come to a complete stop. Then take down the blender jug from the motor base, before reaching into the blender jug or work with cooking utensils and similar objects in the blender jug. WARNING: If you process hot ingredients, please make sure not to burn yourself on the blender jug or lid, or scald on steam or spraying liquids. Place perhaps a kitchen towel over the lid to protect from splashes and steam. Important: The motor will only operate when the blender jug is properly installed. 3. Keep one hand on the lid and turn the appliance on using the ON/OFF-switch. Be sure to select the desired speed level. The motor starts to work. ATTENTION: If the motor ceases to operate unintentionally or is unusually slow, immediately turn the ON/OFF-switch to position ›0‹. Otherwise, the motor may overheat. Pay attention to the section ›Trouble Shooting‹. Note: If you have turned on the pulse function, the motor runs as long as you hold the switch. 26
-
 1
1 -
2
-
3
-
4
-
 5
5 -
 6
6 -
 7
7 -
 8
8 -
 9
9 -
 10
10 -
 11
11 -
 12
12 -
 13
13 -
 14
14 -
 15
15
 |
 |
