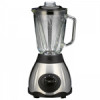
Gastroback 40998 User Manual - Page 11
Care And Cleaning
 |
View all Gastroback 40998 manuals
Add to My Manuals
Save this manual to your list of manuals |
Page 11 highlights
4. After a few seconds turn the ON/OFF-switch to position ›0‹ (OFF) to turn off the appliance. 5. Once the blades have come to a stop, grasp the blender jug by the handle and remove the jug from the motor base. Afterwards you can remove the lid to check the product or push solid or viscous ingredients with a wooden or plastic spoon down gently. If you wish to add other ingredients, use the beaker from the lid. To do this, turn the beaker first anti-clock-wise and then pull it up and out. Put the ingredients through the resulting hole and put the beaker afterwards back on. You may possibly want to run the appliance once more for a few seconds until the product has the desired texture. Return the blender jug onto the motor base. You can then turn on the appliance again. 6. When the product has the desired consistency, turn the appliance off (ON/OFF-switch to position ›0‹) and remove the blender jug from the appliance. Then remove the lid from the blender jug. Flowable products - from drink to viscous dough - you can pour from the blender jug. Then you can clean the blender jug immediately according to the instructions. Important: Do not leave to dry any food residues on the parts of the appliance. Clean the equipment immediately after each use in accordance with the instructions ›Care and cleaning‹. care and cleaning WARNING: Wear appropriate gloves when working with hot liquids. Be careful not to burn yourself on the blender jug or scald spouted or overflowing liquids or steam. Attention: Never use hard or sharp-edged objects, caustic cleaning products (disinfectants), scouring aids (scourer), or abrasives to clean the appliance or the any accessories. Do not apply any violence when cleaning the knife insert so as not to bend the blades and not to damage the mounting. Never clean the appliance or any components of it in the dishwasher. Cleaning the Blender Jug WARNING: The blades of the knife insert are sharp. Treat the blades carefully and without violence, so as not to cut you and not to damage the blades. 1. Empty the blender jug completely and rinse loosely adhering food with clean water. 2. Then fill hot detergent solution into the blender jug. The blades should be covered with the solution. Seal the jug with the lid, turn the appliance on (switch position: ›1‹) and let it work for a few seconds. 3. Switch the appliance off (ON/OFF-switch position ›0‹ (AUS/OFF). Wait until the blades have come to a stop, and remove the blender jug from the motor base. 4. Unplug the power plug from the outlet. 5. Remove the lid from the blender jar and pour out the detergent solution. Remove residue on the walls of the blender jar. You can easily remove clinging residue with a plastic cleaning. WARNING: Use extreme caution when working in the area of the blades; be careful not to cut on the sharp blades and not to damage the blades. Important: In most cases, the blender jug will already be hygienically clean. However, should food residues still are adhering to the knives, then disassemble the bottom of the jug and clean the components individually. 27


