Gateway 7405GX Hardware Reference - Page 46
Replacing the keyboard - lcd back cover
 |
View all Gateway 7405GX manuals
Add to My Manuals
Save this manual to your list of manuals |
Page 46 highlights
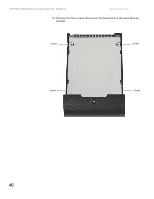
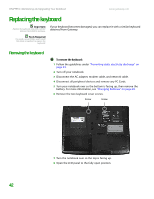
CHAPTER 3: Maintaining and Upgrading Your Notebook www.gateway.com Replacing the keyboard Important Replace the keyboard only with a similar keyboard provided by Gateway. If your keyboard becomes damaged, you can replace it with a similar keyboard obtained from Gateway. Tools Required You need a small Phillips and a small flat-blade screwdriver to replace the keyboard. Removing the keyboard To remove the keyboard: 1 Follow the guidelines under "Preventing static electricity discharge" on page 34. 2 Turn off your notebook. 3 Disconnect the AC adapter, modem cable, and network cable. 4 Disconnect all peripheral devices and remove any PC Cards. 5 Turn your notebook over so the bottom is facing up, then remove the battery. For more information, see "Changing batteries" on page 29. 6 Remove the two keyboard cover screws. Screw Screw 7 Turn the notebook over so the top is facing up. 8 Open the LCD panel to the fully open position. 42
-
 1
1 -
2
-
3
-
4
-
5
-
6
-
7
-
8
-
9
-
10
-
11
-
12
-
13
-
14
-
15
-
16
-
17
-
18
-
19
-
20
-
21
-
22
-
23
-
24
-
25
-
26
-
27
-
28
-
29
-
30
-
31
-
32
-
33
-
34
-
35
-
36
-
37
-
38
-
39
-
40
-
 41
41 -
 42
42 -
 43
43 -
 44
44 -
 45
45 -
 46
46 -
 47
47 -
 48
48 -
 49
49 -
 50
50 -
 51
51 -
52
-
53
-
54
-
55
-
56
-
57
-
58
-
59
-
60
-
61
-
62
-
63
-
64
-
65
-
66
-
67
-
68
 |
 |
