GE 28213EE2 User Guide - Page 33
Phonebook - phone review
 |
UPC - 044319805017
View all GE 28213EE2 manuals
Add to My Manuals
Save this manual to your list of manuals |
Page 33 highlights
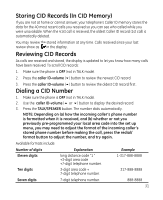
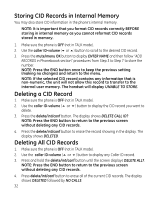
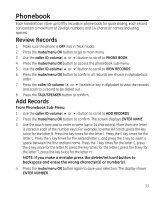
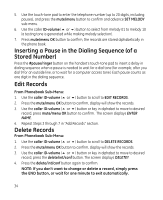
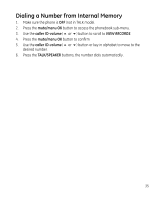
Phonebook Each handset can store up to fifty records in phone book for quick dialing; each record can contain a maximum of 20-digit numbers and 14-character names (including spaces). Review Records 1. Make sure the phone is OFF (not in TALK mode). 2. Press the mute/menu OK button to go to main menu. 3. Use the caller ID-volume (5 or 6) button to scroll to PHONE BOOK. 4. Press the mute/menu OK button to access the phonebook sub-menu. 5. Use the caller ID-volume (5 or 6) button to scroll to VIEW RECORDS. 6. Press the mute/menu OK button to confirm, all records are shown in alphabetical order. 7. Press the caller ID-volume (5 or 6) button or key in alphabet to view the records and scroll to a record to be dialed out. 8. Press the TALK/SPEAKER button to confirm. Add Records From Phonebook Sub-Menu: 1. Use the caller ID-volume (5 or 6) button to scroll to ADD RECORDS. 2. Press the mute/menu OK button to confirm. The screen displays ENTER NAME. 3. Use the touch-tone pad to enter a name (up to 14 characters). More than one letter is stored in each of the number keys. For example, to enter Bill Smith, press the key twice for the letter B. Press the key times for the letter I. Press the 5 key times for the letter L. Press the 5 key times for the second letter L, and press the 1 key to insert a space between the first and last name. Press the 7 key times for the letter S; press the 6 key once for the letter M; press the key times for the letter I; press the 8 key for the letter T; press the key twice for the letter H. NOTE: If you make a mistake press the delete/int/conf button to backspace and erase the wrong character(s) or number(s). 4. Press the mute/menu OK button again to save your selection. The display shows ENTER NUMBER. 33
-
 1
1 -
2
-
3
-
4
-
5
-
6
-
7
-
8
-
9
-
10
-
11
-
12
-
13
-
14
-
15
-
16
-
17
-
18
-
19
-
20
-
21
-
22
-
23
-
24
-
25
-
26
-
27
-
 28
28 -
 29
29 -
 30
30 -
 31
31 -
 32
32 -
 33
33 -
 34
34 -
 35
35 -
 36
36 -
 37
37 -
 38
38 -
39
-
40
-
41
-
42
-
43
-
44
-
45
-
46
-
47
-
48
 |
 |
