GE C2S980S Use and Care Manual - Page 43
Consumer Support, Operating Instructions, Safety Instructions, Troubleshooting Tips, Installation
 |
View all GE C2S980S manuals
Add to My Manuals
Save this manual to your list of manuals |
Page 43 highlights
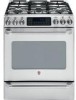
Safety Instructions Operating Instructions Installation Instructions Read these instructions completely and carefully. Gas Supply Requirements Recommended Gas Pipe Outlet Locations NOTE: Make gas connections on the left side of the cutout opening. 30" Recommended area for through-the-wall connection of pipe stub/shut-off valve. 3" 3" 9" This area allows flush installation to rear wall. 7-1/2" 2" Recommended area for through-the-floor connection of pipe stub/ shut-off valve. Provide Adequate Gas Supply Your range is designed to operate at a pressure of 5 ″ of water column on natural gas or, if designed for LP gas (propane or butane), 10 ″ of water column. Make sure you are supplying your range with the type of gas for which it is designed. This range is convertible for use on natural or propane gas. If you decide to use this range on LP gas, conversion must be made by a qualified LP installer before attempting to operate the range on that gas. When checking for proper operation of the regulator, the inlet pressure must be at least 1″ greater than the operating (manifold) pressure as given above. The pressure regulator located at the inlet of the range manifold must remain in the supply line regardless of whether natural or LP gas is being used. For proper operation, the pressure of natural gas supplied to the regulator must be between 5″ and 13″ of water column. For LP gas, the pressure supplied must be between 10″ and 13″ of water column. A flexible metal appliance connector used to connect the range to the gas supply line should have an I.D. of 1/2″ and be 5 feet in length for ease of installation. In Canada, flexible connectors must be single wall metal connectors no longer than 6 feet in length. Troubleshooting Tips Consumer Support 43
-
 1
1 -
2
-
3
-
4
-
5
-
6
-
7
-
8
-
9
-
10
-
11
-
12
-
13
-
14
-
15
-
16
-
17
-
18
-
19
-
20
-
21
-
22
-
23
-
24
-
25
-
26
-
27
-
28
-
29
-
30
-
31
-
32
-
33
-
34
-
35
-
36
-
37
-
 38
38 -
 39
39 -
 40
40 -
 41
41 -
 42
42 -
 43
43 -
 44
44 -
 45
45 -
 46
46 -
 47
47 -
 48
48 -
49
-
50
-
51
-
52
-
53
-
54
-
55
-
56
-
57
-
58
-
59
-
60
-
61
-
62
-
63
-
64
 |
 |
