GE CFE29TSDSS Installation Instructions - Page 28
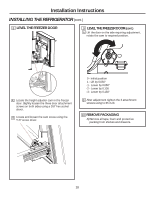
Level The Freezer Door, Remove Packaging
 |
View all GE CFE29TSDSS manuals
Add to My Manuals
Save this manual to your list of manuals |
Page 28 highlights
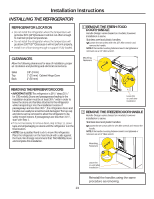
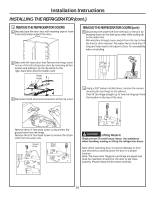
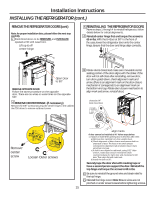
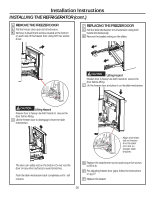
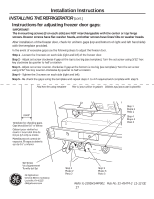
Installation Instructions INSTALLING THE REFRIGERATOR (cont.) 8 LEVEL THE FREEZER DOOR 9 LEVEL THE FREEZER DOOR (cont.) A Lift the door on the side requiring adjustment, rotate the cam to required position. A Locate the height adjuster cam in the freezer door. Slightly loosen the three door attachment screws on both sides using a 3/8" hex socket driver. B Locate and loosen the cam screw using the T-27 screw driver. 0 - Initial position 1 - Lift by 0.050" -1 - Lower by 0.050" -2 - Lower by 0.100 -3 - Lower by 0.150" B After adjustment tighten the 3 attachment screws using to 65 in-lb. 10 REMOVE PACKAGING A) Remove all tape, foam and protective packing from shelves and drawers. 28
-
 1
1 -
2
-
3
-
4
-
5
-
6
-
7
-
8
-
9
-
10
-
11
-
12
-
13
-
14
-
15
-
16
-
17
-
18
-
19
-
20
-
21
-
22
-
 23
23 -
 24
24 -
 25
25 -
 26
26 -
 27
27 -
 28
28 -
 29
29 -
 30
30 -
 31
31 -
 32
32 -
 33
33 -
34
-
35
-
36
-
37
-
38
-
39
-
40
-
41
-
42
-
43
-
44
-
45
-
46
-
47
-
48
 |
 |
LEVEL THE FREEZER DOOR
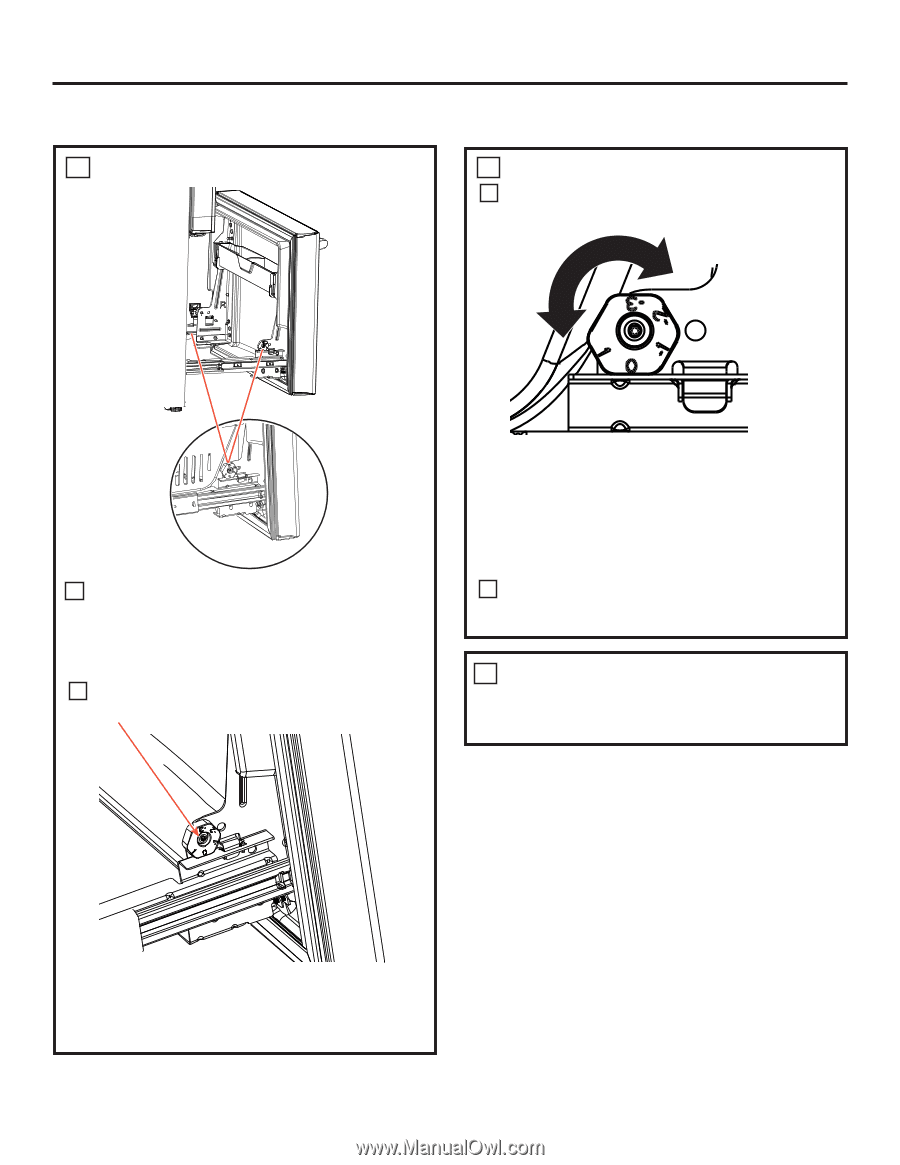
Locate the height adjuster cam in the freezer
door. Slightly loosen the three door attachment
screws on both sides using a 3/8” hex socket
driver.
Locate and loosen the cam screw using the
T-27 screw driver.
Installation Instructions
28
8
A
B
REMOVE PACKAGING
A)
Remove all tape, foam and protective
packing from shelves and drawers.
10
LEVEL THE FREEZER DOOR
(cont.)
Lift the door on the side requiring adjustment,
rotate the cam to required position.
After adjustment tighten the 3 attachment
screws using to 65 in-lb.
9
INSTALLING THE REFRIGERATOR
(cont.)
0 - Initial position
1 - Lift by 0.050”
-1 - Lower by 0.050”
-2 - Lower by 0.100
-3 - Lower by 0.150”
A
B